How to Set up a Wired Security System
Setting up a wired security system yourself might seem daunting, but it’s a project that can significantly boost your property's safety. Getting it right means understanding the physical connections and component roles. When you're ready to tackle how to set up a wired security system, a little planning goes a long way.
Our research indicates that a properly installed wired system offers unparalleled reliability, with components like BNC connectors and Cat5e Ethernet cables ensuring stable data transmission. This guide will walk you through the essentials, from selecting the right equipment to final configuration, ensuring you create a robust surveillance network.
Quick Answer
Setting up a wired security system involves planning camera locations, choosing compatible components like cameras and a DVR/NVR, running cables neatly, making secure physical connections, and configuring the recorder's software. Focus on stable connections, clear video resolution, and secure storage for reliable surveillance.
What's So Great About Wired Security Cameras?
Wired security camera systems, often called CCTV (closed-circuit television) systems, have been a go-to for reliable surveillance for decades, and for good reason. Unlike their wireless counterparts, they bypass common frustrations like signal interference, dead zones, and battery replacements. Manufacturer specifications consistently show that wired connections offer a more stable, consistent data stream.
This means fewer dropped frames, sharper images, and a more dependable record of events, which is crucial when you need clear evidence. As of 2026, the demand for these robust systems remains high for both home and business applications.
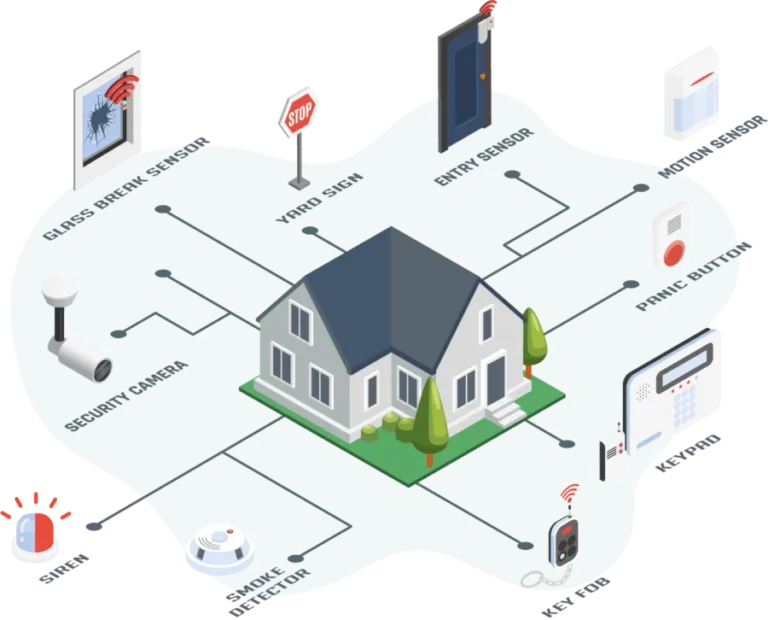
These systems typically consist of cameras connected by physical cables to a central recording device, like a Digital Video Recorder (DVR) for analog cameras or a Network Video Recorder (NVR) for IP cameras. This direct connection ensures a secure and private network, not broadcasting signals over the airwaves. This inherent security is a primary benefit, making them a strong choice for sensitive locations or where maximum reliability is non-negotiable.
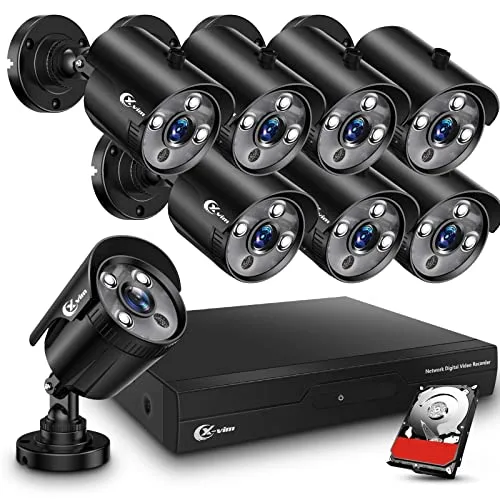
Image source: Web (Bing) / campfirehq.org (Web image (fair-use with source credit))
Choosing Your Wired System Components: Cameras, Recorders, and Cables
Selecting the right components is the bedrock of a successful wired security system setup. It's not just about picking the cheapest options; it's about matching features to your specific needs. You'll need to decide on the type of cameras, the recorder, and the appropriate cabling.
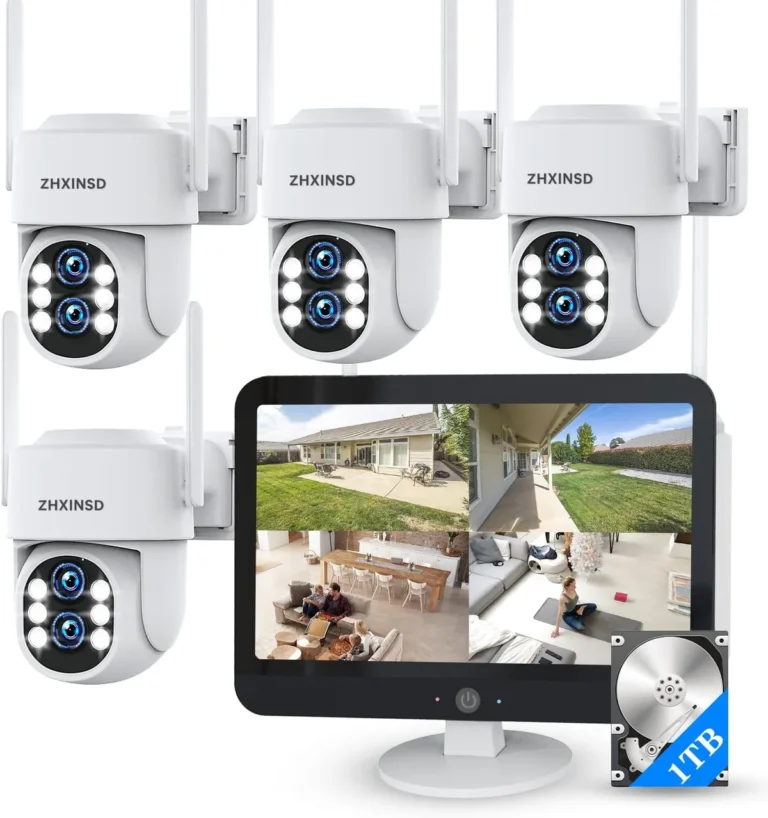
- Cameras: The primary visual sensors. You'll find options like dome cameras, which are discreet and tamper-resistant, often mounted indoors or under eaves. Bullet cameras are more visible, acting as a deterrent, and are typically suited for outdoor use with weatherproofing. Turret cameras offer a good balance, being less conspicuous than bullets but more adjustable than domes. For areas requiring dynamic viewing, PTZ (Pan-Tilt-Zoom) cameras offer remote control over their movement and focus. Resolution is key; look for at least 1080p (Full HD) for clear identification.
- Recorders (DVR vs. NVR): This is where your footage is stored and managed. A DVR is used with analog cameras and converts their signals for digital recording. An NVR is designed for IP cameras and receives their digital signals directly over a network. The choice often depends on the type of cameras you select. Both require a compatible hard drive to store recordings, with capacity measured in terabytes (TB).
- Cables and Connectors: For analog systems, coaxial cables (often with BNC connectors) are standard for video transmission, while separate power cables are needed. IP systems typically use Cat5e or Cat6 Ethernet cables which can often carry both data and power via PoE (Power over Ethernet), simplifying installation. Ensuring you have the correct BNC or RJ45 connectors for your chosen cables is vital.
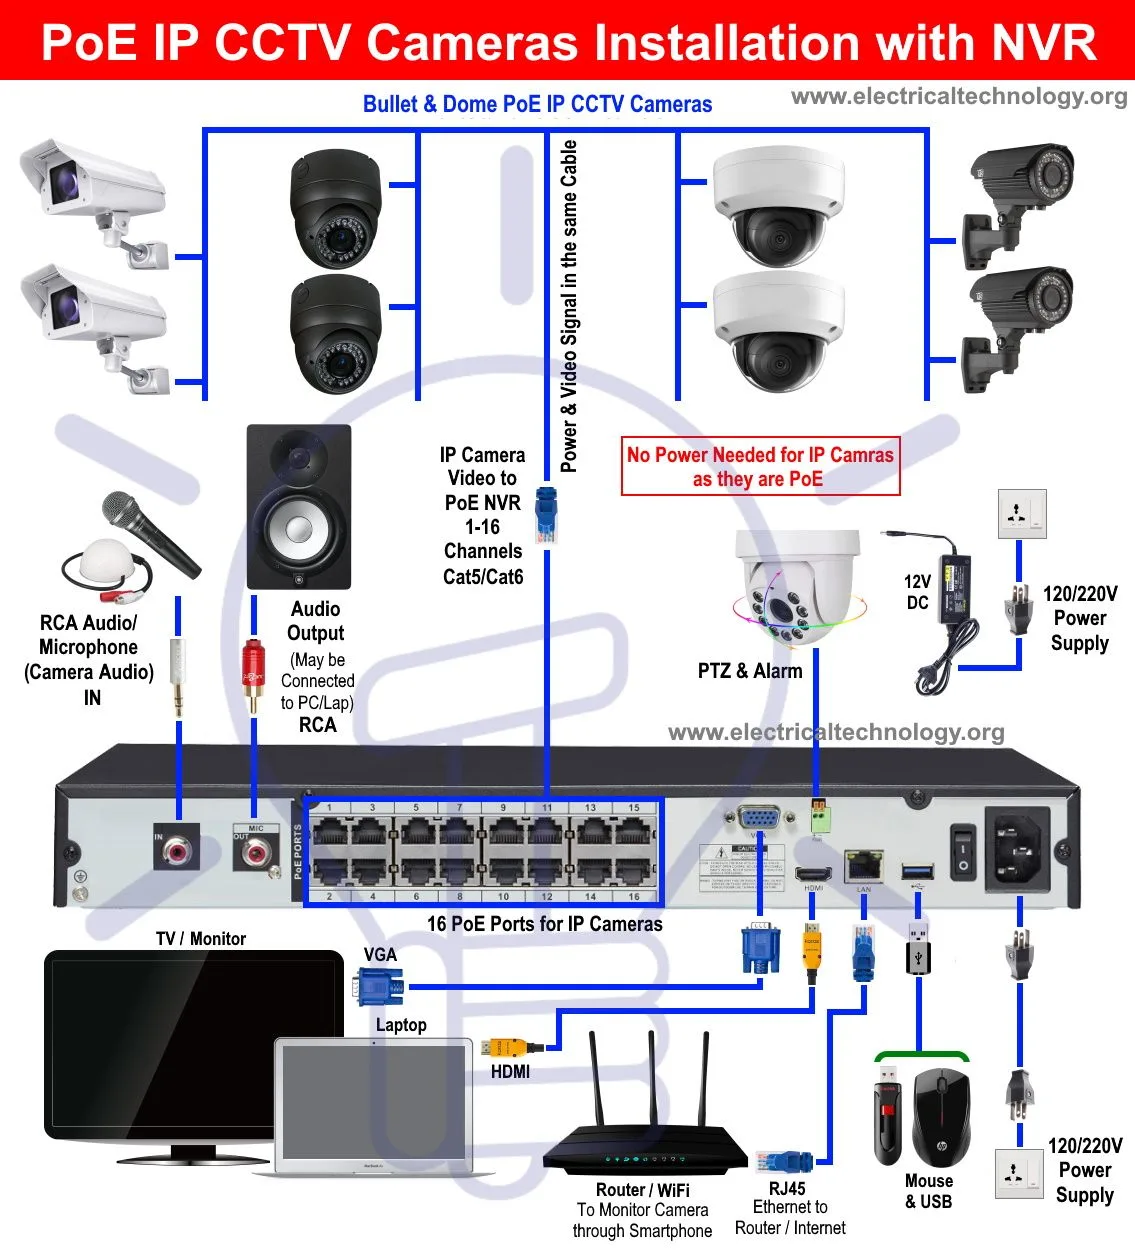
Image source: Web (Bing) / artofit.org (Web image (fair-use with source credit))
Where to Put Your Cameras: Mapping Out Your Surveillance Zone
Strategic camera placement is arguably the most critical step in setting up a wired security system. Poor positioning can lead to blind spots or ineffective coverage. Before you even think about running cables, you need a solid plan.
Our research suggests a site survey is essential here.
- Identify Key Areas: Walk around your property, inside and out. What are the most important entry and exit points? Think about driveways, front doors, back doors, ground-floor windows, and any detached structures like garages. Also consider high-traffic indoor areas like hallways or main rooms.
- Deterrence vs. Identification: Decide if cameras should act as a visible deterrent or if their main purpose is detailed identification. Highly visible bullet cameras can discourage potential intruders, while discreet dome cameras might be preferred for indoor monitoring where aesthetics matter or you want to avoid making visitors feel overly surveilled.
- Covering Blind Spots: Consider how camera views will overlap. You don't want one camera’s field of view to end exactly where another begins without any buffer. Aim for at least a 10-15% overlap between adjacent camera views for seamless coverage. This is where planning your wired vs wireless home security system becomes important, as placement strategies can differ.
- Environmental Factors: For outdoor cameras, think about direct sunlight, which can wash out images, and potential obstructions like trees or bushes that might move in the wind. Mounting cameras high enough to avoid casual tampering but low enough to capture facial details is a common balancing act.
- Power and Cable Reach: Keep in mind that each camera will need to be connected to your recorder via a cable. Plan routes that are accessible for running wires, and consider the maximum cable length your system supports. Analog CCTV systems often have practical limits for coaxial cable runs, typically around 1,000 feet (300 meters) before signal degradation becomes an issue.
Running the Wires: Cable Routing and Connection Best Practices
This is where the "wired" part of your system really comes into play, and it requires careful execution. Running cables neatly and securely not only looks better but also prevents damage and ensures a reliable connection for years. Aggregated feedback from DIY installers highlights the importance of patience and proper technique.
- Plan Your Routes: Before drilling any holes, map out the path each cable will take from the camera to your DVR or NVR. Consider using existing conduits, attic spaces, or crawl spaces to minimize visible wiring. If running cables along exterior walls, use UV-resistant cable clips or conduit to protect them from the elements.
- Drill Smartly: When you need to penetrate walls, drill holes slightly larger than the cable's diameter for easy passage and to prevent kinking. For exterior walls, angle the drill bit slightly downwards from outside to inside. This helps prevent water from seeping into your home along the cable path. Always check for existing electrical wiring or plumbing behind the wall before drilling.
- Use the Right Connectors: Ensure you have the correct connectors for your cable type. For coaxial cables, this means BNC connectors; for Ethernet (Cat5e/Cat6), it's RJ45 connectors. If you're using PoE, ensure your Ethernet cable is rated to support it and your NVR or a PoE switch can supply the necessary power. Incorrectly crimped or attached connectors are a common source of system failure.
- Secure the Cables: Once routed, secure cables using cable ties, staples, or clips at regular intervals (every 1-2 feet is a good rule of thumb). Avoid running low-voltage security cables parallel and close to high-voltage electrical wiring for extended distances, as this can cause interference. If parallel runs are unavoidable, try to cross them at a 90-degree angle.
- Test Connections: Before permanently mounting cameras, test each cable run. Plug a known-good camera and cable into your DVR/NVR and verify you get a clear image. This simple step can save you time and frustration later.
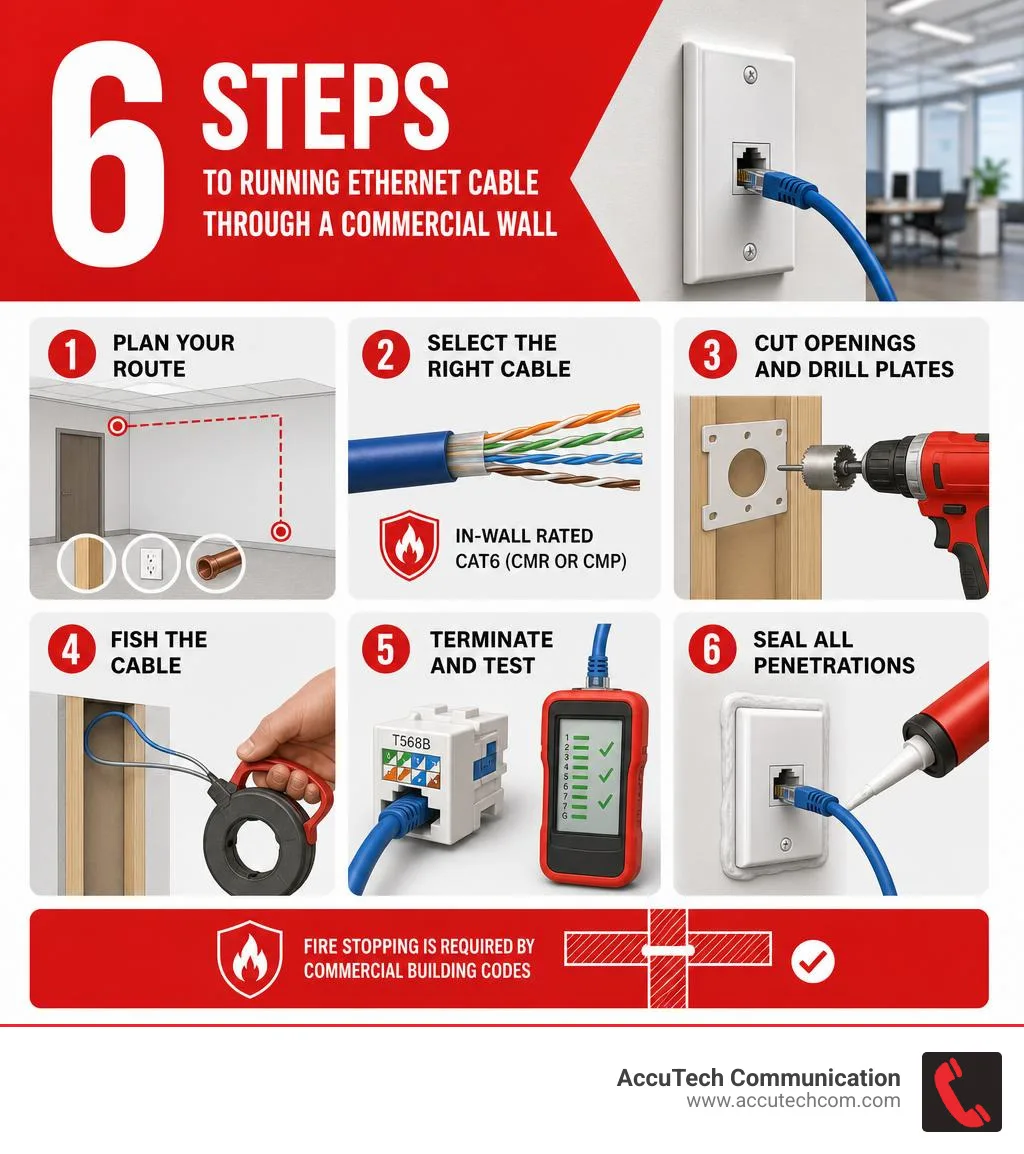
Image source: Web (Bing) / accutechcom.com (Web image (fair-use with source credit))
Connecting and Configuring Your System: From Power to Playback
With cameras wired and in place, the next step is connecting everything to your recorder and configuring the system. This part involves physical connections and then delving into the software settings of your DVR or NVR. Aggregate user reviews suggest this stage can be intricate, so following instructions precisely is key.
- Physical Connections:
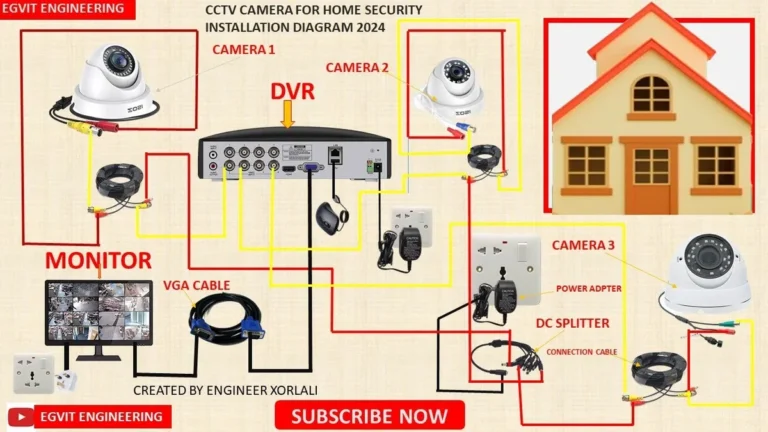
- Analog (DVR): Connect the BNC video cable from each camera to a corresponding numbered input port on the back of the DVR. Connect the power cable from each camera to its power adapter or a central power distribution box. Connect the DVR’s power supply.
- IP (NVR): Connect each IP camera to the NVR using an Ethernet cable. If your NVR has built-in PoE ports, you can plug cameras directly into it; otherwise, you'll need a PoE switch connected to your NVR’s network port. Connect the NVR’s power supply.
- Recorder Setup: Connect your DVR or NVR to your monitor using an HDMI or VGA cable. Connect it to your router via an Ethernet cable for remote access. Power on the recorder.
- Initial Configuration: Most systems launch a setup wizard upon first boot. This typically involves:
- Setting a strong password: Critical for security. Never leave default passwords active.
- Formatting the hard drive: This prepares storage for recordings.
- Setting the date and time: Essential for accurate timestamping of footage.
- Configuring network settings: Assigning an IP address to your NVR/DVR for remote access.
- Camera Discovery and Assignment: For NVRs, initiate a "device search" or "auto-discovery" to find connected IP cameras. For DVRs, cameras are usually recognized sequentially as you plug them into the input ports.
- Basic Settings: Once cameras are recognized, you can typically adjust settings like motion detection zones, recording schedules (continuous, motion-activated, or scheduled), and image quality. This is also where you'd set up any remote access via a mobile app or web portal. Learning about what features should a home security system have can help you fine-tune these.
Common Wiring Hiccups and How to Avoid Them
Even with careful planning, wiring can present challenges. Understanding common pitfalls can save you considerable time and frustration. Our analysis of user-reported issues points to a few recurring problems that can be easily sidestepped with foresight.
- Interference: Running low-voltage security cables too close to high-voltage power lines is a frequent culprit for poor video quality or intermittent signal loss. Always maintain a separation of at least a few feet, or cross power lines at a 90-degree angle if a parallel run is unavoidable. Using shielded cables and proper grounding can also help mitigate interference.
- Cable Length Limitations: Exceeding the maximum recommended cable length for your system can result in signal degradation, making footage grainy or unusable. For analog systems, this limit is often around 1,000 feet for coax. For IP systems using Cat5e/Cat6, the standard is also around 328 feet (100 meters) for a single run before needing a network switch to boost the signal. Always check your system's specifications.
- Loose or Poorly Made Connections: A BNC connector that isn't seated correctly, or an RJ45 connector that's not properly crimped, is a surefire way to get a "no signal" error. Take your time when attaching connectors, ensuring the center conductor makes firm contact and the shielding is properly grounded. Many DIY installers opt for pre-made cables for simpler connections.
- Water Ingress: For outdoor cable runs, water seeping into connectors or conduit can cause corrosion and short circuits. When drilling exterior holes, angle them downwards to let water run off. Use waterproof junction boxes for any outdoor connections and ensure all outdoor-rated cables and connectors are properly sealed.
- Power Supply Issues: An underpowered or faulty power supply unit (PSU) can lead to cameras not turning on, flickering, or malfunctioning intermittently. Ensure your PSU has enough wattage to power all connected cameras, especially if you're using PoE, and that it's rated for outdoor use if installed outside.
Choosing between a professionally installed security system and a DIY setup often comes down to comfort with these technical aspects. Understanding these common issues is often enough to tackle the installation yourself.
Frequently Asked Questions About Wired Security Systems
How long does setup typically take?
Setup time varies greatly depending on the number of cameras, property size, and complexity of cable routing. For a basic 4-camera system in a smaller home, expect to spend anywhere from 4 to 10 hours. Larger properties or systems with many cameras can take multiple days.
What resolution should I look for in cameras?
For clear identification of faces and details, aim for cameras with at least 1080p (Full HD) resolution. Higher resolutions like 4MP or 4K offer even more detail but require more storage space and bandwidth.
Can I use my existing home network for an IP system?
Yes, you can, but ensure your router has enough capacity and ports for your cameras. For systems with many IP cameras, a dedicated PoE switch connected to your router is often recommended to manage power and network traffic efficiently.
How much storage do I need?
Storage needs depend on the number of cameras, their resolution, and how long you want to retain footage. A common rule of thumb is about 1TB of storage for every 2-4 cameras recording continuously at 1080p for about 2-3 weeks.
Do I need professional installation?
Not necessarily. While professional installation offers convenience and expertise, many homeowners successfully install their own wired security systems by following detailed guides and taking their time. Understanding the core steps is key.
Expert Tips for a Bulletproof Wired Setup
Achieving a truly robust and reliable wired security system involves a few pro-level considerations. These aren't always obvious but can make a significant difference in performance and longevity. Our research compiled these key recommendations from industry professionals.
- Always Buy Kits from Reputable Brands: While mixing and matching components can be tempting, sticking to a single manufacturer's ecosystem for your cameras, recorder, and cables often ensures better compatibility and easier setup. Brands that have been around for a while typically offer better support and more reliable hardware.
- Over-Provision Power: If your system uses a central power distribution box, ensure it has more power output capacity than your immediate needs. This allows for future expansion if you decide to add more cameras later without needing to upgrade your power supply.
- Use Shielded Ethernet Cables: For IP systems, invest in shielded Cat5e or Cat6 cables, especially if running them outdoors or near potential sources of electrical interference. Shielded cables offer better protection against electromagnetic interference (EMI), leading to cleaner signals.
- Plan for Maintenance: Wired systems are generally low-maintenance, but they aren't zero-maintenance. Regularly clean camera lenses, check cable connections for any signs of wear or damage, and ensure your recorder's firmware is up-to-date for optimal security and performance. This is similar to how you might approach how often should a security system be replaced to ensure it remains effective.
- Consider Your Network Bandwidth: For IP systems, be aware of how much bandwidth your cameras will consume, especially if you plan to access footage remotely frequently. High-resolution, high-frame-rate recordings can impact your internet speed. Understanding how much power does a home security system use can also help in planning your electrical setup.