How to Clean Security Camera Lenses
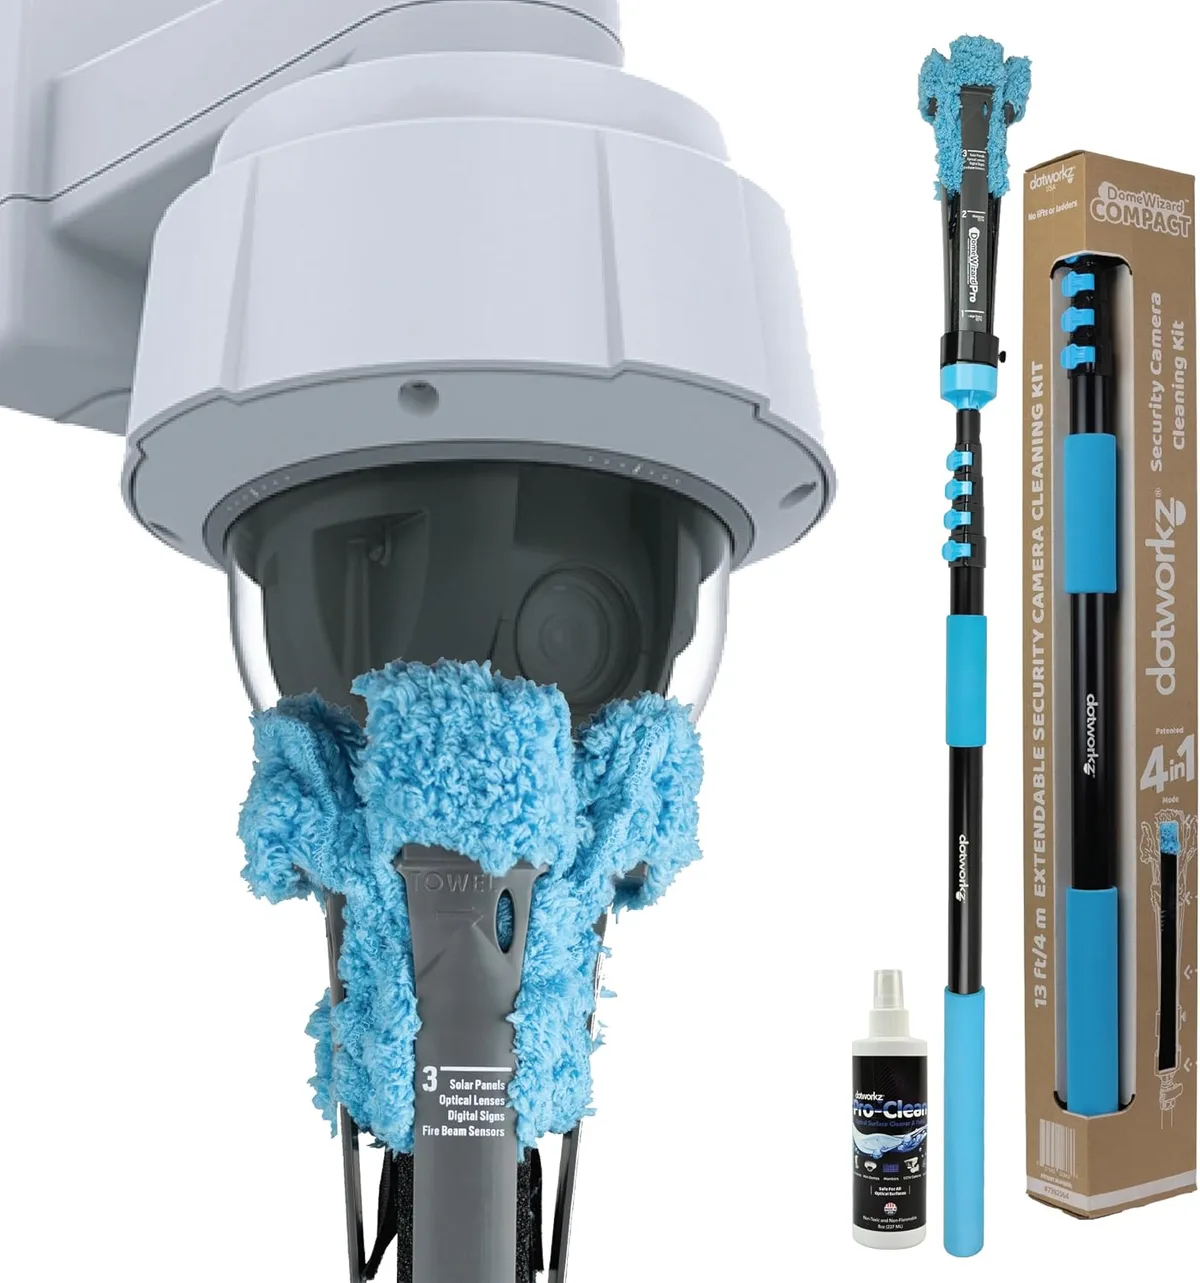
Image source: Web (Bing) / amazon.com.au (Web image (fair-use with source credit))
Keeping your home or business secure often means relying on security cameras. But what happens when that crucial video feed becomes blurry or obscured? You're probably wondering how to clean security camera lenses to restore that sharp, reliable picture.
It's a common issue, and thankfully, a solvable one.
When dust, smudges, or water spots cloud your view, your camera’s effectiveness plummets. Research indicates that dirty lenses can reduce image clarity by up to 20%, impacting everything from identifying visitors to detecting motion accurately. Keeping your lenses pristine ensures your system performs as it should, offering the peace of mind you expect.
Quick Answer
To clean security camera lenses, you need a microfiber cloth, a specialized lens cleaning solution, and sometimes compressed air. Always power down the camera first. Gently wipe the lens in a circular motion, avoiding harsh chemicals or abrasive materials to prevent scratches.
Regular cleaning ensures clear video footage.
Why Your Security Camera Footage Looks Fuzzy (It's Probably the Lens!)
That frustrating fuzziness you see in your security camera footage isn't usually a sign of a failing camera. More often than not, it's simply a buildup of everyday grime. Think dust, pollen, water spots from rain or sprinklers, and even fingerprints from accidental touches.
This debris adheres to the lens, scattering light and degrading the image quality.
Over time, this can significantly impact your camera's ability to do its job. It might miss important details, misinterpret motion, or simply provide an unusable recording. Many users overlook this simple maintenance, leading to a false assumption that their system isn't working correctly.
Regular upkeep is key to maintaining optimal performance.
Spotting Dirt and Smudges Like a Pro
Identifying when your camera lenses need a clean is usually straightforward, but sometimes it’s subtle. You’re looking for visual cues that disrupt the clarity of the image.
What to Look For
- Overall Blurriness: The most obvious sign is a general lack of sharpness across the entire image. Straight lines might appear softened, and fine details are lost.
- Halo Effects: Lights, especially at night, might have a diffused glow or a “halo” around them, indicating that light is being scattered by particles on the lens surface.
- Water Spots: If you see distinct circular or irregular marks that don't disappear, these are likely dried water spots, often from rain or cleaning with tap water.
- Dust or Debris Patches: You might notice small, dark specks or smudges that appear to be sitting directly on the lens. These are usually literal dust bunnies or grit.
- Fingerprints: After handling the camera for installation or adjustment, you might see greasy, smudged marks that look like someone wiped the lens with an oily thumb.
When to Clean
- Monthly Maintenance: For cameras exposed to the elements, a monthly check and gentle cleaning is a good preventative measure. This is especially true in areas with high pollen counts, dust, or frequent rain.
- After Inclement Weather: If your area experiences heavy rain, snow, or dust storms, inspect your lenses soon after to clear any residue before it dries and hardens.
- When Footage Quality Declines: The most direct signal is noticing a degradation in your video feed. Don't wait for it to become completely unusable; address it as soon as you spot a problem.
- Before Critical Monitoring Periods: If you’re expecting a delivery, need to monitor a specific event, or have concerns about security, ensure your cameras are clear for the best possible view.
The Right Gear for a Crystal-Clear Lens
Using the wrong tools or cleaning agents can do more harm than good, potentially scratching the lens or damaging its coatings. Having the right items makes the job safe and effective.
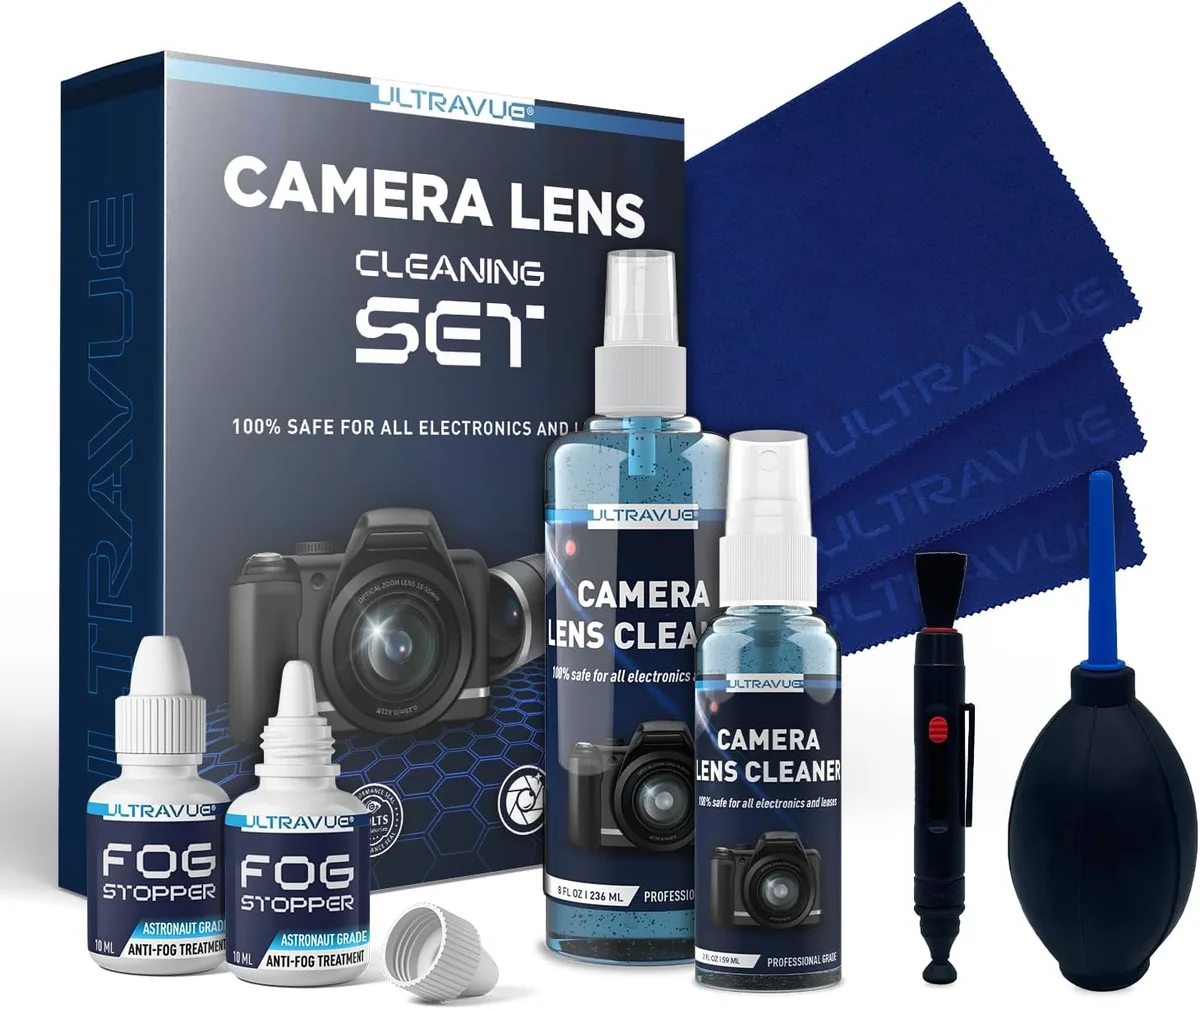
Essential Cleaning Tools
- Microfiber Cloths: These are a must-have. Made of fine, synthetic fibers, they are non-abrasive and excellent at trapping dust and dirt without scratching. Look for cloths specifically designed for optics or electronics. You’ll want at least two: one for cleaning and one for drying.
- Lens Cleaning Solution: A high-quality, alcohol-free lens cleaner is ideal. These solutions are formulated to dissolve smudges and grime without harming lens coatings. Avoid household cleaners or anything containing ammonia, as these can cause permanent damage. Manufacturer specifications often recommend specific solutions or types to avoid.
- Compressed Air Duster: A can of compressed air is perfect for blowing away loose dust and debris without touching the lens surface. Hold the can upright and use short bursts from a distance of about 6, 8 inches.
- Cotton Swabs (Optional): For very tight spots or edges around the lens, a clean cotton swab can be useful. Always ensure it's a soft, medical-grade swab and use it very gently.
What NOT to Use
- Paper Towels or Tissues: These are often made of wood pulp and can be surprisingly abrasive, leaving fine scratches on your lens. They also tend to leave behind lint.
- Household Cleaners: Window cleaners (like Windex), all-purpose sprays, or solvents not designed for optical lenses can strip protective coatings and cause permanent haziness.
- Rough Cloths or Paper: Anything like a regular kitchen towel, shop rag, or even your shirt can be too abrasive.
- Your Breath: While it moistens the lens, the moisture from your breath contains saliva and other particles that can leave streaks and residues once it dries.
Step-by-Step: Cleaning Your Security Camera Lens
This process is designed to be straightforward and safe for your camera's delicate optics. Following these steps will help you achieve a clear view without causing any damage.
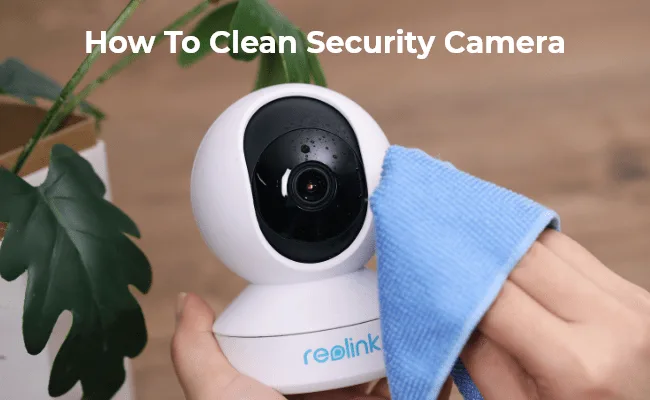
Powering Down and Gentle Prep
1. Power Off the Camera: This is crucial. Always disconnect the power supply to your security camera before attempting any cleaning.
This prevents accidental activation and ensures your safety. If it's a wired system, unplug the adapter from the power source. For battery-powered cameras, remove the battery or disable power through its app if possible.
2. Visual Inspection: Take a close look at the lens. Identify the type of debris present.
Are they loose dust particles, sticky smudges, or dried water spots? This helps you decide on the best approach for cleaning.
Applying the Cleaners (The Right Way!)
3. Blow Away Loose Debris: Hold the can of compressed air upright and about 6, 8 inches away from the lens. Use short, controlled bursts to blow away any loose dust or particles.
Do not spray directly at the lens, as the propellant can be very cold and might cause condensation or damage.
4. Apply Cleaning Solution to the Cloth: Never spray cleaning solution directly onto the lens. Instead, lightly dampen a corner of your microfiber cloth with the lens cleaning solution.
You want the cloth to be moist, not saturated.
The Wiping Technique That Works
5. Gently Wipe the Lens: Start from the center of the lens and gently wipe outwards in a circular motion. Use minimal pressure, you're trying to lift the dirt, not scrub it off.
For stubborn spots, you might need to make a few more gentle passes, re-applying a tiny bit of solution to the cloth if needed.
6. Dry the Lens: Use a dry, clean section of your microfiber cloth to gently buff the lens dry. Again, use a light circular motion, working from the center outwards.
This removes any remaining moisture and prevents water spots.
The Final Check
7. Re-inspect and Power On: Visually check the lens one last time. It should look clear and free of smudges or streaks.
Once you're satisfied, reconnect the power to your security camera.
8. Test the Feed: Open your camera's app or monitoring software to view the live feed. Ensure the image is sharp and clear.
If any faint streaks remain, you can often address them with a very light buff from a dry microfiber cloth, or by powering down and repeating the gentle cleaning process.
Common Lens Cleaning Blunders to Sidestep
Even with the best intentions, it's easy to make mistakes when cleaning delicate camera lenses. Avoiding these common errors will save you from potential damage and ensure you get the clearest possible footage. Our research shows these are the top pitfalls.
Forgetting to Power Down: This is number one for a reason. Attempting to clean a powered-on camera can lead to accidental button presses or sudden movements if it's an active pan-tilt-zoom model. It’s also a safety hazard. Always ensure the device is completely disconnected from its power source first. This simple step is a foundational part of most optical maintenance procedures, as confirmed by various manufacturer guidelines.
Using Too Much Pressure: When you see a stubborn smudge, the instinct might be to scrub harder. However, security camera lenses, whether glass or a hard plastic, can be scratched by even moderate pressure if there's grit involved. The goal is to lift dirt with the right cleaner and a soft cloth, not to grind it away. Think of it like cleaning a pair of eyeglasses, gentle is always better.
Applying Cleaner Directly to the Lens: Spraying cleaning fluid directly onto the lens can cause it to run into the camera housing. This liquid can potentially damage internal electronics or circuitry. It's far safer to apply a small amount of solution to your cleaning cloth first, making it damp rather than soaking the lens. This control prevents excess liquid from pooling.
Using Abrasive Materials: This is a big one. Paper towels, tissues, rough cloths, or even certain types of cotton swabs can have fibers that scratch the lens surface. These microscopic scratches accumulate over time, making the lens permanently hazy and degrading image quality. Always stick to optical-grade microfiber cloths.
Using the Wrong Cleaning Agents: Harsh chemicals, ammonia-based cleaners, window cleaners, or alcohol not specifically formulated for lenses can strip away anti-reflective or weather-resistant coatings. These coatings are vital for image clarity and protection. Once damaged, they can't be repaired and will permanently affect your camera's performance. Always use a cleaner recommended for camera lenses or electronics.
Keeping Your Camera Sharp: Maintenance for Clear Footage
Cleaning your security camera lenses isn't just a one-time fix; it's part of ongoing maintenance that ensures your system is always ready to capture clear, reliable footage. Regular attention prevents small issues from becoming big problems.
How Often Should You Clean?
The frequency of cleaning depends heavily on your camera's environment.
- Indoor Cameras: These generally require less frequent cleaning. A check and wipe every 3, 6 months is usually sufficient, unless you notice obvious dust buildup or smudges.
- Outdoor Cameras: These are exposed to the elements and will need more attention. We recommend a cleaning once a month, or more often if you live in an area with significant dust, pollen, pollution, or frequent rain. Aggregate user feedback often points to quarterly cleanings as a minimum for outdoor units, but monthly checks catch issues sooner.
- High-Traffic Areas: If your camera is near a frequently opened door or in a dusty workshop, you might need to clean it more often, perhaps every few weeks.
Tips for Outdoor Camera Lenses
Outdoor cameras face unique challenges that require a bit more care.
- Weather Resistance: While many outdoor cameras have weather-resistant housings, the lenses themselves can still accumulate water spots, dirt, and bird droppings. Regular cleaning is essential for maintaining visibility.
- Avoid Harsh Weather Cleaning: Don't attempt to clean your outdoor camera lens during rain or extreme cold. Wait for a clear, mild day for the best results and your own comfort.
- Check for Insect Buildup: In warmer climates, insects can often be found on or near camera lenses. A gentle wipe with a microfiber cloth dampened with lens cleaner should take care of them.
- Inspect for Cracks or Damage: While cleaning, take a moment to inspect the lens for any physical damage, such as cracks or deep scratches. If you find any, it may be time to consider a replacement for that camera. Many security systems offer modular components, allowing for easier part replacement. You can learn more about what features should a home security system have to ensure yours is well-equipped.
Your Burning Questions Answered: Security Camera Lens Cleaning FAQs
How often should I clean my security camera lenses?
For indoor cameras, cleaning every 3-6 months is usually enough. Outdoor cameras need more frequent attention, ideally once a month, especially in dusty or rainy environments.
Can I use regular glass cleaner on my security camera lens?
No, it’s best to avoid standard glass cleaners. They often contain ammonia, which can damage lens coatings. Always opt for a cleaner specifically designed for camera lenses or electronics.
What happens if I scratch the lens?
A scratched lens will permanently degrade your video quality, causing blurriness, light artifacts, and reduced sharpness. It's irreversible and will necessitate replacing the camera lens or the entire unit.
My camera is mounted high up. How can I safely clean it?
Use a sturdy ladder or a telescopic cleaning pole designed for windows or cameras. Ensure you have stable footing and consider having someone assist you for safety. Alternatively, some outdoor cameras have features that allow for remote lens cleaning cycles, though manual cleaning is often more effective.
Is it safe to use my breath and a cloth to clean the lens?
It's not recommended. Your breath contains moisture and particles that can leave streaks and residues. While it might seem like a quick fix, it’s better to use proper lens cleaning tools for a truly clear result.