How Do I Connect CCTV to a TV?
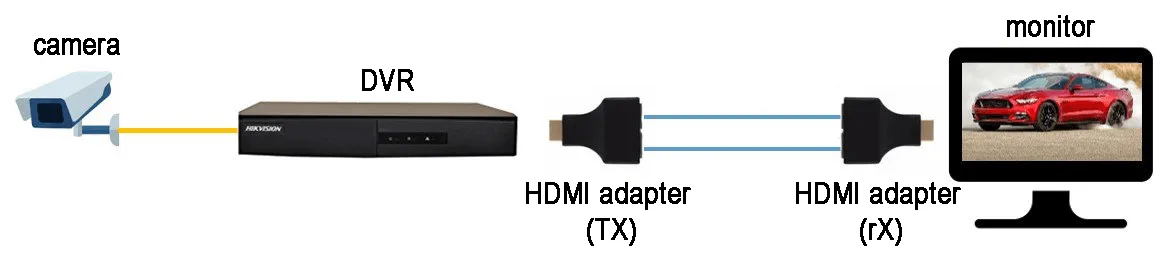
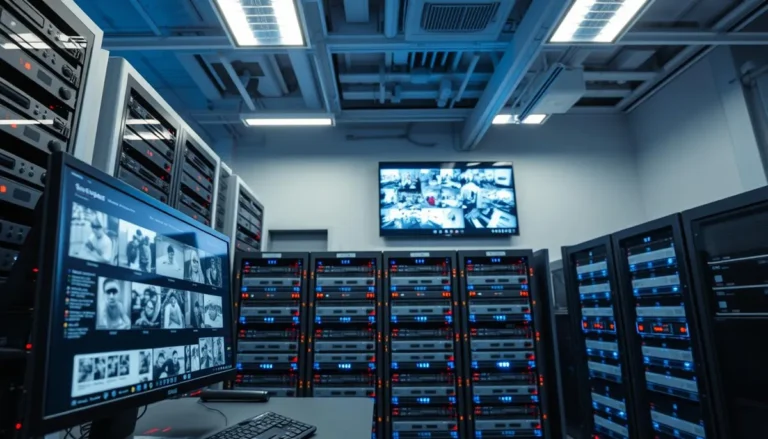
Image source: Bing (Web (fair-use with source credit))
So, you've got a CCTV system up and running, or you're planning to get one, and you're wondering how do I connect CCTV to a TV? It’s a common question, and the answer usually means taking advantage of a display you already have instead of buying a specialized monitor. Most modern televisions are perfectly capable of showing your security camera feeds.
The process largely depends on whether you're dealing with an older analog CCTV setup or a more modern IP (Internet Protocol) camera system. For most users, connecting through a Digital Video Recorder (DVR) or Network Video Recorder (NVR) is the standard way to get those crisp images onto your television screen. This guide will walk you through the ins and outs, ensuring you can see what’s happening at a glance.
Quick Answer
Connect your DVR or NVR to your TV using an HDMI cable. Select the correct input on your television. For older analog systems, a VGA cable might be needed.
Ensure your recorder's video output matches your TV's input.
Is Connecting CCTV to Your TV Right for You?
Deciding whether to hook up your CCTV system to your regular TV screen versus getting a dedicated monitor isn't always a clear-cut choice. For most home users and small businesses, using your existing television offers a cost-effective and convenient solution. It means one less piece of equipment to manage and power.
However, there are times when a dedicated CCTV monitor might be a better fit. For instance, if you need constant, high-resolution viewing of multiple cameras without interruption, or if your security setup is particularly complex with many cameras feeding into a high-end NVR, a specialized display might offer superior performance and dedicated features.
When a Dedicated Monitor Makes More Sense
A dedicated CCTV monitor is essentially a display built specifically for surveillance feeds. These often boast better refresh rates, higher pixel density for sharper images, and sometimes even built-in KVM (keyboard, video, mouse) switches for direct control of your DVR or NVR without needing a separate computer. Our research indicates that if your primary goal is continuous, multi-camera surveillance at resolutions like 1080p or higher, a dedicated monitor will generally provide a smoother, more responsive experience than a standard consumer TV.
Think of it like using a professional graphics tablet versus a consumer iPad for detailed digital art.
What Do You Need to Connect CCTV to a TV?
To get your CCTV cameras displayed on your television, you'll need a few key components. The exact items depend heavily on the type of CCTV system you have, specifically, if it’s an analog system or an IP camera network. The most common scenario involves using a central recording unit, either a DVR or NVR, to manage your cameras before sending the video signal to your TV.
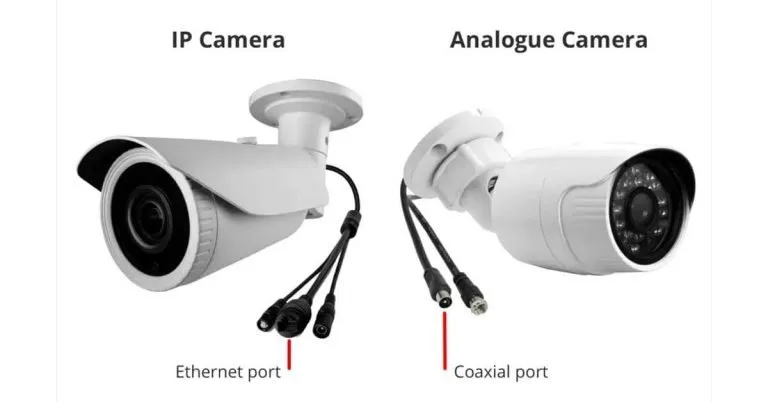
Image source: Web (Bing) / highdigital.pk (Web image (fair-use with source credit))
Understanding Your System: Analog vs. IP Cameras
The biggest differentiator is how your cameras transmit video. Analog CCTV cameras typically send a raw video signal over coaxial cables directly to a DVR. This DVR then processes the signal, digitizes it, and allows for recording and playback.
IP cameras, on the other hand, are network devices. They connect to your router or a network switch (often via Ethernet cables, or sometimes Wi-Fi) and transmit digital video data over your network to an NVR. The NVR acts as a central hub for these IP cameras.
Understanding which type you have is the first step to picking the right cables and connection methods.
Essential Cables and Connectors
- HDMI Cable: This is the standard for modern connections. Most DVRs and NVRs will have an HDMI output, and nearly all new TVs have HDMI inputs. It carries both high-definition video and audio, though audio isn't typically a primary concern for CCTV feeds.
- VGA Cable: For older DVRs or TVs that lack HDMI, a VGA (Video Graphics Array) connection might be your only option. This is an analog video signal and won't offer the same quality as HDMI. You’ll need a VGA output port on your DVR/NVR and a VGA input on your TV, along with a compatible cable.
- Ethernet Cable (RJ45): If you have an IP camera system, you'll use Ethernet cables to connect your IP cameras to your NVR or a network switch. The NVR then connects to your TV. Some NVRs might also use HDMI or VGA for their TV output.
- Coaxial Cable: This is primarily used for older analog CCTV cameras to connect them to the DVR. It's not usually directly involved in connecting the DVR/NVR to the TV itself.
The Core Setup: DVR/NVR to TV Connection
For the vast majority of users, connecting your CCTV system to your television involves bridging your recording unit (DVR or NVR) to your TV. This is usually the most straightforward part of the setup, leveraging common household connections. Think of the DVR or NVR as the translator, taking your camera's raw feed and making it understandable for your television.
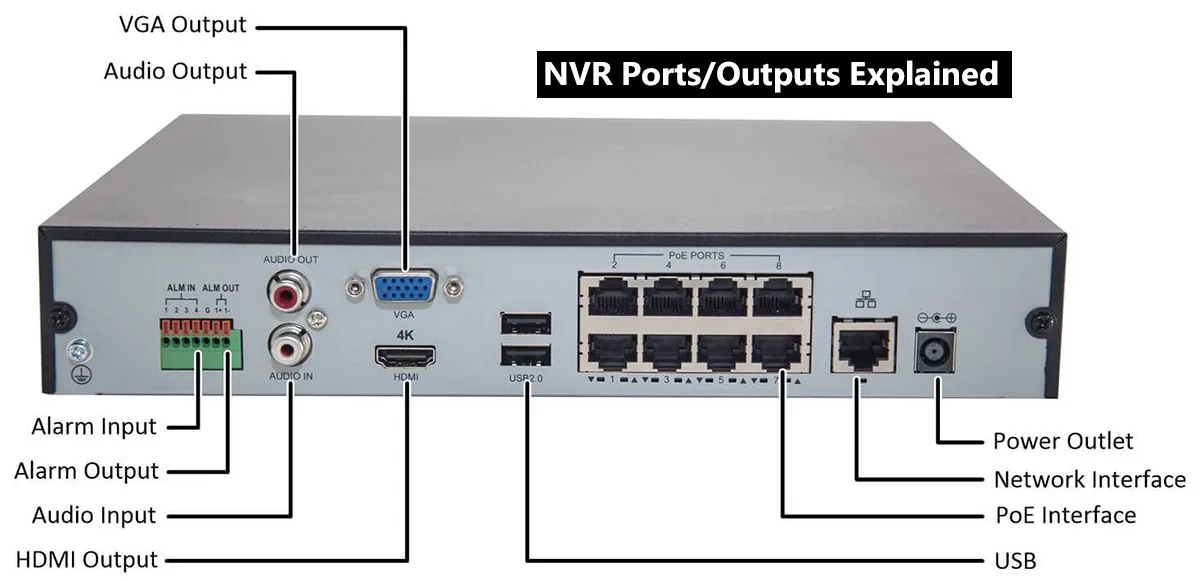
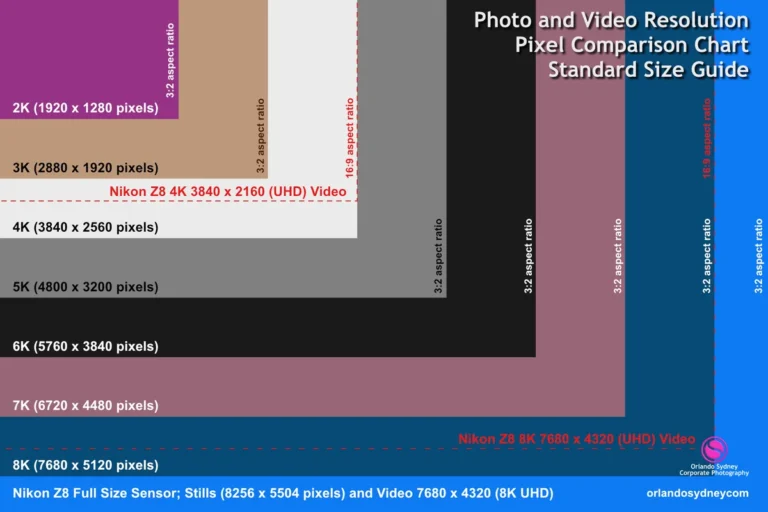
Image source: Web (Bing) / securitycamcenter.com (Web image (fair-use with source credit))
Step 1: Identify Your DVR/NVR Video Output
First, locate the video output ports on the back of your Digital Video Recorder (DVR) or Network Video Recorder (NVR). These are typically clearly labeled. You're looking for ports like "HDMI," "VGA," or sometimes even "CVBS" (which is a composite video output, usually for older analog systems and not recommended for modern TVs).
Manufacturer specifications confirm that most modern DVRs and NVRs released since 2020 are equipped with at least one HDMI output.
Step 2: Connect the Right Cable to Your TV
Once you've identified the output port on your recorder, grab the corresponding cable. For most setups today, this means an HDMI cable. Plug one end into the HDMI output port on your DVR or NVR and the other end into an available HDMI input port on your television.
If you're using an older VGA connection, plug the VGA cable into the respective ports on both devices.
Step 3: Select the Correct TV Input Source
With the devices physically connected, it’s time to tell your TV what to display. Turn on your television and use your TV's remote control to cycle through its input sources. You’ll usually find an "Input," "Source," or "AV" button.
Cycle through the options until you select the input that matches the port you used for your CCTV system (e.g., HDMI 1, HDMI 2, VGA). Your TV should then display the interface of your DVR or NVR, showing your camera feeds if they are active.
When Analog Cameras Go Direct (and Why It's Rare)
In the early days of CCTV, some analog cameras could be connected directly to a television using a coaxial cable, often requiring a specific adapter or tuner. This setup was incredibly basic and provided limited functionality, usually just showing a live feed without any recording or advanced features. It was a quick way to get a visual, but it lacked the crucial ability to save footage or manage multiple cameras.
Today, this direct connection method is exceedingly rare and generally not recommended for several reasons. Firstly, most modern televisions lack the specialized analog input ports or tuners needed for this type of connection. Secondly, even if you could connect an analog camera directly, you wouldn't have any recording capabilities, motion detection, or the ability to view multiple cameras simultaneously.
For these reasons, connecting through a DVR is the standard and vastly superior method for analog systems.
Troubleshooting: No Picture on Your TV?
Seeing a blank screen when you expect to see your security camera feed can be frustrating, but it's usually a solvable problem. The most common culprits are simple connection errors or incorrect settings on either your TV or your CCTV recording unit. Let’s break down the likely issues and how to fix them.
Common Connection Mistakes to Watch For
- Wrong Input Selected: This is the number one reason for a blank screen. Double-check that your TV is set to the correct input source (HDMI 1, HDMI 2, VGA, etc.) that matches the cable you've plugged your DVR or NVR into.
- Loose Cables: Ensure all cables are firmly seated in their ports on both the DVR/NVR and the TV. A slightly dislodged HDMI or VGA connector can easily cause a signal loss.
- Faulty Cables: While less common, a damaged or incompatible cable can prevent a signal from transmitting. If possible, try a different HDMI or VGA cable to rule this out.
- Device Power: Make sure both your TV and your DVR/NVR are powered on and have been given a minute to boot up completely.
Checking DVR/NVR Settings for Video Output
If the physical connections seem fine, the issue might be with your DVR or NVR's output settings. Sometimes, the device might be configured for a different output resolution or type than your TV can support. For instance, if your NVR is set to output 4K video, but your TV only supports 1080p, you might get a black screen.
You may need to temporarily connect your DVR/NVR to a different display (like a computer monitor with a compatible input) or reset its video output settings to a default, commonly supported resolution (like 1080p or 720p) via its menu. If you’re experiencing video lag or motion detection issues, you might need to troubleshoot those separately; for example, how to fix security camera motion detection problems often stem from incorrect configuration rather than connection faults. If your system is consistently showing a black screen, why is my security camera showing a black screen could offer more specific solutions.
How to View Multiple CCTV Cameras on One TV Screen
Once your CCTV system is connected, you’ll likely want to see what all your cameras are capturing. The way you view multiple cameras depends entirely on your DVR or NVR. These recorders are designed to process and display feeds from all connected cameras, often simultaneously on a single screen.
Most modern systems offer a multi-view or quad-view option, allowing you to see four cameras at once.
Higher-end recorders can display nine, sixteen, or even more camera feeds on screen at a time. This is incredibly useful for getting a comprehensive overview of your property or business premises. You’ll navigate these views using the controls on your DVR/NVR, typically with a mouse or the provided remote.
Utilizing DVR/NVR Multi-View Features
Most DVRs and NVRs come with pre-set layouts for viewing multiple cameras. The most common is the 4-camera split screen, where the TV screen is divided into four equal quadrants, each showing a live feed from a different camera. You can usually cycle through different camera groupings or select individual cameras to view in full screen.
To access these features, you’ll navigate through your DVR/NVR's menu system. Look for options like "View," "Live View," "Display Mode," or "Channel Layout." The exact terminology varies by manufacturer, but the functionality is consistent. For example, you might click through options to see a 9-camera grid or a sequential view that cycles through each camera one by one.
If you experience issues like video lag or your motion detection isn't triggering, it’s worth checking if your system’s firmware is up-to-date; our research indicates that how to update security camera firmware can resolve many performance glitches.
When to Consider Alternatives to TV Viewing
While connecting your CCTV to a TV is convenient, it’s not always the perfect solution for every situation. If your primary goal is constant, high-definition monitoring, or if you need to access your feeds remotely from anywhere, a TV might not be the best long-term answer. Relying solely on your TV means you can only view your cameras when you're physically present and the TV is on and set to the correct input.
For many, the drawbacks of TV viewing become apparent when they need continuous surveillance or remote access. This is where dedicated monitors, mobile apps, or web browser interfaces come into play, offering more flexibility and functionality beyond what a standard TV connection can provide.
Remote Viewing Options
The biggest advantage of modern IP camera systems is the ability to view feeds remotely. Most NVRs and even many standalone IP cameras come with companion mobile apps and web interfaces. These allow you to log in and see your cameras live from your smartphone, tablet, or computer, no matter where you are in the world.
This is invaluable for checking in on your home while on vacation or monitoring your business from another location.
Dedicated CCTV Monitors
As mentioned earlier, dedicated CCTV monitors offer specialized features. They often have higher refresh rates for smoother video, can display more cameras clearly, and are built for continuous operation. While they represent an additional cost, for businesses or individuals requiring constant, high-quality surveillance, they can be a worthwhile investment.
They integrate directly with your DVR/NVR and are designed to display video feeds optimally, often without the extra processing that a consumer TV might add, which can sometimes cause issues like why is my security camera delayed or motion detection problems.
Expert Tips for Optimal CCTV to TV Display
Getting your CCTV feed onto your TV is straightforward, but a few pro tips can make the experience even better. These suggestions focus on maximizing clarity, ensuring smooth playback, and avoiding common headaches. Making small adjustments can significantly improve your viewing experience, especially if you're dealing with multiple cameras or less-than-ideal signal strength.
One key tip is to use the highest quality connection your devices support. This usually means HDMI. If your DVR/NVR and TV both have HDMI ports, always opt for that connection over VGA or composite.
The difference in video quality is substantial, ensuring you can see fine details like license plates or faces more clearly.
Maximizing Video Quality
- Use HDMI: Always prioritize HDMI for the best resolution and clarity. VGA connections are analog and can result in fuzzy or distorted images, especially at higher resolutions.
- Check Resolution Settings: Ensure your DVR/NVR's video output resolution is set to match your TV's native resolution or a compatible setting. Setting it too high for your TV can result in a blank screen or distorted picture. For example, if your TV is 1080p, set your recorder to 1080p output.
- Cable Length Matters: While not always a major issue with modern HDMI, extremely long or poor-quality cables can sometimes degrade signal quality. Stick to reputable brands and keep cable runs as short as practical.
Ensuring Smooth Playback
If your footage looks choppy or skips frames, it might be related to playback settings or network issues if you're using IP cameras. For example, how to improve security camera WiFi signal is crucial if your cameras are wireless and experiencing stuttering. The same applies if your recordings are affected by poor Wi-Fi performance, leading to issues like why is my security camera blurry or incomplete motion events.
Common Mistakes When Connecting CCTV to TV
While setting up your CCTV to TV connection, a few common pitfalls can trip you up. Understanding these can save you a lot of time and frustration. Most of these errors are easily corrected once you know what to look for.
One of the most frequent mistakes is incorrect cable selection. People might try to use a standard Ethernet cable for an analog camera system, or vice-versa. Always match the cable type to the ports on your DVR/NVR and your TV.
Another mistake is forgetting to change the TV’s input source. Your TV won't automatically switch to show your camera feed; you have to manually select the correct input using your TV remote.
Cable Confusion
- Analog vs. Digital Cables: Don't try to connect an analog BNC output directly to an HDMI input without an appropriate converter, or vice versa. You need cables that match the signal type and connector type of both devices.
- Ethernet for Analog: Ethernet cables (RJ45) are for IP camera networks and NVRs, not for older analog cameras connecting to a DVR.
Input and Power Issues
- Forgetting to Switch TV Input: Always confirm your TV is on the correct input channel (HDMI 1, HDMI 2, VGA, etc.).
- Power Cycling: Sometimes, simply turning off and then back on your DVR/NVR and TV can resolve minor glitches. Ensure both devices have adequate power.
Frequently Asked Questions
How long does it take to connect CCTV to a TV?
Typically, connecting your DVR or NVR to your TV takes about 5 to 15 minutes if you have the correct cables and understand your devices. The main time commitment comes from navigating menus if you need to adjust settings.
Can I connect multiple CCTV cameras directly to my TV without a DVR/NVR?
Generally, no. Modern CCTV systems use a DVR or NVR to manage multiple camera feeds, process them, and output a single signal to your TV. Older, very basic analog cameras might have had direct-to-TV options, but these lack recording and advanced features.
What if my TV doesn't have an HDMI port?
If your TV lacks an HDMI port, check for a VGA or composite video input. You’ll need a DVR/NVR with a matching video output and the appropriate cable (VGA to VGA, or composite video cable). Quality might be reduced compared to HDMI.
Do I need a special type of TV for CCTV?
No, most standard HD or 4K televisions will work fine. The key is ensuring your TV has the correct input ports (preferably HDMI) to match your DVR or NVR's output.
Can I view my CCTV on my TV and my phone simultaneously?
Yes, most modern NVRs and some DVRs support simultaneous viewing. You can connect your recorder to your TV for local viewing and use its mobile app or web interface to view feeds on your smartphone or computer at the same time.