How Do I Install CCTV Cameras Outside?
Getting your head around how to install CCTV cameras outside can feel like a puzzle. You want that extra layer of security, but figuring out the wires, angles, and weatherproofing can be tricky. That's where having a clear visual guide makes all the difference, transforming a confusing task into something manageable.
This guide breaks down the process, focusing on what you'll actually see and do on your property. We'll look at what makes a good camera placement, how to handle outdoor wiring, and what features to prioritize. Our research shows that for many homeowners, the visual aspect of installation is the most crucial part.
Quick Answer
To install CCTV cameras outside, plan placements, choose weatherproof cameras rated at least IP66, run cables neatly, and secure all connections. Use power-over-ethernet (PoE) for simpler wiring if possible. Ensure cameras are angled correctly for clear views, and seal all exterior entry points to prevent water damage.
Planning Your Outdoor Camera Setup: What to Look For
Before you even pick up a drill, spending time planning is the smartest move you can make. This isn't just about where you want a camera, but where it will actually work best. Think about your property's layout, potential entry points for intruders, and the common pathways people might take.
Assessing Your Property for Camera Placement
When you're looking at your house from the outside, try to see it from a potential intruder's perspective. Where are the blind spots? What areas are usually unlit at night?
Manufacturer specifications often detail optimal mounting heights and angles for maximum coverage, typically recommending placement between 8 to 10 feet off the ground. This height is usually high enough to deter tampering but low enough to capture clear facial details.
Here's a quick checklist for assessing your property:
- Entry Points: Front doors, back doors, ground-floor windows, and garage doors are top priorities.
- Vulnerable Areas: Driveways, side gates, sheds, or any secluded spots.
- Blind Spots: Corners of the house, dense landscaping, or areas obscured by fences.
- Power Access: Where will you get power for wired cameras or how close are Wi-Fi routers for wireless ones?
- Lighting: Consider areas that are dark at night and how infrared night vision will perform.
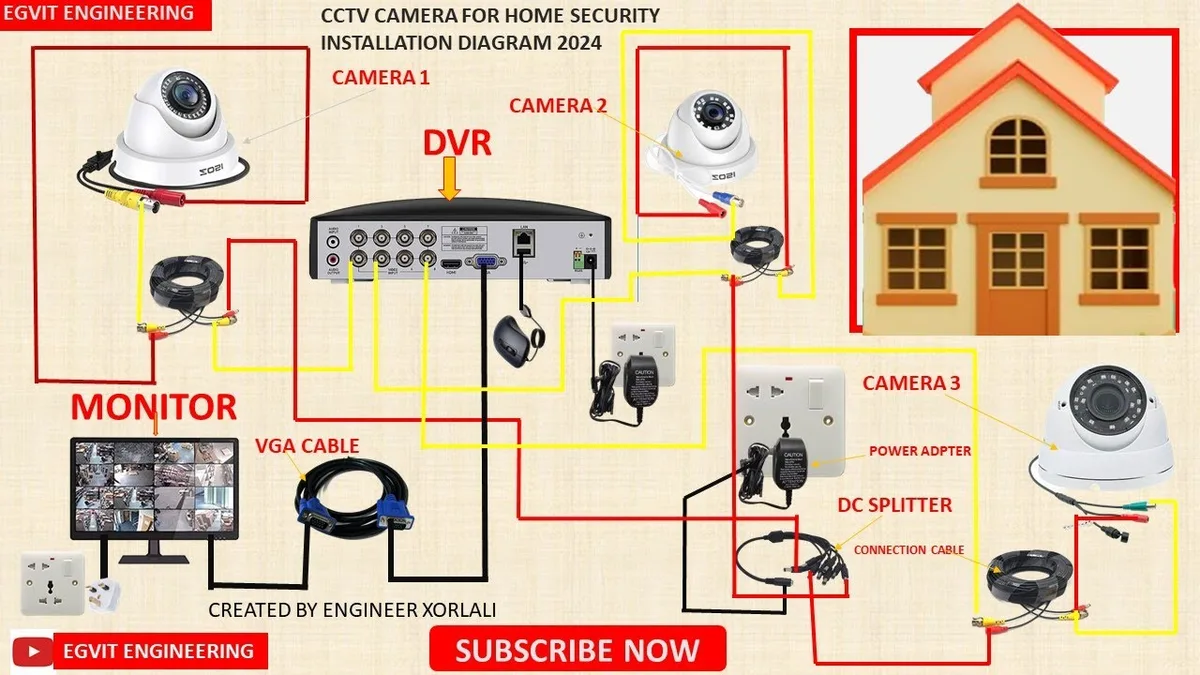
Image source: Bing (Web (fair-use with source credit))
Choosing the Right Outdoor CCTV Cameras
Selecting the correct cameras is vital. Outdoor models need to withstand the elements. Look for a robust IP rating, which tells you how well a device is protected against dust and water.
For outdoor use, a rating of IP66 or higher is generally recommended. IP66 means the camera is dust-tight and protected against powerful water jets, making it suitable for harsh weather.
Consider these key features:
- Weather Resistance: An IP66 rating or better.
- Night Vision: Infrared (IR) LEDs for clear images in darkness. Check the effective range (e.g., 30 meters / 100 feet).
- Resolution: Higher resolution (e.g., 1080p, 4K) provides more detail.
- Field of View (FOV): A wider FOV covers more area, but can distort at the edges.
- Connectivity:
- PoE (Power over Ethernet): Combines power and data over a single Ethernet cable, simplifying wiring. This is a highly recommended option.
- Wi-Fi: Easier setup for areas without direct cable access, but can be susceptible to signal interference. Per our research, weak Wi-Fi signals can lead to why is my security camera delayed?
- Analog/Coaxial: Older technology, often requires separate power cables.
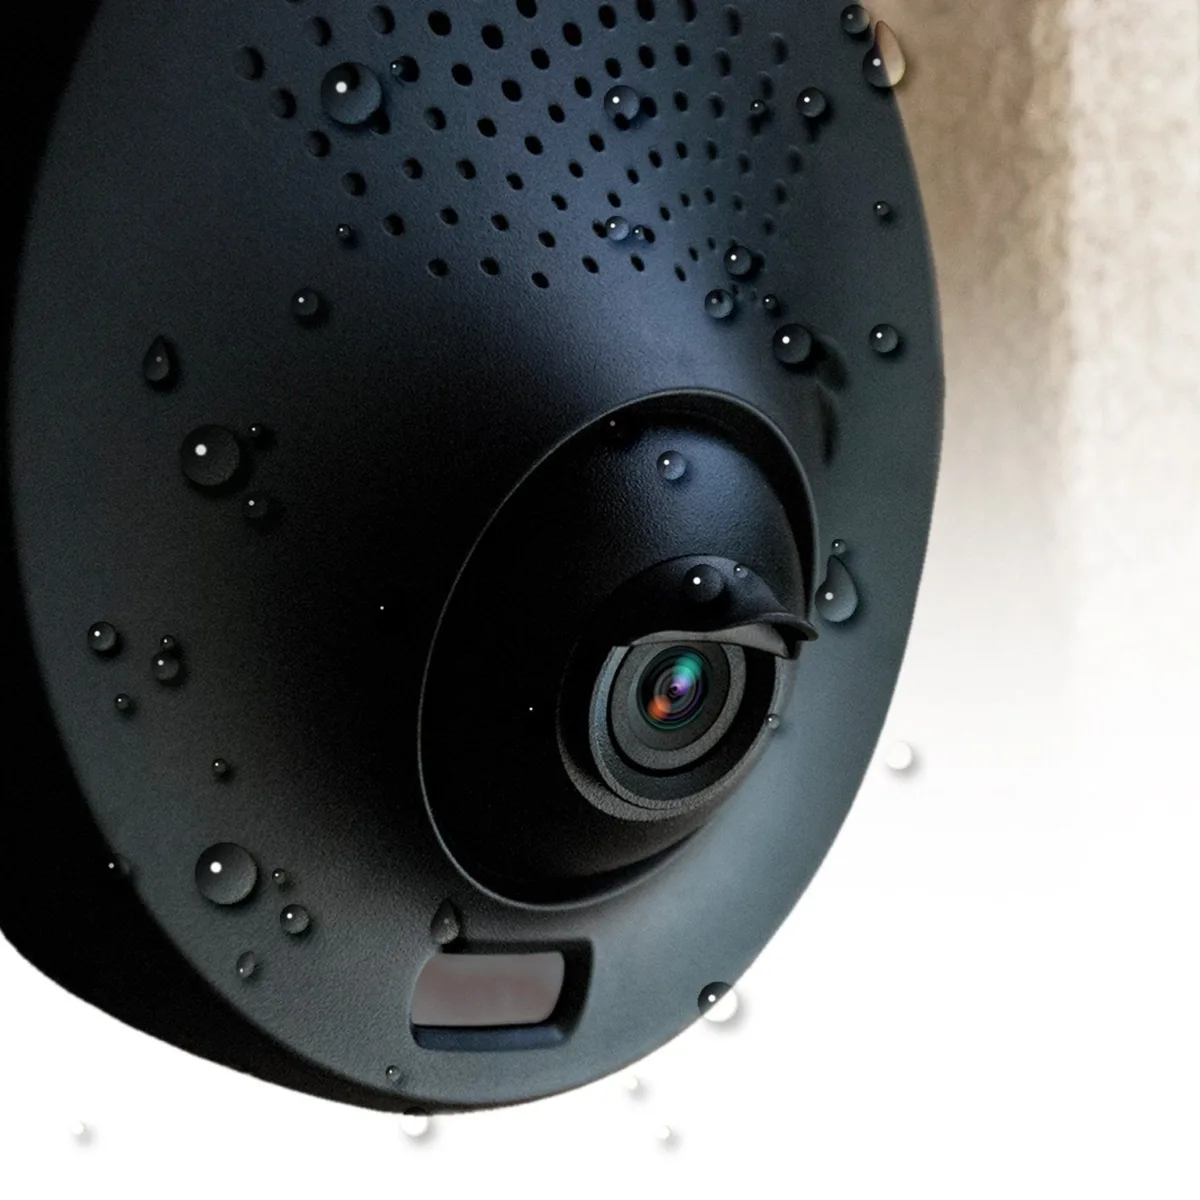
Image source: Web (Bing) / pinterest.com (Web image (fair-use with source credit))
Step-by-Step: The Visual Guide to Installing Outdoor CCTV Cameras
Actually installing the cameras involves a series of physical actions that are best understood by seeing them. This isn't just about following a list; it's about the practical execution of each step to ensure your system is effective and durable. We'll walk through the process as if you were looking at it, step-by-step.
Preparing Your Tools and Materials
Before you start, gather everything you need. Having all your tools and materials ready will make the installation process much smoother and faster. It prevents you from stopping halfway through to hunt for something you forgot.
Here's a typical tool and materials list:
- CCTV Cameras: Your chosen outdoor models.
- Mounting Brackets: Usually included with cameras, but ensure they're suitable for your wall type.
- Cables: Ethernet (Cat5e or Cat6 for PoE) or coaxial cables, plus necessary power cables if not using PoE.
- Connectors: RJ45 for Ethernet, BNC for coaxial.
- Power Supply: A compatible power adapter or PoE switch.
- Drill and Drill Bits: For making mounting holes and passing cables.
- Screwdriver Set: For attaching brackets and securing components.
- Wire Strippers and Crimpers: For preparing and attaching connectors.
- Cable Testers: To ensure your cables are connected correctly before powering up.
- Sealant/Caulk: Outdoor-grade silicone sealant for weatherproofing entry points.
- Ladder: For reaching higher mounting spots.
- Safety Glasses: Always protect your eyes.
- Measuring Tape: For accurate placement.
Mounting Cameras Securely Outdoors
Mounting the camera is the first physical step. You want it solid, pointing the right way, and secured against wind or tampering. The goal is stability and the perfect angle for coverage.
Consider these points for mounting:
- Surface Prep: Ensure the mounting surface is clean and sound. If mounting on brick, use appropriate masonry anchors.
- Drill Pilot Holes: Use a drill bit slightly smaller than your screws or anchors.
- Attach Bracket: Securely fasten the mounting bracket to the surface.
- Camera Attachment: Mount the camera onto the bracket.
Running and Hiding Your CCTV Cables
This is where visual planning is key. You don't want cables dangling everywhere. Running them neatly not only looks better but also protects them from damage and the elements.
Here’s how to tackle cable management:
- Route Inside: Whenever possible, run cables through attics, crawl spaces, or wall cavities. This protects them from weather and makes them less visible.
- Exterior Concealment: Use outdoor-rated conduit, cable raceways, or UV-resistant zip ties to secure cables along eaves, siding, or fences. Painting cables to match your house can make them disappear.
- Seal Entry Points: After routing cables into your home or to your recording device, use outdoor sealant to make the entry points watertight. This is crucial to prevent water damage and leaks.
- Cable Lengths: Be mindful of maximum cable lengths for Ethernet (typically 100 meters or 328 feet) to avoid signal degradation. If you need longer runs, you might need a network extender.
Image source: Bing (Web (fair-use with source credit))
If your signal strength is an issue, you might need to look into how to improve security camera wifi signal; good cable placement helps avoid this.
Connecting Power and Your Recording Device (DVR/NVR)
This step varies depending on your camera type. For Power over Ethernet (PoE) systems, the Ethernet cable you just ran usually handles both data and power. For other systems, you'll need to connect a separate power adapter.
- PoE Setup: Connect the Ethernet cable directly from your camera to a PoE-enabled switch or NVR. The switch or NVR will then power the camera.
- Non-PoE Setup: Connect the camera's power adapter to the camera and then plug the adapter into a nearby, weatherproof outdoor electrical outlet or route power cables back to an indoor power source.
- DVR/NVR Connection: Connect all your cameras to your Digital Video Recorder (DVR) or Network Video Recorder (NVR) using the appropriate cables (coaxial for DVR, Ethernet for NVR). Ensure your DVR/NVR is powered on and connected to your network if remote viewing is desired.
Initial Setup and Testing Your System
Once everything is connected physically, it's time to bring the system to life and make sure it's working. This involves powering up your recorder and then your cameras, and checking the feed.
Here's how to get started:
- Power On: Turn on your DVR/NVR and your camera power supplies (if separate).
- Access Recorder Interface: Connect a monitor and mouse to your DVR/NVR or access its web interface via your network.
- Detect Cameras: The system should automatically detect connected cameras. You might need to manually add them in the settings.
- View Live Feed: Check that each camera is displaying a clear image. If a camera shows a black screen, it might indicate a connection or power issue. For troubleshooting, consult why is my security camera showing a black screen?
- Adjust Angles: Fine-tune the camera angles to cover your desired areas without glare or blind spots.
- Configure Settings: Set up motion detection, recording schedules (continuous or event-based), and any alerts. If motion detection isn't working right, you might need to check why is my security camera not detecting motion?
- Test Remote Viewing: If your system supports it, download the mobile app or access the web portal to ensure you can view your cameras remotely. This often requires configuring network settings on your recorder.
Common Pitfalls and How to Avoid Them When Installing
Even with a good plan, little mistakes can trip you up during installation. These often happen when people rush or overlook crucial details. Being aware of these common pitfalls can save you a lot of headaches and ensure your security system works reliably.
Visual Mistakes That Compromise Your Security
The biggest mistakes are often the most obvious ones you only notice after the cameras are up and running, usually when reviewing footage. These visual blunders can render your cameras less effective, or even useless, when you need them most.
Here are some common visual mistakes:
- Blind Spots: Not covering all critical angles or leaving areas obscured by trees, furniture, or architectural features.
- Glare: Mounting cameras directly into a light source (like the sun or a porch light) without considering Wide Dynamic Range (WDR) capabilities, which can wash out the image.
- Poor Angle for Faces: Placing cameras too high or too low, making it difficult to get clear facial identification.
- Obstructed View: Trees, bushes, or even outdoor decorations that grow or shift, blocking the camera's line of sight over time.
- Incorrect Lighting: Relying on ambient light without ensuring adequate IR coverage for night vision, or placing cameras where shadows are too deep.
Weatherproofing and Connection Challenges
Outdoor installations face unique challenges due to exposure to the elements. Forgetting to properly weatherproof connections or mounting points can lead to early system failure or even damage to your property.
- Unsealed Entry Points: This is critical. If you drill a hole through your wall to run a cable, water can seep in. Always use high-quality, exterior-grade silicone sealant to fill the gap around the cable, ensuring a watertight seal. Manufacturer documentation often stresses this as a primary point of failure.
- Exposed Connectors: Electrical connections, especially for non-PoE cameras, must be protected from moisture. Use weatherproof junction boxes or specialized outdoor-rated connectors. Even Wi-Fi cameras need their power adapters protected.
- Cable Strain: Ensure cables aren't pulled too tight, which can damage them over time, especially with temperature fluctuations causing expansion and contraction. Leave a little slack where cables enter or exit enclosures.
- Corrosion: Using the wrong type of screws or mounting hardware outdoors can lead to rust and corrosion, weakening the mount. Always opt for stainless steel or galvanized hardware designed for exterior use.
Essential Features to Look For in Outdoor Cameras
When you're shopping for outdoor CCTV cameras, you'll see a lot of technical jargon. Focusing on a few key features will ensure you get a camera that’s built for the job and provides the clarity you need for effective surveillance. Prioritizing these attributes means a more reliable and useful security system, especially as of 2026.
Here are the must-have features for outdoor camera systems:
- Durability and Weather Resistance: As mentioned, a high IP rating (like IP66) is non-negotiable. This rating confirms the camera can handle dust, rain, and even high-pressure water jets.
- Effective Night Vision: Look for cameras with strong infrared (IR) LEDs. Check the specified range (e.g., 30 meters or 100 feet) to ensure it covers your target areas at night. Some advanced models offer color night vision, which can provide even more detail.
- Image Resolution and Clarity: While 1080p is common, consider 4K for superior detail, especially if you need to identify faces or license plates from a distance. Features like Wide Dynamic Range (WDR) help balance bright and dark areas in the image, preventing blown-out highlights or deep shadows that can obscure details.
- Motion Detection and Alerts: Most modern cameras offer motion detection. Advanced systems allow for customizable detection zones and smart alerts (person detection vs. general motion) to reduce false alarms. If your motion detection is inconsistent, you might need to explore how to fix security camera motion detection or learn why is my security camera not detecting motion?
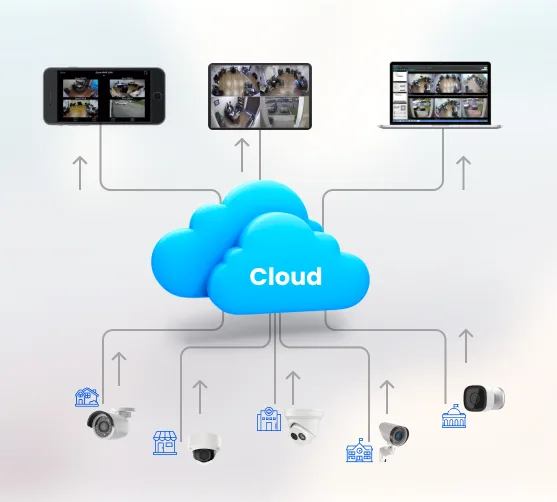
- Storage Options: Decide if you prefer local storage (SD card, DVR, NVR) or cloud storage. Cloud storage offers remote access and backup but often involves subscription fees. Local storage means you manage the recordings yourself. Our analysis of cloud vs local storage security cameras shows tradeoffs in cost and convenience.
- Connectivity Type:
- PoE (Power over Ethernet): This is often the most reliable and convenient for wired installations, as it uses a single cable for both power and data. It simplifies wiring and reduces potential points of failure.
- Wi-Fi: Convenient for wireless setups but ensure you have a strong, stable Wi-Fi signal where you plan to place the camera. A weak signal can cause why is my security camera delayed? or dropped connections.
Safety First: Legal and Electrical Considerations
When you're installing anything electrical outside your home, safety and legal compliance are paramount. It's not just about making the system work; it's about doing it in a way that's safe for you, your family, and your property, while also respecting privacy laws.
Electrical Safety
- Professional Help for Wiring: If you're uncomfortable working with electrical wiring, especially AC power, hire a qualified electrician. Improper wiring can lead to shocks, fires, or damage to your equipment.
- Outdoor-Rated Components: Always use electrical components rated for outdoor use. This includes outlets, junction boxes, and cables. These are designed to withstand moisture, temperature changes, and UV exposure.
- Grounding: Ensure all connected equipment is properly grounded. This is a fundamental safety measure to protect against electrical surges and faults. Standards bodies like Underwriters Laboratories (UL) test and certify electrical products for safety.
Legal and Privacy Considerations
- Audio Recording Laws: Be aware that laws regarding audio recording vary significantly by location. In many places, it's illegal to record conversations without the consent of all parties involved. Check your local regulations before enabling audio recording on your cameras.
- Neighbor's Property: Aim your cameras at your own property. Avoid pointing them directly into neighbors' windows, yards, or private areas, as this can be a violation of privacy laws and create significant conflict.
- Public Areas: Recording public sidewalks or streets may have restrictions depending on your local ordinances. The general principle is to focus on securing your property, not surveying public spaces unnecessarily.
- Signage: In some jurisdictions, it may be advisable or legally required to post signage indicating that your property is under video surveillance.
Keeping Your System Running: Maintenance Tips
Installing your CCTV cameras is just the beginning. To ensure they continue to provide reliable security for years to come, regular maintenance is essential. Think of it like changing the oil in your car, a little upkeep goes a long way.
Here are key maintenance tasks to perform periodically:
- Clean Camera Lenses: Dust, pollen, spiderwebs, and grime can build up on camera lenses, significantly degrading image quality.
- Frequency: Monthly, or more often if you notice image quality issues.
- How: Use a soft, lint-free cloth (like a microfiber cloth) and a mild lens cleaner or a slightly damp cloth. Never use abrasive materials or harsh chemicals.
- Check Connections: Periodically inspect all cable connections, both at the camera and at your recorder (DVR/NVR).
- Frequency: Every 3-6 months.
- What to look for: Loose connectors, signs of corrosion, or damage to the cables. Ensure all weatherproof seals are intact.
- Inspect Mounting Hardware: Make sure cameras are still securely mounted and haven't become loose due to vibration or weather stress.
- Frequency: Every 6-12 months.
- Test Functionality: Regularly verify that your cameras are recording, motion detection is working correctly, and remote viewing is active.
- Frequency: Monthly.
- Action: Review recent footage, check alert logs, and try accessing your system remotely via its app or web interface. If your system needs a reboot or refresh, you might need to know how to reset a security camera.
- Update Firmware: Keeping your camera and recorder firmware up to date is crucial for security and performance. Updates often patch vulnerabilities and can improve features. You can usually do this through the system's interface or a dedicated app. Learn more about how to update security camera firmware.
Frequently Asked Questions About Outdoor CCTV Installation
How long does setup typically take?
The actual physical installation for a few outdoor cameras can range from 2 to 8 hours, depending on property complexity and the number of cameras. This timeline doesn't include initial planning or system configuration. Running wires neatly and ensuring weatherproof connections are key factors affecting the duration.
What's the difference between PoE and Wi-Fi cameras for outdoor use?
PoE cameras use a single Ethernet cable for both power and data, offering a more stable and reliable connection. Wi-Fi cameras are easier to install as they don't require a direct data cable, but their performance depends heavily on your Wi-Fi signal strength, which can be a challenge outdoors. Weak signals can lead to issues like why is my security camera delayed?
Can I use indoor cameras outside?
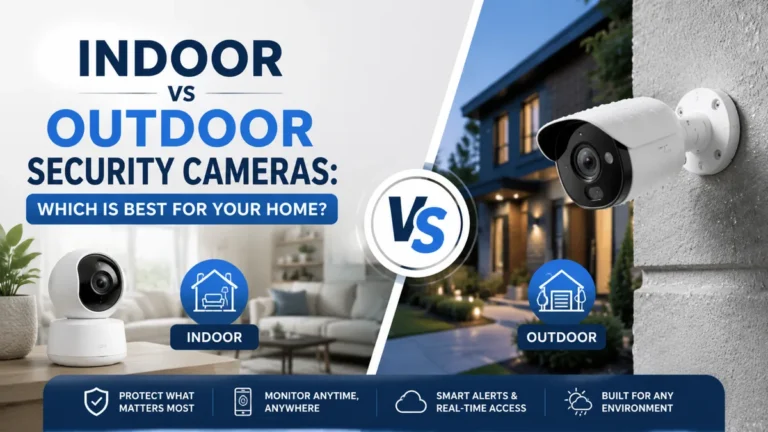
No, it's strongly advised against using indoor cameras outdoors. Indoor cameras are not built to withstand weather conditions like rain, extreme temperatures, or dust, and they lack the necessary IP ratings for outdoor durability. This will lead to premature failure and poor image quality.
What if my camera's view is blurry?
A blurry image from an outdoor camera can stem from several issues. It could be a dirty lens, improper focus setting (if adjustable), or condensation. If the blurriness is consistent, investigate why is my security camera blurry? for detailed troubleshooting steps.
How much data do security cameras use?
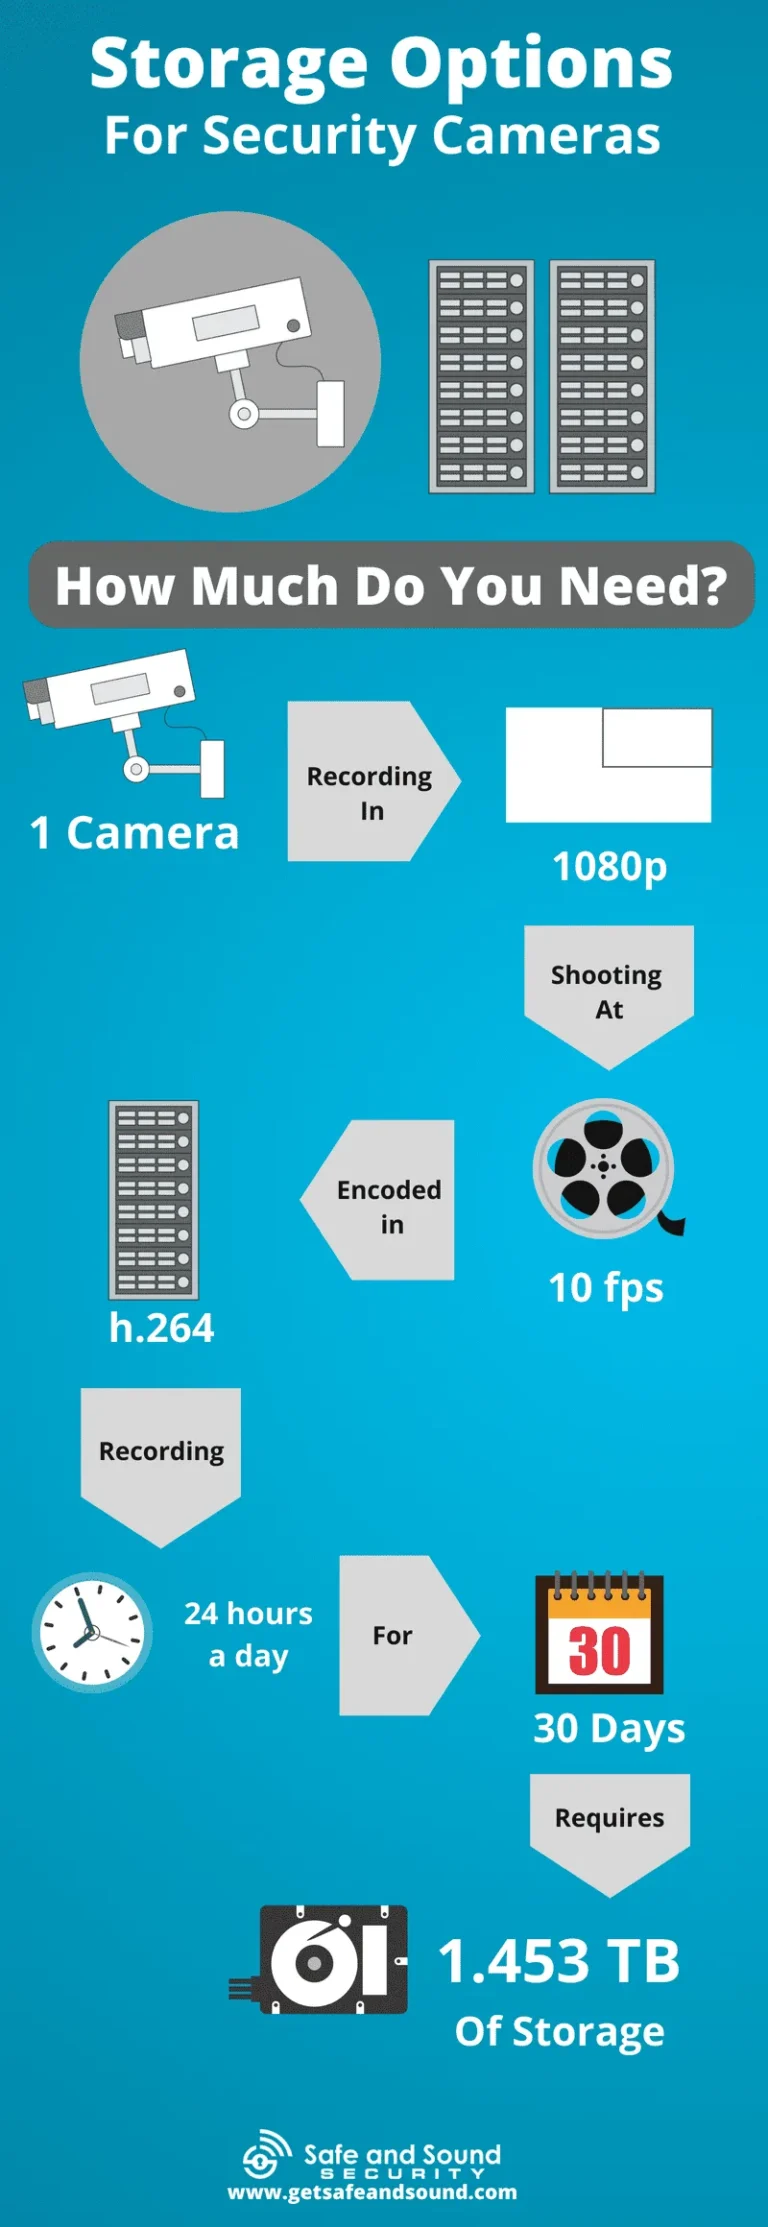
Data usage varies by resolution and recording type. Continuous 1080p recording can use several gigabytes per day per camera, while motion-activated recording uses much less. You can find detailed breakdowns at how much data does a security camera use?