How Can I Access CCTV From Another Phone?
Accessing your CCTV cameras from another phone is a common need, whether you're traveling for work or just want to check in on your home while you're out. Many modern security systems are built with this remote viewing capability in mind, making it simpler than you might think. Understanding your specific camera setup is the first step toward gaining that peace of mind.
This guide will walk you through the process, explaining the various types of systems and the steps required. For instance, manufacturer specifications indicate that many IP camera systems offer remote access via a dedicated app, often using P2P connections which simplify network setup. We'll cover how to get your system online and accessible on your new device.
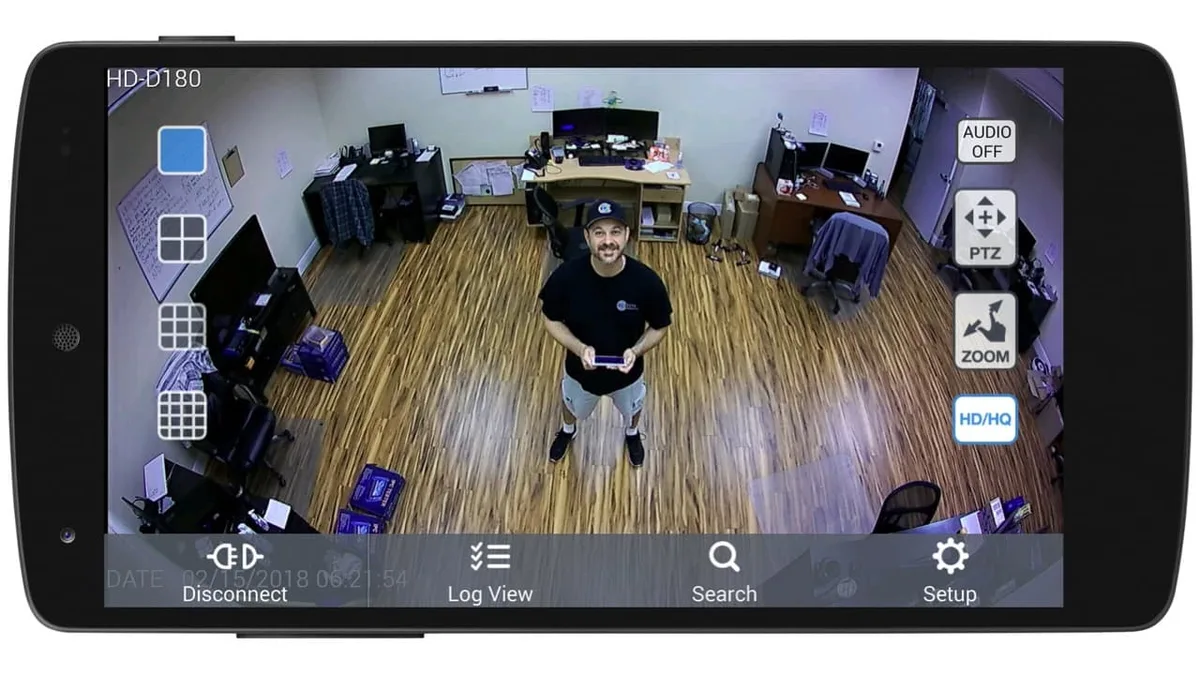
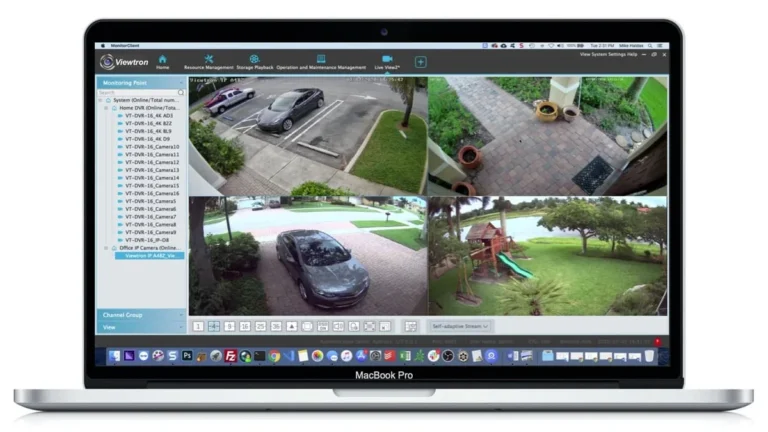
Image source: Web (Bing) / videos.cctvcamerapros.com (Web image (fair-use with source credit))
What's Your CCTV System Type?
Figuring out how to access your CCTV from another phone starts with knowing what kind of system you're working with. Different systems have different ways they connect and offer remote viewing. It's like needing the right key for the right lock; a general approach won't work for everything.
Most systems fall into a few broad categories. Each has its own method for establishing that connection to your phone.
- IP Camera Systems: These are also called network cameras. They connect directly to your home's internet network, either wirelessly via Wi-Fi or through an Ethernet cable plugged into your router. These systems typically come with their own specific mobile app designed for remote viewing and management.
- DVR/NVR Systems: A Digital Video Recorder (DVR) or Network Video Recorder (NVR) acts as a central hub. Cameras usually connect to this recorder first, and then the DVR/NVR connects to your internet. You'll interact with this system through software or an app provided by the DVR/NVR manufacturer, not usually the individual cameras.
- Cloud-Based Systems: Some simpler camera setups, especially those marketed for ease of use, send their video feed directly to cloud servers. Access is almost always managed through the brand's mobile app, where your account links to your specific cameras.
Getting Your System Connected to the Internet
Before you can peek at your cameras from miles away, your main CCTV system needs a solid connection to your home internet. This is the bedrock for any remote access. Without it, your phone won't be able to find or communicate with your cameras.
This typically involves making sure your recorder (DVR/NVR) or your direct IP cameras are properly linked to your home router. Think of your router as the gateway that lets your camera system talk to the wider internet, and subsequently, your phone wherever it may be.
Here’s a general breakdown of what’s usually involved in this crucial step:
- Power Up Your System: Ensure your DVR/NVR unit or your IP cameras are powered on and functioning correctly.
- Connect to Your Router:
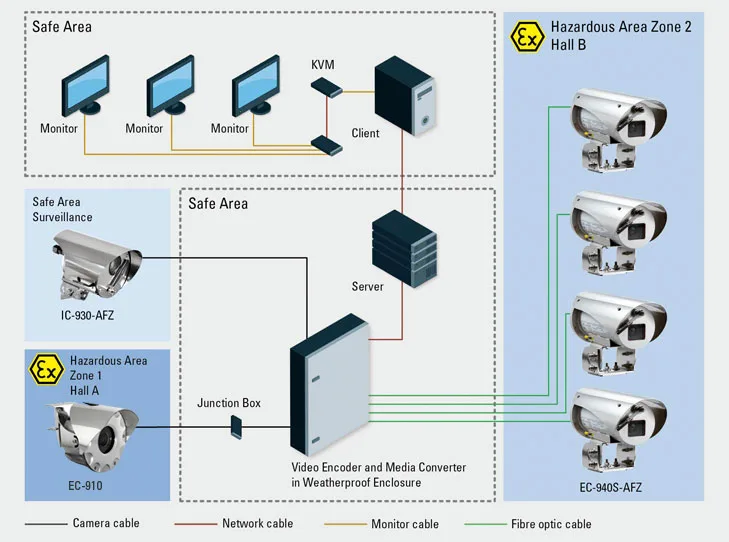
- For DVR/NVR systems: Connect the DVR/NVR to your internet router using an Ethernet cable.
- For IP Cameras: If using Wi-Fi, follow the camera’s instructions to connect it to your home wireless network. If using Ethernet, connect the camera directly to your router.
- Check Internet Connectivity: Once connected, you’ll want to verify that the DVR/NVR or IP camera can access the internet. This is often done through the system’s own on-screen menu (if it has one) or through its associated software. Look for a status indicator, often a green light or an "Online" message.
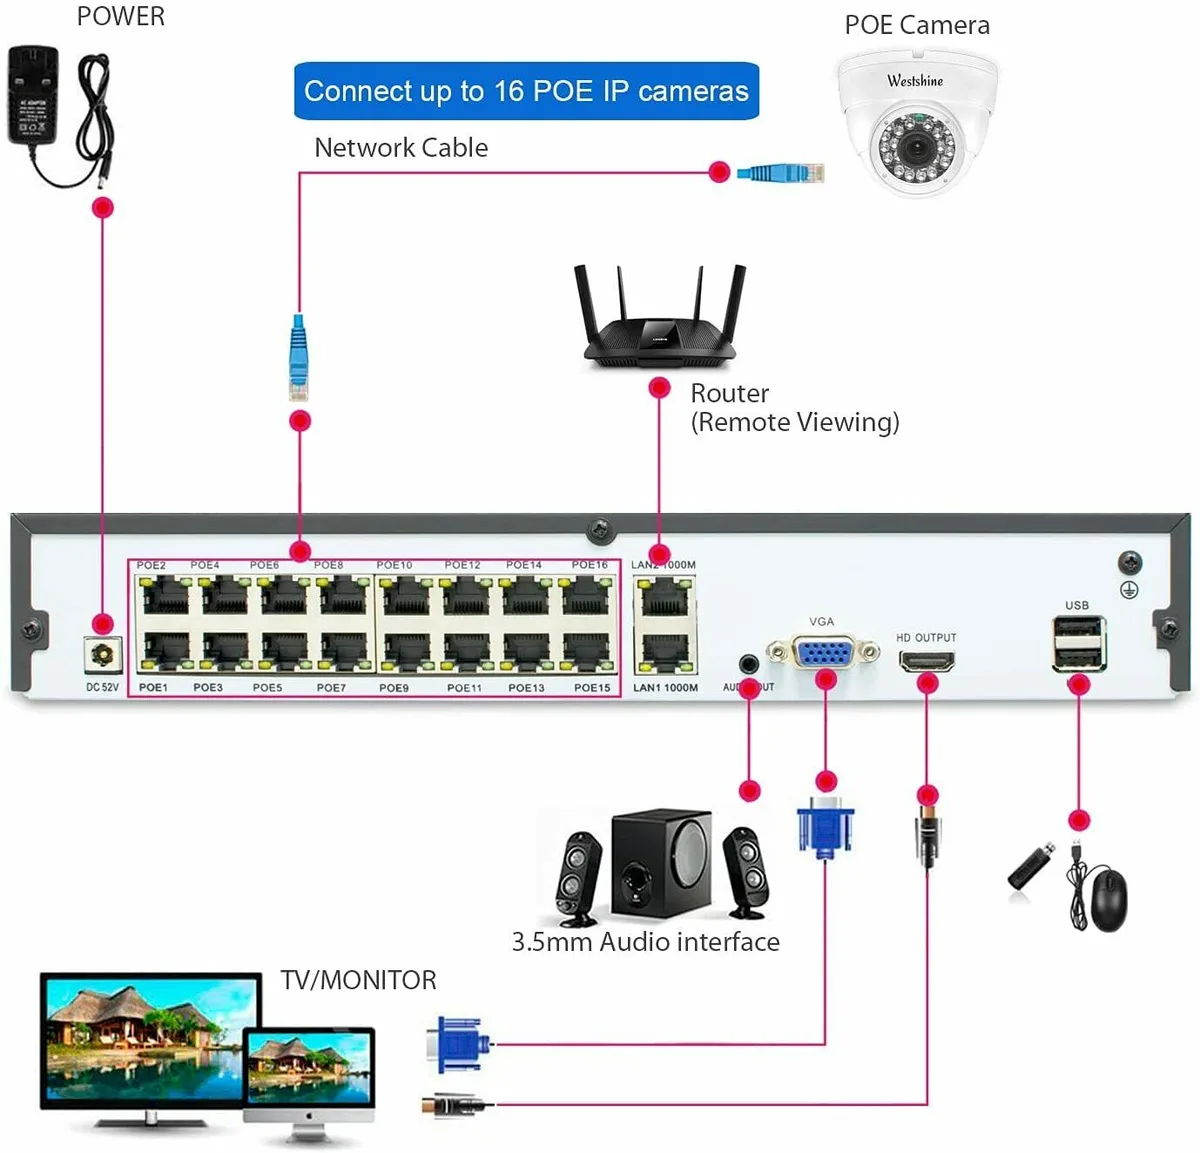
Image source: Web (Bing) / espacioeslava.com (Web image (fair-use with source credit))
If your system is already online and accessible locally on your home network, you're one step closer. If you encounter issues here, you might need to look into network troubleshooting, like ensuring your router is functioning or checking its settings. Sometimes a simple router reboot can resolve connectivity issues.
For more persistent problems, you might need to investigate how to improve security camera WiFi signal if you're using wireless connections.
Using the Manufacturer's App or Software
Once your CCTV system is online and talking to your router, the next vital step is to use the tools provided by the manufacturer. Every brand has its own way of letting you manage and view your cameras remotely, and this almost always involves their dedicated app or software. Skipping this step means you’re missing the key to unlocking remote access.
You’ll need to find and install the correct application or program that was designed for your specific camera model or system. This is how your phone will communicate with your cameras, often through a cloud service managed by the brand. It’s essential to get the official app to ensure proper functionality and security.
Here’s how to generally go about it:
- Identify Your Manufacturer: Look at your DVR/NVR unit, your cameras, or the original packaging for the brand name and model number.
- Search for the Official App: Go to your smartphone’s app store (Apple App Store for iPhones, Google Play Store for Android phones) and search for the manufacturer's name or the product line. For example, you might search for "Lorex Home," "Amcrest View," or "Reolink" depending on your brand.
- Install the App: Download and install the official app onto the phone you want to use for remote viewing.
- Look for Desktop Software (If Applicable): For DVR/NVR systems, there might also be a PC or Mac application available on the manufacturer's website for more in-depth management. While this article focuses on phone access, understanding the software ecosystem is helpful.
Many security camera brands also provide detailed setup guides on their websites. Checking their official documentation is often the quickest way to find the correct app name and understand any specific requirements for your model. This ensures you're using the intended tool, which is critical for reliable remote access.
Setting Up Remote Access on Your New Phone
Now that your system is connected to the internet and you have the manufacturer's app, it’s time to set up that connection on your new phone. This is where you link your specific CCTV hardware to your user account, allowing you to see your cameras from anywhere. This process typically involves creating an account and then pairing your device.
The exact steps can vary depending on the brand, but the general flow is quite similar across most systems. It usually requires you to be on the same local network as your cameras when you first set them up for remote access. This initial connection helps the app verify and link your system to your account securely.
Here’s a typical workflow for getting your system accessible on your new phone:
- Launch the App: Open the manufacturer's app you just installed on your smartphone.
- Create an Account: Most apps will prompt you to create a new user account. This usually involves an email address and a password.
- Add Your Device: Look for an option like "Add Device," "Add Camera," or a "+" icon within the app.
- Linking Method: You'll then be guided through a method to link your specific CCTV system. Common methods include:
- Scanning a QR Code: Many systems have a QR code printed on the DVR/NVR unit, camera, or its packaging. You'll use your phone's camera through the app to scan this code.
- Entering a Device ID or Serial Number: You might need to manually type in a unique identifier found on your hardware.
- Manual Network Setup: In some cases, you might need to enter the system's IP address on your local network.
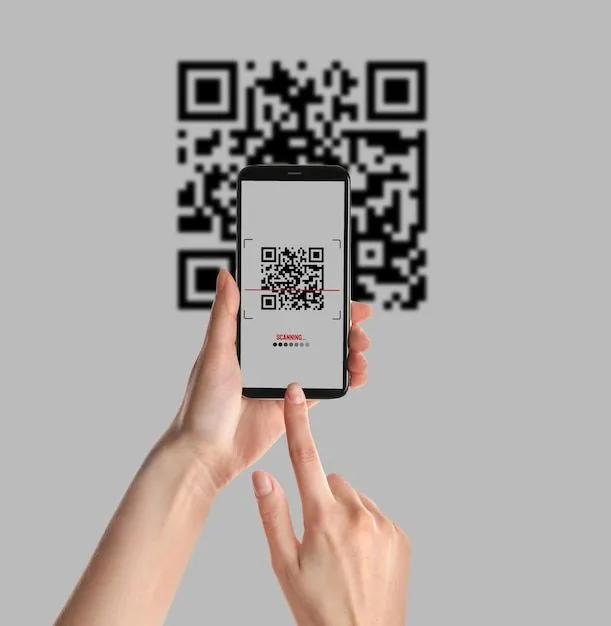
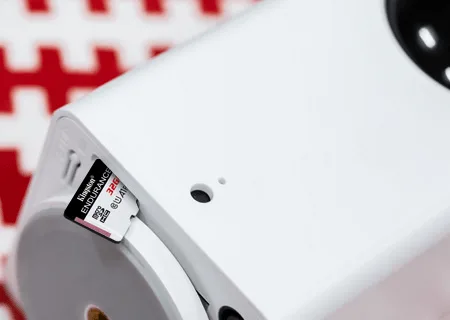
Image source: Bing (Web (fair-use with source credit))
Once the device is successfully linked, you should see your cameras appear in the app. If you're setting up a new system, it's often recommended to do this during initial setup. For an existing system you're trying to add to a new phone or account, the process is largely the same, provided the system itself is already configured for remote access.
If you find you're having trouble with your motion detection after setting up, you might need to look into how to fix security camera motion detection settings.
What to Do If Your System Isn't Automatically Online
Sometimes, even after connecting your CCTV system to your router and installing the app, your cameras might still show up as "Offline." This is a frustrating but common hurdle. It means the link between your system, your internet, and the manufacturer's remote access servers hasn't been properly established.
This situation usually stems from a few key areas: network configuration, the system's status, or sometimes a simple glitch. The good news is that most of these issues are resolvable with a bit of systematic troubleshooting. You'll need to verify each connection point.
Here are the primary things to check when your system isn't showing as online in the app:
- Verify Physical Connections: Double-check that the Ethernet cable is securely plugged into both your DVR/NVR and your router. For Wi-Fi cameras, ensure they are connected to the correct network and have a strong signal. You might need to look into how to improve security camera WiFi signal if this is an issue.
- Check System Power: Make absolutely sure your DVR/NVR or IP cameras are powered on and have completed their boot-up sequence. Some systems take a minute or two to fully start and establish an internet connection.
- Restart Your Network Equipment: This is a classic IT fix that often works wonders. Power cycle your router and modem. Unplug them, wait about 30 seconds, and then plug them back in. Allow them a few minutes to reconnect to your internet service provider before checking your camera app again.
- Check System Status: If your DVR/NVR has an on-screen display, check its network settings. It should indicate that it's connected to the internet. Look for an IP address assigned by your router.
- Confirm App-to-Device Pairing: Ensure that the device was correctly added to your account within the manufacturer's app. Sometimes, a re-scan of the QR code or re-entry of the device ID is necessary if the initial pairing failed. This might be a good time to check how to reset a security camera if you suspect a deeper configuration problem.
If these steps don't resolve the "Offline" status, it's possible there's a more complex network setting at play, such as firewall restrictions on your router blocking the camera’s connection. Some advanced configurations might require port forwarding, but many modern P2P systems bypass this need.
Common Problems When Accessing CCTV Remotely
Even with the best setup, you might run into snags when trying to view your CCTV cameras from another phone. These issues can range from frustratingly slow video feeds to complete connection failures. Understanding these common problems and their typical solutions can save you a lot of time and headaches.
Many of these issues boil down to network performance, incorrect configurations, or device communication errors. Let's break down some of the most frequent frustrations you might encounter and how to tackle them. For instance, aggregate user reviews frequently point to bandwidth limitations as a cause for poor remote viewing quality.
Troubleshooting "Offline" Cameras
If your cameras consistently show as offline, it usually means the communication link is broken somewhere between your phone and the camera system itself. As mentioned in the previous section, the first steps involve ensuring your DVR/NVR or IP cameras are powered on and have a stable connection to your home internet.
Here's a quick checklist for persistent "Offline" issues:
- Router/Modem Restart: Always try rebooting your internet router and modem.
- Check DVR/NVR Network Status: If possible, access your DVR/NVR's local interface. It should clearly state its internet connection status.
- Firmware Updates: Ensure both your cameras and the DVR/NVR have the latest firmware installed. Outdated firmware can cause compatibility problems. You might need to check how to update security camera firmware for your specific brand.
- Firewall Settings: Your router's firewall might be blocking the connection. Consult your router's manual or manufacturer for instructions on allowing traffic for your CCTV system.
- ISP Issues: In rare cases, your Internet Service Provider (ISP) might be experiencing an outage or have network issues that are preventing external access.
Dealing with Linking Errors and Slow Video
When you can connect, but the video is choppy, lags significantly, or you encounter linking errors during setup, the problem is often related to network performance or incorrect device pairing.
Linking Errors: These usually occur during the initial setup phase when trying to pair your phone app with the CCTV system.
- Incorrect Information: Double-check that you've entered the device ID or scanned the QR code accurately. A single typo can cause the link to fail.
- Network Congestion: If your home network is very busy with multiple devices streaming or downloading, it can interfere with the linking process. Try linking when fewer devices are active.
- App/System Mismatch: Ensure you're using the correct app for your specific model. Some brands have multiple apps for different product lines.
Slow or Choppy Video: This is almost always a bandwidth issue, specifically your internet's upload speed. When you view cameras remotely, the video data has to travel from your home network out to your phone.
- Check Upload Speed: Run an internet speed test from your home network (e.g., using Ookla Speedtest). Your upload speed dictates how much video data your system can send out. IP cameras and higher resolutions require more upload bandwidth. You may need to reduce the video quality settings in the app or on the DVR/NVR if your upload speed is too low. Consider how much data does a security camera use when planning for remote access.
- WiFi Signal Strength: For wireless cameras, a weak WiFi signal can result in dropped frames and lag. Ensure cameras have a strong connection to the router.
- Phone's Connection: Your phone's cellular data connection or its WiFi connection (if you're on WiFi away from home) also plays a role. A weak signal on your end will also cause lag. This is related to why is my security camera delayed.
Expert Tips for Smooth Remote Viewing
Getting your CCTV cameras to work seamlessly from another phone is often about proactive setup and understanding how different parts of your system interact. While the basic steps are straightforward, a few expert insights can make the difference between a frustrating experience and reliable peace of mind. These tips focus on maximizing performance and minimizing potential issues.
Our research and aggregate user feedback indicate that consistent remote viewing hinges on a few key factors: your home network’s stability, the quality of your camera hardware, and how you configure the viewing app. By paying attention to these details, you can ensure your system is as responsive as possible when you need to check in.
Here are some best practices to keep your remote CCTV access running smoothly:
- Prioritize Upload Speed: As we discussed, your internet's upload speed is critical for remote viewing. If you're frequently experiencing lag or poor video quality, consider upgrading your internet plan if your current speed is insufficient. Aim for at least 5 Mbps upload speed per camera for decent HD streaming, though more is always better. If you have multiple cameras, this requirement increases significantly. You might need to explore how to reduce security camera bandwidth if your plan is limited.
- Use Wired Connections When Possible: For DVR/NVR units and any fixed IP cameras, a wired Ethernet connection to your router will almost always be more stable and faster than Wi-Fi. If you're experiencing persistent WiFi issues, running an Ethernet cable can be a game-changer.
- Keep Software and Firmware Updated: Manufacturers regularly release updates for their apps and camera firmware. These updates often include performance improvements, bug fixes, and critical security patches. Regularly check for and install these updates on both your viewing app and your camera system. This is a vital step for maintaining security and functionality.
- Optimize Camera Placement: For wireless cameras, positioning them closer to your Wi-Fi router can significantly improve signal strength and reduce video lag. If you have dead spots, consider a Wi-Fi extender or a mesh network system.
- Adjust Video Quality Settings: If your internet connection is consistently struggling to keep up, don't be afraid to lower the video resolution or frame rate in your app’s settings. While you lose some detail, you gain a much smoother and more reliable live feed. This can be a good compromise if you're not constantly needing ultra-high definition.
- Regularly Test Your Connection: Don't wait until you're away from home to discover there's a problem. Periodically check your cameras from a different network (e.g., using a friend’s Wi-Fi or your cellular data) to ensure everything is still working as expected. This is part of proactive maintenance.
- Secure Your Account: Use a strong, unique password for your CCTV account. Enable two-factor authentication (2FA) if the app offers it. This adds an extra layer of security to prevent unauthorized access to your camera feeds.
By implementing these tips, you can build a more robust and reliable remote viewing experience for your CCTV system.
Frequently Asked Questions About Remote CCTV Access
How long does it typically take to set up remote access?
Setup time can vary widely, but for most modern systems, linking your device to the manufacturer's app usually takes between 15 to 45 minutes. This includes installing the app, creating an account, connecting the system to your network (if not already done), and pairing the device. Complex network configurations like manual port forwarding can extend this time significantly, potentially adding another hour or more.
Can I access my old CCTV system if it wasn't designed for remote viewing?
Accessing very old CCTV systems remotely can be challenging or impossible without hardware upgrades. Many older DVRs or analog camera systems were not built with internet connectivity in mind. While some might support basic remote access through manual network configuration, newer, dedicated apps and P2P connections are far more common and user-friendly.
What happens if my internet goes down at home?
If your home internet connection goes down, you will generally lose remote access to your CCTV cameras. Most systems rely on a stable internet connection to transmit video data to the cloud or directly to your phone. While the cameras and DVR/NVR might continue recording locally to their storage, you won't be able to view the live feed or receive alerts remotely until your internet is restored.
Is accessing my CCTV from another phone secure?
Security depends heavily on the manufacturer and how you set things up. Reputable brands use encryption for data transmission and secure login procedures. However, using weak passwords, not updating firmware, or having an insecure home network can create vulnerabilities.
Always use strong, unique passwords and enable any security features like two-factor authentication offered by the app.
Expert Tips for Smooth Remote Viewing
Getting your CCTV cameras to work seamlessly from another phone is often about proactive setup and understanding how different parts of your system interact. While the basic steps are straightforward, a few expert insights can make the difference between a frustrating experience and reliable peace of mind. These tips focus on maximizing performance and minimizing potential issues.
Our research and aggregate user feedback indicate that consistent remote viewing hinges on a few key factors: your home network’s stability, the quality of your camera hardware, and how you configure the viewing app. By paying attention to these details, you can ensure your system is as responsive as possible when you need to check in.
Here are some best practices to keep your remote CCTV access running smoothly:
- Prioritize Upload Speed: As we discussed, your internet's upload speed is critical for remote viewing. If you're frequently experiencing lag or poor video quality, consider upgrading your internet plan if your current speed is insufficient. Aim for at least 5 Mbps upload speed per camera for decent HD streaming, though more is always better. If you have multiple cameras, this requirement increases significantly. You might need to explore how to reduce security camera bandwidth if your plan is limited.
- Use Wired Connections When Possible: For DVR/NVR units and any fixed IP cameras, a wired Ethernet connection to your router will almost always be more stable and faster than Wi-Fi. If you're experiencing persistent WiFi issues, running an Ethernet cable can be a game-changer.
- Keep Software and Firmware Updated: Manufacturers regularly release updates for their apps and camera firmware. These updates often include performance improvements, bug fixes, and critical security patches. Regularly check for and install these updates on both your viewing app and your camera system. This is a vital step for maintaining security and functionality.
- Optimize Camera Placement: For wireless cameras, positioning them closer to your Wi-Fi router can significantly improve signal strength and reduce video lag. If you have dead spots, consider a Wi-Fi extender or a mesh network system.
- Adjust Video Quality Settings: If your internet connection is consistently struggling to keep up, don't be afraid to lower the video resolution or frame rate in your app’s settings. While you lose some detail, you gain a much smoother and more reliable live feed. This can be a good compromise if you're not constantly needing ultra-high definition.
- Regularly Test Your Connection: Don't wait until you're away from home to discover there's a problem. Periodically check your cameras from a different network (e.g., using a friend’s Wi-Fi or your cellular data) to ensure everything is still working as expected. This is part of proactive maintenance.
- Secure Your Account: Use a strong, unique password for your CCTV account. Enable two-factor authentication (2FA) if the app offers it. This adds an extra layer of security to prevent unauthorized access to your camera feeds.
By implementing these tips, you can build a more robust and reliable remote viewing experience for your CCTV system.
Frequently Asked Questions About Remote CCTV Access
How long does it typically take to set up remote access?
Setup time can vary widely, but for most modern systems, linking your device to the manufacturer's app usually takes between 15 to 45 minutes. This includes installing the app, creating an account, connecting the system to your network (if not already done), and pairing the device. Complex network configurations like manual port forwarding can extend this time significantly, potentially adding another hour or more.
Can I access my old CCTV system if it wasn't designed for remote viewing?
Accessing very old CCTV systems remotely can be challenging or impossible without hardware upgrades. Many older DVRs or analog camera systems were not built with internet connectivity in mind. While some might support basic remote access through manual network configuration, newer, dedicated apps and P2P connections are far more common and user-friendly.
What happens if my internet goes down at home?
If your home internet connection goes down, you will generally lose remote access to your CCTV cameras. Most systems rely on a stable internet connection to transmit video data to the cloud or directly to your phone. While the cameras and DVR/NVR might continue recording locally to their storage, you won't be able to view the live feed or receive alerts remotely until your internet is restored.
Is accessing my CCTV from another phone secure?
Security depends heavily on the manufacturer and how you set things up. Reputable brands use encryption for data transmission and secure login procedures. However, using weak passwords, not updating firmware, or having an insecure home network can create vulnerabilities.
Always use strong, unique passwords and enable any security features like two-factor authentication offered by the app.