How to Replace a Security Sensor Battery
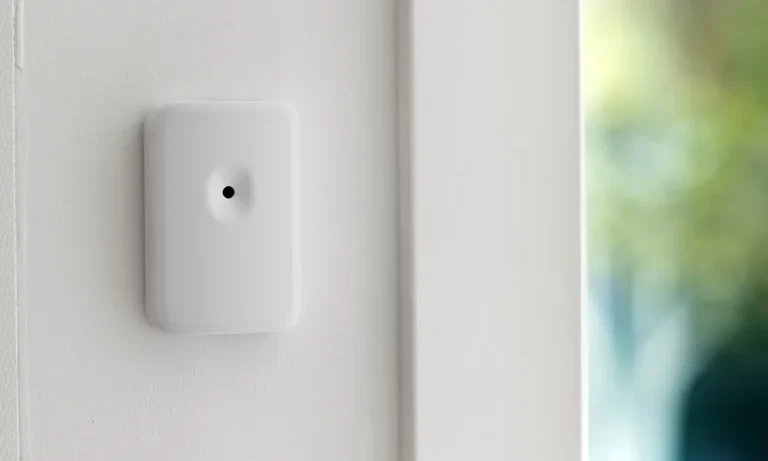
A blinking light or an alert on your phone signals it's time to swap out a dead battery in your home security sensor. Ignoring these warnings means compromising your property's protection, leaving you vulnerable to potential break-ins or other emergencies. Knowing how to replace a security sensor battery is a fundamental skill for any homeowner who values their peace of mind and the safety of their loved ones.
Most wireless security sensors run on small, coin-cell or AA/AAA batteries that typically last between one and five years. Manufacturer specifications indicate that consistent temperature fluctuations and high-frequency wireless transmissions can impact this lifespan. Fortunately, the process itself is usually straightforward and doesn't require professional help, saving you time and money.
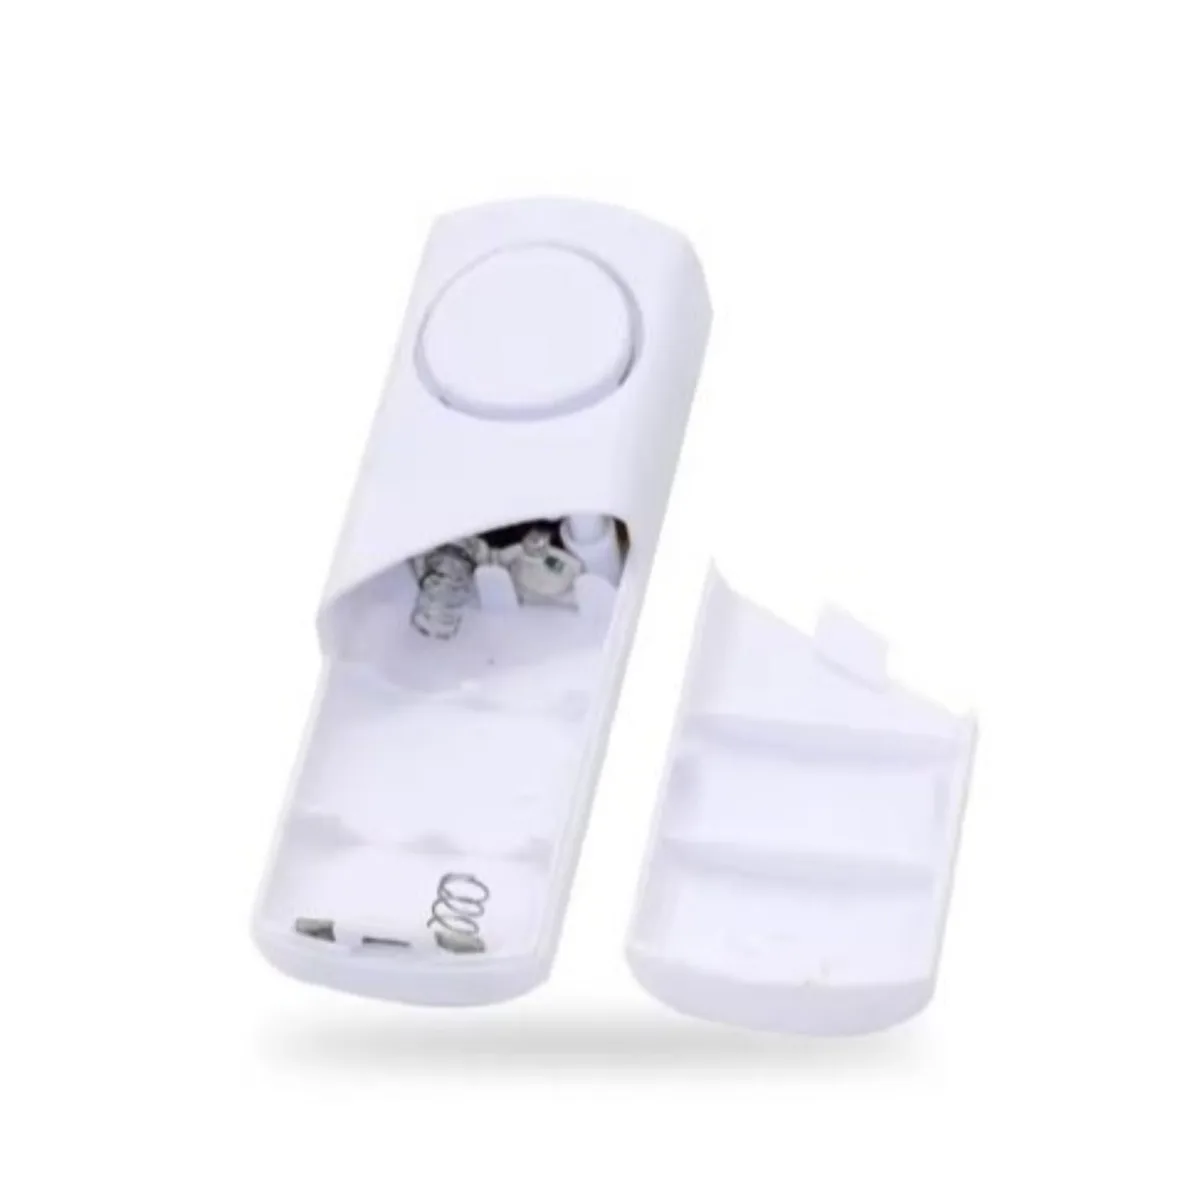
Image source: Bing (Web (fair-use with source credit))
Quick Answer
To replace a security sensor battery, first identify the sensor type and the required battery. Locate the low battery warning, then carefully open the sensor casing. Remove the old battery, insert a new one of the same type and voltage, and reassemble the sensor.
Finally, test the sensor to confirm it's working correctly.
Understanding the Low Battery Warning
Your security system is designed to give you ample notice before a sensor's battery completely dies. This crucial heads-up prevents unexpected system failures. Typically, you'll receive a notification through your system's mobile app, a text message, or an audible chirp from the main control panel.
Some sensors also have a small LED light that might blink or turn red to indicate a low battery.
Pay close attention to these alerts. They are your system's way of saying, "I need a little attention soon." Acting promptly ensures your sensors continue to monitor for intrusions, smoke, or other hazards without interruption. If you consistently ignore these warnings, you risk a sensor going offline without you realizing it, which is when your home's security is truly compromised.
Identifying the Warning Signs
- App Notifications: Most modern systems send alerts directly to your smartphone. Check these messages promptly.
- Audible Chirps: Some panels emit a distinct chirp, often hourly, to remind you of a pending battery issue.
- LED Indicators: Older or simpler sensors might have a flashing or solid red light on the unit itself.
- System Status: Your main security panel might display a "trouble" or "fault" status indicating a sensor problem.
Ignoring these signs can lead to a sensor failing at a critical moment. For instance, a door sensor that’s out of power won't trigger an alarm if the door is opened. This simple oversight can negate the entire purpose of your security system.
What Kind of Battery Does Your Sensor Need?
Not all security sensors use the same type of battery. Figuring out the correct replacement is the most critical first step. You'll usually find this information directly on the sensor itself or in the system's user manual.
Common types include coin cells like the CR2032, and standard cylindrical batteries such as AA or AAA.
Using the wrong battery can cause several problems. It might not fit, it might not provide enough power, or it could even damage the sensor. Always double-check the markings on the old battery or consult your system's documentation.
Manufacturer specifications, like those from Energizer Holdings, Inc., detail the precise voltage and chemistry required for optimal performance.
Matching the Right Battery to the Sensor
Identifying the correct battery is crucial for the sensor’s proper function and longevity. Here's how to nail it:
- Check the Sensor: Most sensors have battery compartment covers that either pop off or slide open. Often, the battery type is printed directly on the inside of this cover or on the battery housing itself.
- Consult the Manual: If the sensor markings are unclear or the casing is difficult to open, your security system’s user manual is your best resource. It will list the specific battery models for each component.
- Manufacturer's Website: If you’ve lost the manual, a quick search on your security system’s brand website should provide access to the documentation for your specific model.
- Online Identification: If you know the sensor's model number, you can often find its battery requirements with a quick web search, but always cross-reference with official sources if possible.
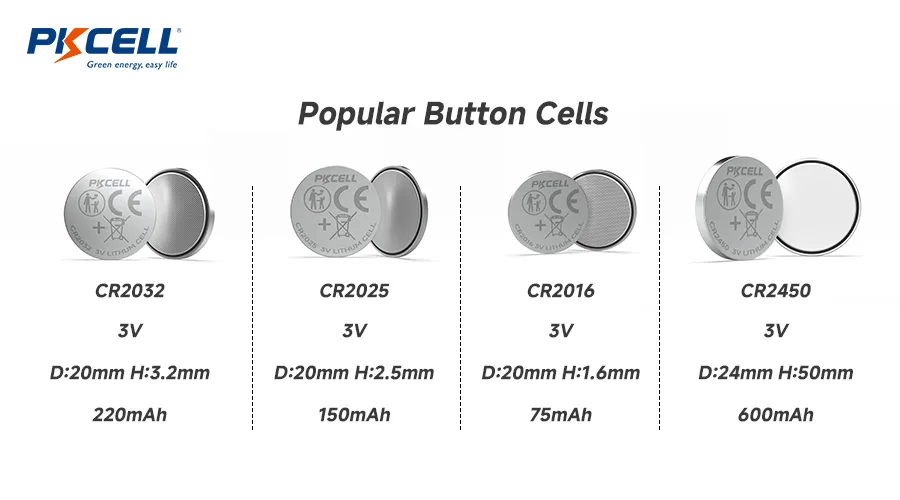
Image source: Web (Bing) / pkcellpower.com (Web image (fair-use with source credit))
A common mistake is assuming all sensors from the same brand use the same battery. This isn't always true, especially if your system has different types of sensors, such as motion detectors versus door/window contacts. Always confirm the specific requirement for that particular sensor.
How to Safely Open Your Security Sensor
Opening a security sensor is usually straightforward, but it requires a gentle touch. Most are designed to be opened without tools, using small clips or sliding mechanisms. Applying too much force can easily break the plastic casing or damage the internal components.
It’s important to approach this step methodically, observing how the parts are fitted together.
Some sensors have a small slot for a flathead screwdriver or a coin to help pry them open. Others simply snap apart. If you're unsure, look for arrows or markings on the casing that indicate the direction to slide or twist.
The goal is to release the locking tabs without causing any stress fractures.
Identifying the Casing Type
Security sensors come in various shapes and sizes, and their casings reflect different design approaches. Understanding the type of housing you're dealing with is the first step to opening it without incident.
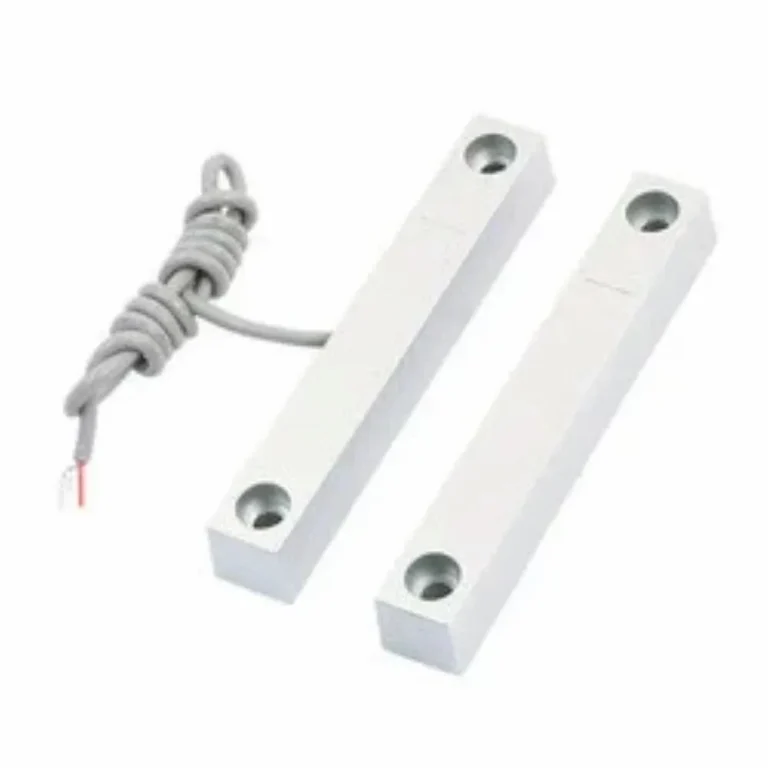
- Two-Piece Snap-Together: These are very common for door/window sensors. One part typically mounts on the frame, the other on the door or window. They often have a seam where they meet, and you can usually insert a fingernail or a thin, flat tool into this seam to gently pry them apart.
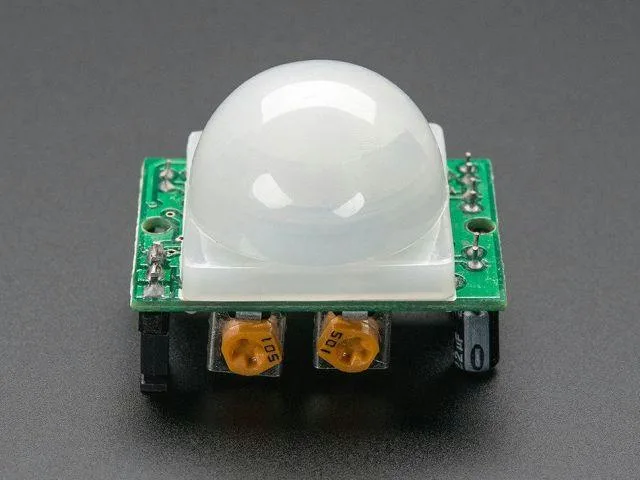
- Single-Piece Sliding/Twisting: Some motion detectors or larger sensors are a single unit. These might have a section that slides off, or a base that twists to unlock from the main body. Look for subtle lines indicating a movable panel or a rotational lock.
- Screwed Housings: Less common for wireless sensors, but some might have small, recessed screws. If you see tiny screw heads, you’ll need a small Phillips or flathead screwdriver. Be sure to use the correct size to avoid stripping the screw.
Finding Release Points
Once you know the general type of casing, look for the specific release points. These are often subtly incorporated into the design.
- Notches and Slots: Many casings have small, almost invisible notches or slots along the seam. These are designed for a fingernail, a plastic pry tool, or a very thin flathead screwdriver. Insert your tool and gently twist or lever to release the clips.
- Arrows: Some manufacturers will include small arrows indicating the direction to slide or twist a panel to open it. Even faint arrows are worth looking for.
- Pressure Points: On some snap-fit designs, you might need to apply pressure to specific points along the seam simultaneously to release the clips. Observe the casing for any slight indentations or variations in texture that suggest a pressure point.
Never force it. If it feels stuck, re-examine the casing for hidden tabs or clips you might have missed. A little patience here prevents a costly mistake later.
Step-by-Step: Replacing the Sensor Battery
Now that you know which battery you need and how to open the sensor, it's time to perform the swap. This process is designed to be user-friendly, but a systematic approach ensures everything goes smoothly and your sensor remains operational.
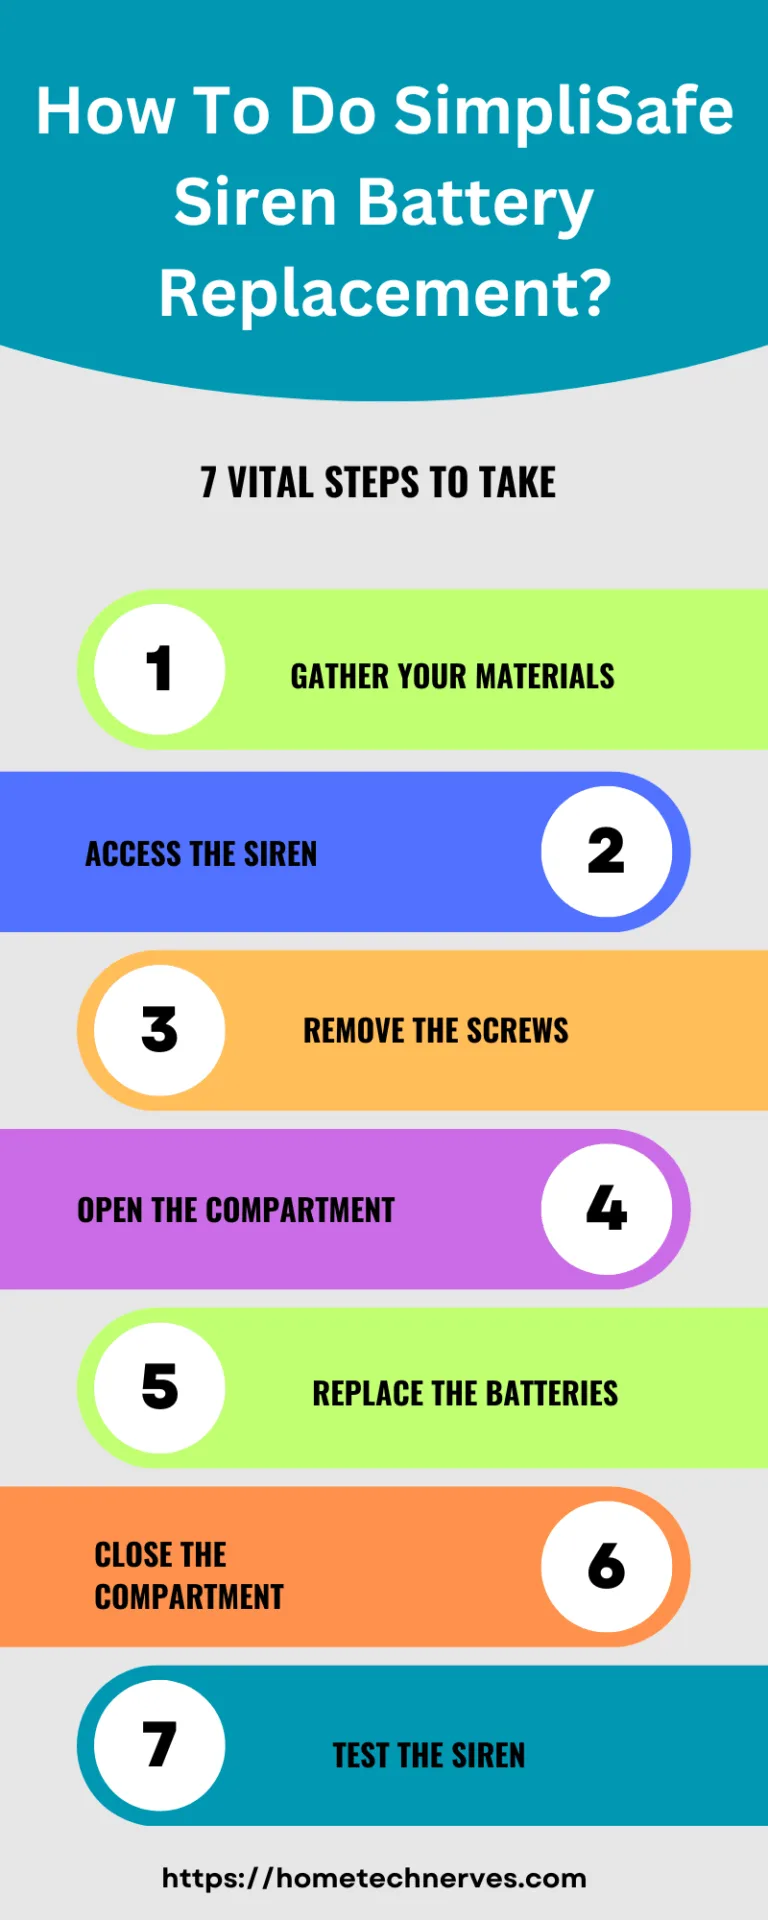
Image source: Bing (Web (fair-use with source credit))
Step 1: Prepare Your Workspace
Before you start, clear a small, well-lit area. You’ll want a flat surface where you can lay out the sensor parts without losing them. Having a small bowl or container handy can be useful for holding the old battery and any small screws.
Ensure your hands are clean and dry.
Step 2: Power Down (If Necessary)
Many wireless sensors don't require the entire security system to be powered down. However, some manufacturers recommend temporarily disarming and even putting your system into a "maintenance mode" to avoid false alarms or error messages during the battery change. Consult your system's manual to see if this step is necessary for your specific setup.
If you do power down, remember to re-enable it afterward.
Step 3: Remove the Old Battery
With the sensor casing open, you’ll see the battery. If it’s a coin cell, it might be held in place by a small clip or simply seated in a compartment. Gently push or slide the battery out.
For cylindrical batteries, they usually just pull out. Be careful not to touch the contacts inside the battery compartment with your fingers, as oils can degrade the connection.
Step 4: Install the New Battery
Take your new, correctly identified battery and insert it into the compartment. Pay close attention to the +/- polarity markings. Most sensors have these clearly indicated inside the battery housing.
If the battery doesn't seat easily, double-check that you have the correct type and that it's oriented properly. A CR2032 coin cell, for example, usually has the positive (+) side facing up.
Step 5: Reassemble the Sensor
Once the new battery is in place, carefully align the sensor casing parts and snap or slide them back together. Ensure all the clips engage securely and that there are no gaps. If you removed any screws, re-tighten them, but don't overtighten, as this can strip the plastic threads.
Step 6: Test the Sensor
This is a critical step that many people skip. After reassembling the sensor, test its functionality. If it’s a door/window sensor, open and close the protected door or window and listen for a confirmation chime or check your app for status updates.
For a motion sensor, walk in front of it and verify that it triggers an alert or LED response. If your system requires it, re-enable it from maintenance mode.
Common Mistakes When Swapping Sensor Batteries
Even with clear instructions, it's easy to make a misstep when changing a sensor battery. Understanding these common errors can help you avoid them and ensure your security system remains fully functional. Most problems arise from rushing the process or not paying attention to the details.
Not Testing After Replacement
This is perhaps the most frequent oversight. You've swapped the battery, snapped the case shut, and feel like the job is done. However, without testing, you have no real confirmation that the new battery is correctly seated, the sensor is powered up, or that the sensor is still communicating with your alarm panel.
A sensor that appears to be working but isn't fully communicating can leave a blind spot in your security coverage.
Using the Wrong Battery Type
We've covered how vital it is to get the right battery. Using one with the wrong voltage or capacity might mean the sensor powers on but doesn't perform optimally, leading to intermittent issues or a much shorter lifespan for the new battery. In rare cases, an incompatible battery could even damage the sensor's electronics.
Always check the markings or the manual. For instance, a CR2450 might look similar to a CR2032 but has a different voltage and thickness.
Forgetting to Secure the Casing
If the sensor casing isn't properly secured, it can lead to several issues. It might allow dust or moisture to get inside, potentially damaging the electronics over time. In some cases, a loose casing can also interfere with the sensor's tamper switch, causing a persistent "trouble" alert.
Make sure all clips are engaged and the housing feels snug and secure before putting the sensor back in place. If screws are involved, ensure they are tightened appropriately without overdoing it.
What Kind of Battery Does Your Sensor Need?
Not all security sensors use the same type of battery. Figuring out the correct replacement is the most critical first step. You'll usually find this information directly on the sensor itself or in the system's user manual.
Common types include coin cells like the CR2032, and standard cylindrical batteries such as AA or AAA.
Using the wrong battery can cause several problems. It might not fit, it might not provide enough power, or it could even damage the sensor. Always double-check the markings on the old battery or consult your system's documentation.
Manufacturer specifications, like those from Energizer Holdings, Inc., detail the precise voltage and chemistry required for optimal performance.
Matching the Right Battery to the Sensor
Identifying the correct battery is crucial for the sensor’s proper function and longevity. Here's how to nail it:
- Check the Sensor: Most sensors have battery compartment covers that either pop off or slide open. Often, the battery type is printed directly on the inside of this cover or on the battery housing itself.
- Consult the Manual: If the sensor markings are unclear or the casing is difficult to open, your security system’s user manual is your best resource. It will list the specific battery models for each component.
- Manufacturer's Website: If you’ve lost the manual, a quick search on your security system’s brand website should provide access to the documentation for your specific model.
- Online Identification: If you know the sensor's model number, you can often find its battery requirements with a quick web search, but always cross-reference with official sources if possible.
Image source: Web (Bing) / pkcellpower.com (Web image (fair-use with source credit))
A common mistake is assuming all sensors from the same brand use the same battery. This isn't always true, especially if your system has different types of sensors, such as motion detectors versus door/window contacts. Always confirm the specific requirement for that particular sensor.
How to Safely Open Your Security Sensor
Opening a security sensor is usually straightforward, but it requires a gentle touch. Most are designed to be opened without tools, using small clips or sliding mechanisms. Applying too much force can easily break the plastic casing or damage the internal components.
It’s important to approach this step methodically, observing how the parts are fitted together.
Some sensors have a small slot for a flathead screwdriver or a coin to help pry them open. Others simply snap apart. If you're unsure, look for arrows or markings on the casing that indicate the direction to slide or twist.
The goal is to release the locking tabs without causing any stress fractures.
Identifying the Casing Type
Security sensors come in various shapes and sizes, and their casings reflect different design approaches. Understanding the type of housing you're dealing with is the first step to opening it without incident.
- Two-Piece Snap-Together: These are very common for door/window sensors. One part typically mounts on the frame, the other on the door or window. They often have a seam where they meet, and you can usually insert a fingernail or a thin, flat tool into this seam to gently pry them apart.
- Single-Piece Sliding/Twisting: Some motion detectors or larger sensors are a single unit. These might have a section that slides off, or a base that twists to unlock from the main body. Look for subtle lines indicating a movable panel or a rotational lock.
- Screwed Housings: Less common for wireless sensors, but some might have small, recessed screws. If you see tiny screw heads, you’ll need a small Phillips or flathead screwdriver. Be sure to use the correct size to avoid stripping the screw.
Finding Release Points
Once you know the general type of casing, look for the specific release points. These are often subtly incorporated into the design.
- Notches and Slots: Many casings have small, almost invisible notches or slots along the seam. These are designed for a fingernail, a plastic pry tool, or a very thin flathead screwdriver. Insert your tool and gently twist or lever to release the clips.
- Arrows: Some manufacturers will include small arrows indicating the direction to slide or twist a panel to open it. Even faint arrows are worth looking for.
- Pressure Points: On some snap-fit designs, you might need to apply pressure to specific points along the seam simultaneously to release the clips. Observe the casing for any slight indentations or variations in texture that suggest a pressure point.
Never force it. If it feels stuck, re-examine the casing for hidden tabs or clips you might have missed. A little patience here prevents a little cost later.
Step-by-Step: Replacing the Sensor Battery
Now that you know which battery you need and how to open the sensor, it's time to perform the swap. This process is designed to be user-friendly, but a systematic approach ensures everything goes smoothly and your sensor remains operational.
Image source: Bing (Web (fair-use with source credit))
Step 1: Prepare Your Workspace
Before you start, clear a small, well-lit area. You’ll want a flat surface where you can lay out the sensor parts without losing them. Having a small bowl or container handy can be useful for holding the old battery and any small screws.
Ensure your hands are clean and dry.
Step 2: Power Down (If Necessary)
Many wireless sensors don't require the entire security system to be powered down. However, some manufacturers recommend temporarily disarming and even putting your system into a "maintenance mode" to avoid false alarms or error messages during the battery change. Consult your system's manual to see if this step is necessary for your specific setup.
If you do power down, remember to re-enable it afterward.
Step 3: Remove the Old Battery
With the sensor casing open, you’ll see the battery. If it’s a coin cell, it might be held in place by a small clip or simply seated in a compartment. Gently push or slide the battery out.
For cylindrical batteries, they usually just pull out. Be careful not to touch the contacts inside the battery compartment with your fingers, as oils can degrade the connection.
Step 4: Install the New Battery
Take your new, correctly identified battery and insert it into the compartment. Pay close attention to the +/- polarity markings. Most sensors have these clearly indicated inside the battery housing.
If the battery doesn't seat easily, double-check that you have the correct type and that it's oriented properly. A CR2032 coin cell, for example, usually has the positive (+) side facing up.
Step 5: Reassemble the Sensor
Once the new battery is in place, carefully align the sensor casing parts and snap or slide them back together. Ensure all the clips engage securely and that there are no gaps. If you removed any screws, re-tighten them, but don't overtighten, as this can strip the plastic threads.
Step 6: Test the Sensor
This is a critical step that many people skip. After reassembling the sensor, test its functionality. If it’s a door/window sensor, open and close the protected door or window and listen for a confirmation chime or check your app for status updates.
For a motion sensor, walk in front of it and verify that it triggers an alert or LED response. If your system requires it, re-enable it from maintenance mode.
Common Mistakes When Swapping Sensor Batteries
Even with clear instructions, it's easy to make a misstep when changing a sensor battery. Understanding these common errors can help you avoid them and ensure your security system remains fully functional. Most problems arise from rushing the process or not paying attention to the details.
Not Testing After Replacement
This is perhaps the most frequent oversight. You've swapped the battery, snapped the case shut, and feel like the job is done. However, without testing, you have no real confirmation that the new battery is correctly seated, the sensor is powered up, or that the sensor is still communicating with your alarm panel.
A sensor that appears to be working but isn't fully communicating can leave a blind spot in your security coverage.
Using the Wrong Battery Type
We've covered how vital it is to get the right battery. Using one with the wrong voltage or capacity might mean the sensor powers on but doesn't perform optimally, leading to intermittent issues or a much shorter lifespan for the new battery. In rare cases, an incompatible battery could even damage the sensor's electronics.
Always check the markings or the manual. For instance, a CR2450 might look similar to a CR2032 but has a different voltage and thickness.
Forgetting to Secure the Casing
If the sensor casing isn't properly secured, it can lead to several issues. It might allow dust or moisture to get inside, potentially damaging the electronics over time. In some cases, a loose casing can also interfere with the sensor's tamper switch, causing a persistent "trouble" alert.
Make sure all clips are engaged and the housing feels snug and secure before putting the sensor back in place. If screws are involved, ensure they are tightened appropriately without overdoing it.
When to Replace Your Sensor Battery Proactively
While low battery warnings are helpful, sometimes it’s smart to replace sensor batteries before they even signal they’re dying. This proactive approach ensures your system is always at peak performance. For critical sensors, like those on main entry doors or in primary living areas, consider swapping batteries annually.
This is especially true if you live in climates with extreme temperature swings, as this can shorten battery life.
Aggregate reviews indicate that many sensors start to experience intermittent performance issues even before a formal low-battery alert. Replacing them every 12-18 months, depending on the manufacturer's recommendation and your specific usage, can prevent unexpected failures. Think of it like changing the oil in your car; it's maintenance that saves you from bigger headaches down the road.
Factors Affecting Battery Lifespan
Several environmental and usage factors can influence how long a sensor's battery lasts. Understanding these can help you set a realistic replacement schedule.
- Temperature: Extreme cold or heat can degrade battery performance. If your sensors are in an unconditioned space like a garage or attic, expect a shorter battery life.
- Transmission Frequency: Sensors that communicate more often, such as those in high-traffic areas or those with frequent false alarms, will drain batteries faster.
- Signal Strength: A weak signal between the sensor and the main panel can cause the sensor to use more power to transmit. Ensuring good placement and minimizing interference is key.
- Battery Age: Even unused batteries lose some charge over time. Old stock batteries might not last as long as fresher ones.
Troubleshooting Common Sensor Battery Issues
Even after replacing a battery, you might encounter problems. The sensor might still not respond, or it could trigger false alarms. Don't panic; these are usually easy fixes.
The most common culprits are incorrect battery installation or a small oversight in the reassembly process.
Sensor Not Responding After Battery Change
If your sensor is completely dead after the swap, first re-check the battery installation. Ensure the positive (+) and negative (-) terminals are correctly aligned and that the battery is fully seated. Sometimes, a slight wiggle or firmly pressing the battery can make a difference.
If it’s still unresponsive, try a different brand-new battery of the exact same type. It's possible the first replacement battery was faulty.
False Alarms or Error Messages
If you're getting error messages or false alarms after the swap, carefully re-open the sensor. Ensure the casing is snapped shut completely and that no wires or internal components are pinched or out of place. Check that the tamper switch, if present, is properly depressed when the casing is closed.
Some systems might require you to "re-learn" the sensor to the panel after a battery change; consult your system's manual for this specific procedure.
FAQs About Security Sensor Battery Replacement
How long does setup take?
Replacing a security sensor battery usually takes between 5 to 15 minutes per sensor. The exact time depends on how easily the casing opens and whether you need to power down your main security system.
How often should I replace sensor batteries?
Most manufacturers recommend replacing batteries every 1 to 5 years, depending on the sensor type and usage. For critical sensors, consider a proactive annual replacement to ensure reliability.
What happens if I use the wrong battery?
Using the wrong battery can result in the sensor not working, performing poorly, or even being damaged. Always match the battery type, size, and voltage to the manufacturer's specifications.
Can I replace batteries in all weather conditions?
It's best to replace batteries in a controlled environment. Extreme temperatures can affect battery performance and make the casing brittle. Performing the swap indoors is always recommended.
Do I need special tools for battery replacement?
Most wireless security sensors are designed for tool-free battery replacement. You might need a small, flathead screwdriver or a plastic pry tool for stubborn casings, but fingernails often suffice.
When to Replace Your Sensor Battery Proactively
While low battery warnings are helpful, sometimes it’s smart to replace sensor batteries before they even signal they’re dying. This proactive approach ensures your system is always at peak performance. For critical sensors, like those on main entry doors or in primary living areas, consider swapping batteries annually.
This is especially true if you live in climates with extreme temperature swings, as this can shorten battery life.
Aggregate reviews indicate that many sensors start to experience intermittent performance issues even before a formal low-battery alert. Replacing them every 12-18 months, depending on the manufacturer's recommendation and your specific usage, can prevent unexpected failures. Think of it like changing the oil in your car; it's maintenance that saves you from bigger headaches down the road.
Factors Affecting Battery Lifespan
Several environmental and usage factors can influence how long a sensor's battery lasts. Understanding these can help you set a realistic replacement schedule.
- Temperature: Extreme cold or heat can degrade battery performance. If your sensors are in an unconditioned space like a garage or attic, expect a shorter battery life.
- Transmission Frequency: Sensors that communicate more often, such as those in high-traffic areas or those with frequent false alarms, will drain batteries faster.
- Signal Strength: A weak signal between the sensor and the main panel can cause the sensor to use more power to transmit. Ensuring good placement and minimizing interference is key.
- Battery Age: Even unused batteries lose some charge over time. Old stock batteries might not last as long as fresher ones.
Troubleshooting Common Sensor Battery Issues
Even after replacing a battery, you might encounter problems. The sensor might still not respond, or it could trigger false alarms. Don't panic; these are usually easy fixes.
The most common culprits are incorrect battery installation or a small oversight in the reassembly process.
Sensor Not Responding After Battery Change
If your sensor is completely dead after the swap, first re-check the battery installation. Ensure the positive (+) and negative (-) terminals are correctly aligned and that the battery is fully seated. Sometimes, a slight wiggle or firmly pressing the battery can make a difference.
If it’s still unresponsive, try a different brand-new battery of the exact same type. It's possible the first replacement battery was faulty.
False Alarms or Error Messages
If you're getting error messages or false alarms after the swap, carefully re-open the sensor. Ensure the casing is snapped shut completely and that no wires or internal components are pinched or out of place. Check that the tamper switch, if present, is properly depressed when the casing is closed.
Some systems might require you to "re-learn" the sensor to the panel after a battery change; consult your system's manual for this specific procedure.
FAQs About Security Sensor Battery Replacement
How long does setup take?
Replacing a security sensor battery usually takes between 5 to 15 minutes per sensor. The exact time depends on how easily the casing opens and whether you need to power down your main security system.
How often should I replace sensor batteries?
Most manufacturers recommend replacing batteries every 1 to 5 years, depending on the sensor type and usage. For critical sensors, consider a proactive annual replacement to ensure reliability.
What happens if I use the wrong battery?
Using the wrong battery can result in the sensor not working, performing poorly, or even being damaged. Always match the battery type, size, and voltage to the manufacturer's specifications.
Can I replace batteries in all weather conditions?
It's best to replace batteries in a controlled environment. Extreme temperatures can affect battery performance and make the casing brittle. Performing the swap indoors is always recommended.
Do I need special tools for battery replacement?
Most wireless security sensors are designed for tool-free battery replacement. You might need a small, flathead screwdriver or a plastic pry tool for stubborn casings, but fingernails often suffice.
Why Your Security Sensor Needs a Battery Swap
A blinking light or an alert on your phone signals it's time to swap out a dead battery in your home security sensor. Ignoring these warnings means compromising your property's protection, leaving you vulnerable to potential break-ins or other emergencies. Knowing how to replace a security sensor battery is a fundamental skill for any homeowner who values their peace of mind and the safety of their loved ones.
Most wireless security sensors run on small, coin-cell or AA/AAA batteries that typically last between one and five years. Manufacturer specifications indicate that consistent temperature fluctuations and high-frequency wireless transmissions can impact this lifespan. Fortunately, the process itself is usually straightforward and doesn't require professional help, saving you time and money.
Image source: Bing (Web (fair-use with source credit))
Quick Answer
To replace a security sensor battery, first identify the sensor type and the required battery. Locate the low battery warning, then carefully open the sensor casing. Remove the old battery, insert a new one of the same type and voltage, and reassemble the sensor.
Finally, test the sensor to confirm it's working correctly.
Understanding the Low Battery Warning
Your security system is designed to give you ample notice before a sensor's battery completely dies. This crucial heads-up prevents unexpected system failures. Typically, you'll receive a notification through your system's mobile app, a text message, or an audible chirp from the main control panel.
Some sensors also have a small LED light that might blink or turn red to indicate a low battery.
Pay close attention to these alerts. They are your system's way of saying, "I need a little attention soon." Acting promptly ensures your sensors continue to monitor for intrusions, smoke, or other hazards without interruption. If you consistently ignore these warnings, you risk a sensor going offline without you realizing it, which is when your home's security is truly compromised.
Identifying the Warning Signs
- App Notifications: Most modern systems send alerts directly to your smartphone. Check these messages promptly.
- Audible Chirps: Some panels emit a distinct chirp, often hourly, to remind you of a pending battery issue.
- LED Indicators: Older or simpler sensors might have a flashing or solid red light on the unit itself.
- System Status: Your main security panel might display a "trouble" or "fault" status indicating a sensor problem.
Ignoring these signs can lead to a sensor failing at a critical moment. For instance, a door sensor that’s out of power won't trigger an alarm if the door is opened. This simple oversight can negate the entire purpose of your security system.
What Kind of Battery Does Your Sensor Need?
Not all security sensors use the same type of battery. Figuring out the correct replacement is the most critical first step. You'll usually find this information directly on the sensor itself or in the system's user manual.
Common types include coin cells like the CR2032, and standard cylindrical batteries such as AA or AAA.
Using the wrong battery can cause several problems. It might not fit, it might not provide enough power, or it could even damage the sensor. Always double-check the markings on the old battery or consult your system's documentation.
Manufacturer specifications, like those from Energizer Holdings, Inc., detail the precise voltage and chemistry required for optimal performance.
Matching the Right Battery to the Sensor
Identifying the correct battery is crucial for the sensor’s proper function and longevity. Here's how to nail it:
- Check the Sensor: Most sensors have battery compartment covers that either pop off or slide open. Often, the battery type is printed directly on the inside of this cover or on the battery housing itself.
- Consult the Manual: If the sensor markings are unclear or the casing is difficult to open, your security system’s user manual is your best resource. It will list the specific battery models for each component.
- Manufacturer's Website: If you’ve lost the manual, a quick search on your security system’s brand website should provide access to the documentation for your specific model.
- Online Identification: If you know the sensor's model number, you can often find its battery requirements with a quick web search, but always cross-reference with official sources if possible.
Image source: Web (Bing) / pkcellpower.com (Web image (fair-use with source credit))
A common mistake is assuming all sensors from the same brand use the same battery. This isn't always true, especially if your system has different types of sensors, such as motion detectors versus door/window contacts. Always confirm the specific requirement for that particular sensor.
How to Safely Open Your Security Sensor
Opening a security sensor is usually straightforward, but it requires a gentle touch. Most are designed to be opened without tools, using small clips or sliding mechanisms. Applying too much force can easily break the plastic casing or damage the internal components.
It’s important to approach this step methodically, observing how the parts are fitted together.
Some sensors have a small slot for a flathead screwdriver or a coin to help pry them open. Others simply snap apart. If you're unsure, look for arrows or markings on the casing that indicate the direction to slide or twist.
The goal is to release the locking tabs without causing any stress fractures.
Identifying the Casing Type
Security sensors come in various shapes and sizes, and their casings reflect different design approaches. Understanding the type of housing you're dealing with is the first step to opening it without incident.
- Two-Piece Snap-Together: These are very common for door/window sensors. One part typically mounts on the frame, the other on the door or window. They often have a seam where they meet, and you can usually insert a fingernail or a thin, flat tool into this seam to gently pry them apart.
- Single-Piece Sliding/Twisting: Some motion detectors or larger sensors are a single unit. These might have a section that slides off, or a base that twists to unlock from the main body. Look for subtle lines indicating a movable panel or a rotational lock.
- Screwed Housings: Less common for wireless sensors, but some might have small, recessed screws. If you see tiny screw heads, you’ll need a small Phillips or flathead screwdriver. Be sure to use the correct size to avoid stripping the screw.
Finding Release Points
Once you know the general type of casing, look for the specific release points. These are often subtly incorporated into the design.
- Notches and Slots: Many casings have small, almost invisible notches or slots along the seam. These are designed for a fingernail, a plastic pry tool, or a very thin flathead screwdriver. Insert your tool and gently twist or lever to release the clips.
- Arrows: Some manufacturers will include small arrows indicating the direction to slide or twist a panel to open it. Even faint arrows are worth looking for.
- Pressure Points: On some snap-fit designs, you might need to apply pressure to specific points along the seam simultaneously to release the clips. Observe the casing for any slight indentations or variations in texture that suggest a pressure point.
Never force it. If it feels stuck, re-examine the casing for hidden tabs or clips you might have missed. A little patience here prevents a little cost later.
Step-by-Step: Replacing the Sensor Battery
Now that you know which battery you need and how to open the sensor, it's time to perform the swap. This process is designed to be user-friendly, but a systematic approach ensures everything goes smoothly and your sensor remains operational.
Image source: Bing (Web (fair-use with source credit))
Step 1: Prepare Your Workspace
Before you start, clear a small, well-lit area. You’ll want a flat surface where you can lay out the sensor parts without losing them. Having a small bowl or container handy can be useful for holding the old battery and any small screws.
Ensure your hands are clean and dry.
Step 2: Power Down (If Necessary)
Many wireless sensors don't require the entire security system to be powered down. However, some manufacturers recommend temporarily disarming and even putting your system into a "maintenance mode" to avoid false alarms or error messages during the battery change. Consult your system's manual to see if this step is necessary for your specific setup.
If you do power down, remember to re-enable it afterward.
Step 3: Remove the Old Battery
With the sensor casing open, you’ll see the battery. If it’s a coin cell, it might be held in place by a small clip or simply seated in a compartment. Gently push or slide the battery out.
For cylindrical batteries, they usually just pull out. Be careful not to touch the contacts inside the battery compartment with your fingers, as oils can degrade the connection.
Step 4: Install the New Battery
Take your new, correctly identified battery and insert it into the compartment. Pay close attention to the +/- polarity markings. Most sensors have these clearly indicated inside the battery housing.
If the battery doesn't seat easily, double-check that you have the correct type and that it's oriented properly. A CR2032 coin cell, for example, usually has the positive (+) side facing up.
Step 5: Reassemble the Sensor
Once the new battery is in place, carefully align the sensor casing parts and snap or slide them back together. Ensure all the clips engage securely and that there are no gaps. If you removed any screws, re-tighten them, but don't overtighten, as this can strip the plastic threads.
Step 6: Test the Sensor
This is a critical step that many people skip. After reassembling the sensor, test its functionality. If it’s a door/window sensor, open and close the protected door or window and listen for a confirmation chime or check your app for status updates.
For a motion sensor, walk in front of it and verify that it triggers an alert or LED response. If your system requires it, re-enable it from maintenance mode.
Common Mistakes When Swapping Sensor Batteries
Even with clear instructions, it's easy to make a misstep when changing a sensor battery. Understanding these common errors can help you avoid them and ensure your security system remains fully functional. Most problems arise from rushing the process or not paying attention to the details.
Not Testing After Replacement
This is perhaps the most frequent oversight. You've swapped the battery, snapped the case shut, and feel like the job is done. However, without testing, you have no real confirmation that the new battery is correctly seated, the sensor is powered up, or that the sensor is still communicating with your alarm panel.
A sensor that appears to be working but isn't fully communicating can leave a blind spot in your security coverage.
Using the Wrong Battery Type
We've covered how vital it is to get the right battery. Using one with the wrong voltage or capacity might mean the sensor powers on but doesn't perform optimally, leading to intermittent issues or a much shorter lifespan for the new battery. In rare cases, an incompatible battery could even damage the sensor's electronics.
Always check the markings or the manual. For instance, a CR2450 might look similar to a CR2032 but has a different voltage and thickness.
Forgetting to Secure the Casing
If the sensor casing isn't properly secured, it can lead to several issues. It might allow dust or moisture to get inside, potentially damaging the electronics over time. In some cases, a loose casing can also interfere with the sensor's tamper switch, causing a persistent "trouble" alert.
Make sure all clips are engaged and the housing feels snug and secure before putting the sensor back in place. If screws are involved, ensure they are tightened appropriately without overdoing it.