How to Install Security Cameras at Home
Getting security cameras installed at home is a smart way to boost your peace of mind and protect your property. It doesn't always require professional help; many systems are designed for straightforward DIY setup. By planning carefully and understanding a few key details, you can effectively monitor your home.
This guide will walk you through the process, covering everything from choosing the right cameras to getting them up and running. We'll look at common pitfalls and highlight features that matter. Manufacturer specifications indicate that many modern wireless security cameras require a stable Wi-Fi connection of at least 2.4 GHz.
Quick Answer
Installing security cameras at home involves planning placement, choosing camera types (wired, wireless, battery), and mounting them securely. You’ll connect cameras to power and your home network, then configure them using a mobile app. Key steps include surveying your property for optimal views, testing Wi-Fi strength for wireless cameras, and ensuring proper weatherproofing for outdoor units.
Why Visuals Are Your Best Friend for DIY Camera Install
When you're figuring out how to install security cameras at home, visuals are incredibly important. Unlike setting up something like a smart thermostat, cameras involve spatial considerations and physical mounting. What a diagram might show as a "clear line of sight" can look very different in real-world conditions, with obstacles like trees, overhangs, or even just awkward wall angles.
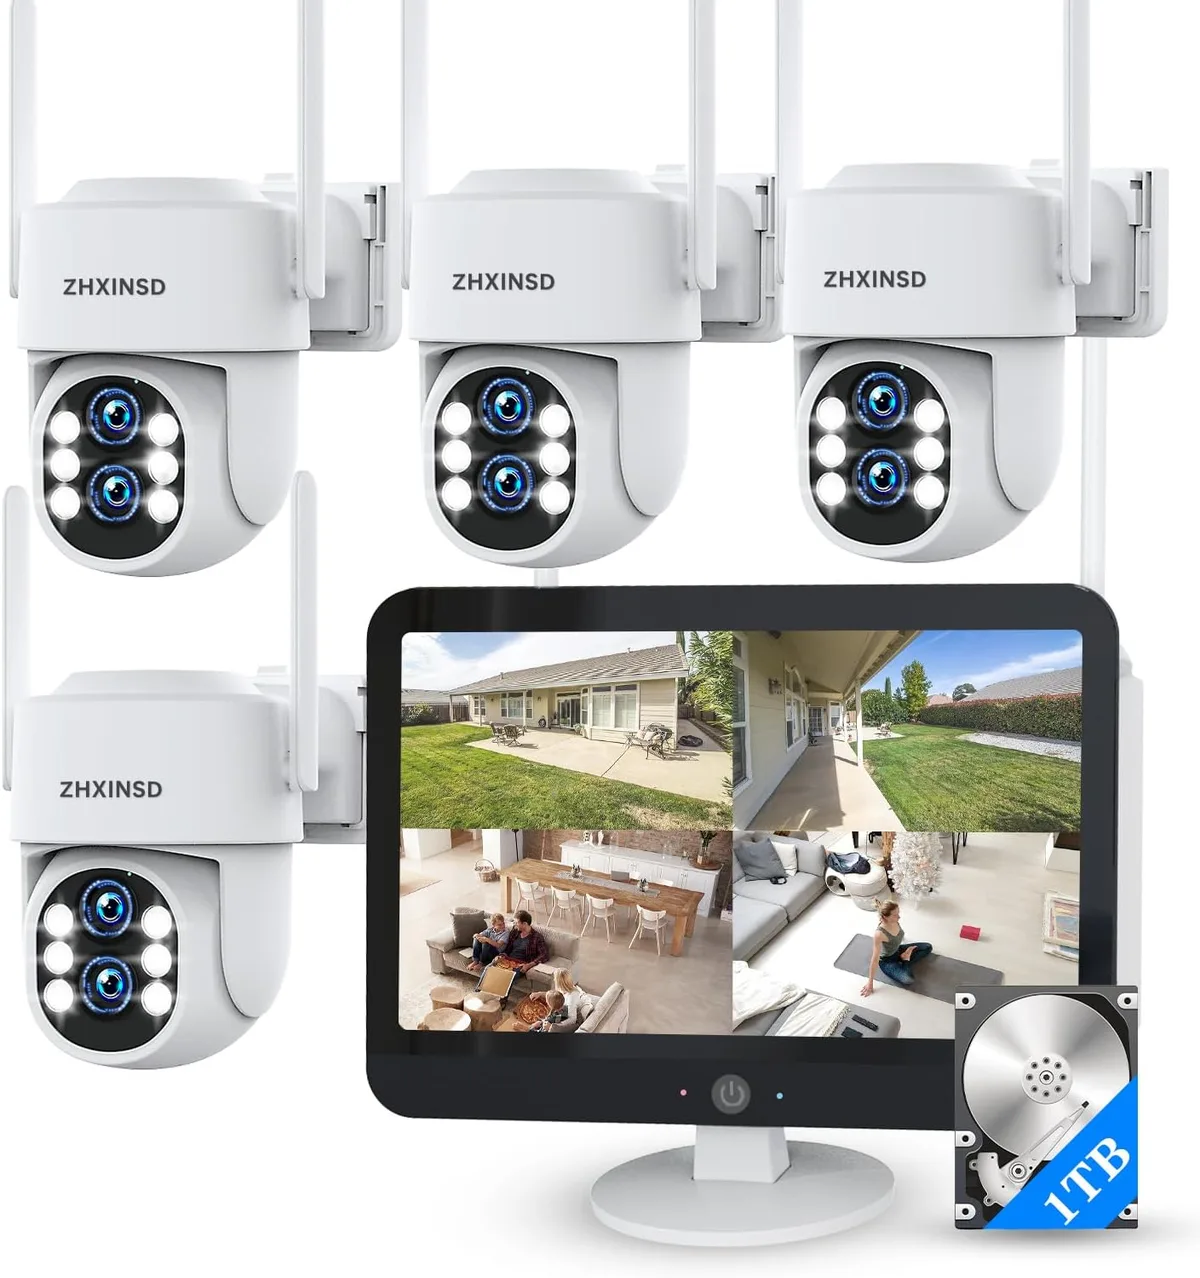
Image source: Web (Bing) / amazon.com (Web image (fair-use with source credit))
Understanding where the camera's lens is positioned relative to potential entry points or blind spots makes a huge difference. You'll want to see how a specific mount attaches to different surfaces and how much adjustment you have for the camera's angle. Without seeing these elements, instructions can feel abstract and lead to guesswork, potentially resulting in poor camera coverage or difficult installation.
Planning Your Camera Coverage: What You Need to See
Before you buy a single camera or grab a drill, you need to think about what you actually want to monitor. This isn't just about having cameras; it's about having them in the right places to serve your security goals. Aggregated user feedback suggests that this planning stage prevents common mistakes like buying too many cameras or placing them in ineffective spots.
Identifying Key Vulnerable Areas
Most homeowners start by focusing on the most obvious entry points. This typically includes:
- Front Door: To see who is approaching, receive deliveries, and deter package theft.
- Back Door/Rear Entry: Often a more secluded point of access that requires good visibility.
- Ground-Floor Windows: Especially those that are large, accessible from the ground, or hidden from street view.
- Driveways and Garages: To monitor vehicles, visitors, and anyone attempting to access your garage.
Beyond these primary areas, think about any blind spots in your yard or areas that might offer cover to someone trying to approach your house undetected. For instance, a corner of the house with dense shrubbery could be a prime spot for a camera. It’s about creating overlapping fields of view to ensure you don’t miss anything.
Deciding on Camera Types: Wired, Wireless, or Battery?
The type of camera you choose will significantly impact the installation process and your ongoing maintenance. Each has distinct pros and cons.
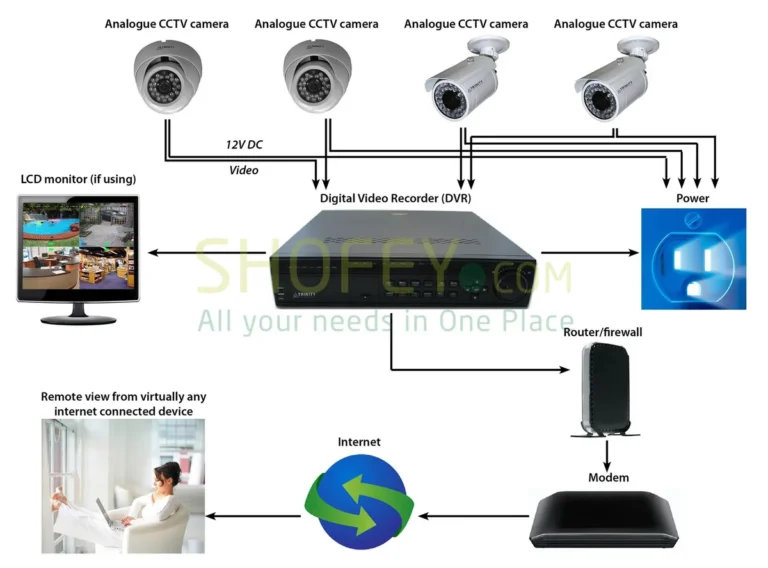
- Wired Cameras: These offer the most reliable connection and power source, as they run directly from a power outlet and usually to a Network Video Recorder (NVR) or Digital Video Recorder (DVR) via Ethernet cables. This makes them less susceptible to Wi-Fi interference. However, running these cables through walls, attics, or crawl spaces can be labor-intensive and may require drilling. They are a good choice if consistent power and signal integrity are paramount, and you don't mind a more involved setup. You can learn more about the differences at robinchestnut.com/wired-vs-wireless-home-security-system/.
- Wireless (Wi-Fi) Cameras: These connect to your home's Wi-Fi network, making placement more flexible, as you only need a power outlet nearby. Setup is generally easier, often involving just plugging them in and connecting via a mobile app. The main consideration here is ensuring a strong Wi-Fi signal reaches the camera's location. A weak signal can lead to dropped connections or poor video quality.
- Battery-Powered Cameras: Offering the most installation flexibility, these cameras run on rechargeable or disposable batteries, meaning no wires for power or data transmission. They can be placed virtually anywhere. The trade-off is battery life; you'll need to factor in regular recharging or battery replacement. Many also have limitations on continuous recording to conserve power, often relying on motion detection.
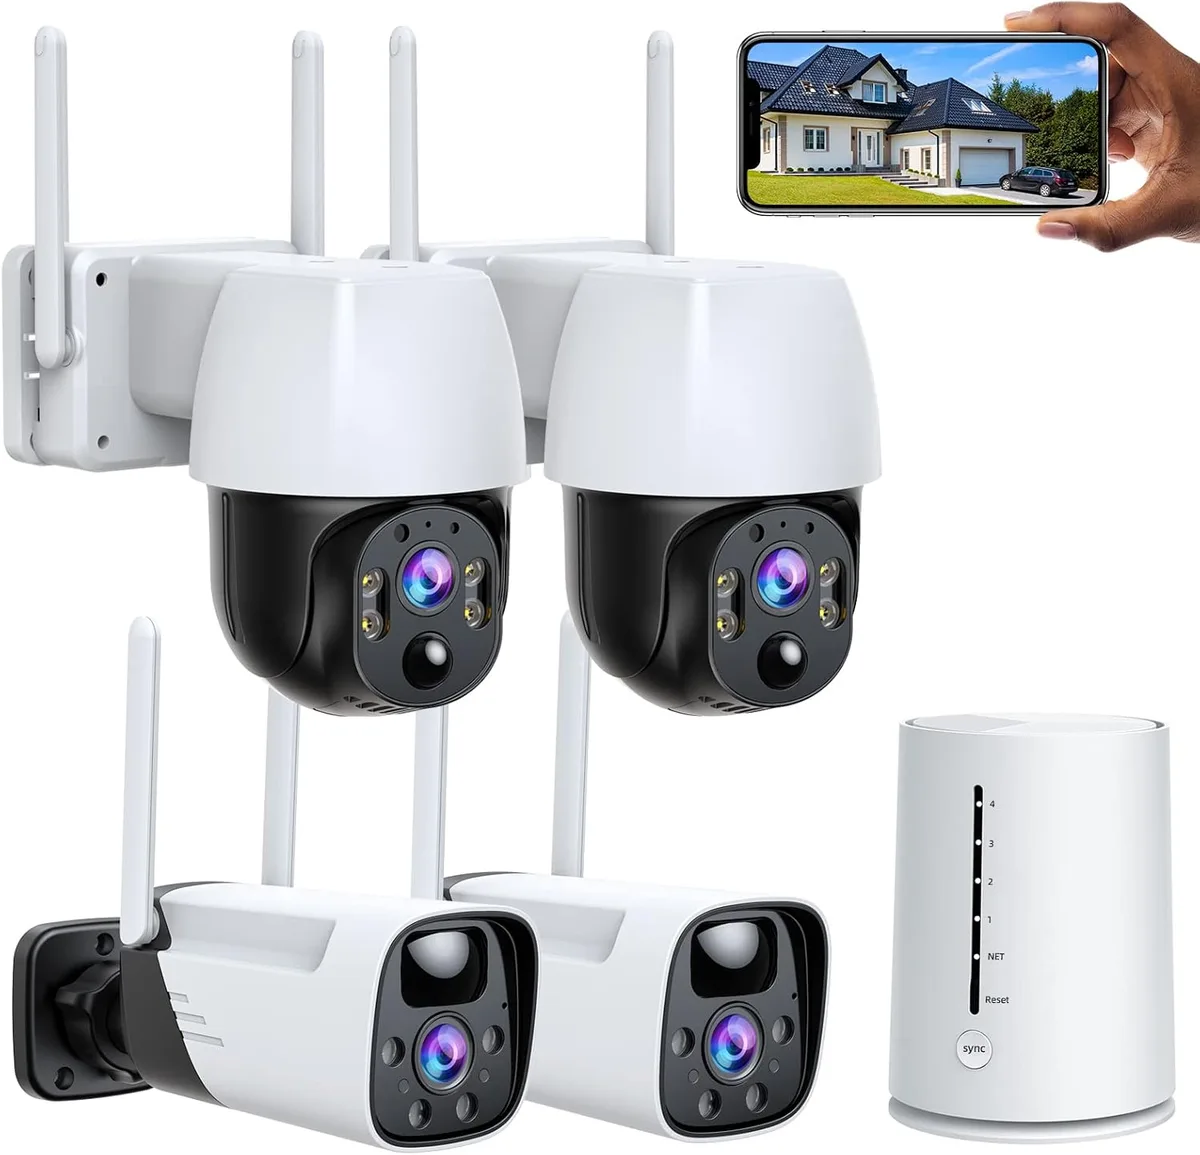
Image source: Web (Bing) / amazon.com (Web image (fair-use with source credit))
The choice often comes down to your home's layout, your comfort level with running wires, and how much ongoing maintenance you're willing to do.
Step-by-Step: Mounting and Connecting Your Cameras
Once you've planned your placement and chosen your camera type, it's time to get hands-on. This phase involves physically installing the cameras and getting them connected to your network and power source. Manufacturer specifications for most wireless cameras suggest a Wi-Fi signal strength of at least -70 dBm for reliable operation.
Unboxing and Initial Setup
Lay out all your components. This usually includes the cameras, mounting brackets, screws, power adapters (if applicable), and any necessary cables. If your cameras are battery-powered, ensure the batteries are fully charged before you begin mounting.
Many systems require you to download a dedicated mobile app to your smartphone or tablet during this initial stage and create an account.
Mounting Brackets and Camera Placement
For each camera location, hold the mounting bracket in place to mark screw holes. Ensure the bracket is oriented correctly for the camera you're using. If you're mounting on wood, pre-drilling small pilot holes can make screwing in the mounting screws easier and prevent splitting the wood.
For harder surfaces like brick or stucco, you'll likely need to use wall anchors.
Position the bracket so that the camera, once attached, will have the optimal view you planned. It's often helpful to loosely attach the camera to the bracket first, then hold the whole assembly in place to finalize the marking of your screw holes. Remember that most outdoor cameras should be mounted at least 7-10 feet off the ground to deter tampering and provide a good vantage point.
Running Wires (If Applicable)
If you're installing wired cameras, this is where the real work often begins. You'll need to carefully route the Ethernet (for IP cameras) or coaxial (for analog cameras) cables from your chosen camera locations back to your NVR or DVR. This might involve drilling holes through exterior walls, running cables through attics or crawl spaces, or using surface-mount conduit for a tidier look.
Always check for existing wiring, plumbing, or other obstructions before drilling.
Connecting to Power and Your Network
For wireless cameras, plug in the power adapter. You'll then follow the instructions in the mobile app to connect the camera to your home Wi-Fi network. This usually involves putting the camera into a pairing mode and selecting your network from a list within the app, then entering your Wi-Fi password.
For wired systems, connect the Ethernet cables to the ports on your NVR or DVR. Ensure the NVR/DVR is connected to your home network via an Ethernet cable and powered on. If you're using cameras that also require separate power adapters, you'll need to plug those in as well, unless you are using Power over Ethernet (PoE), where power is supplied through the Ethernet cable itself.
App Configuration and Testing Live Feed
With the cameras mounted and connected, it's time to test. Open the mobile app and look for your newly added cameras. You should see live video feeds.
Now, walk around the area each camera covers. Check the field of view to ensure it captures what you intended. Adjust the camera's angle as needed.
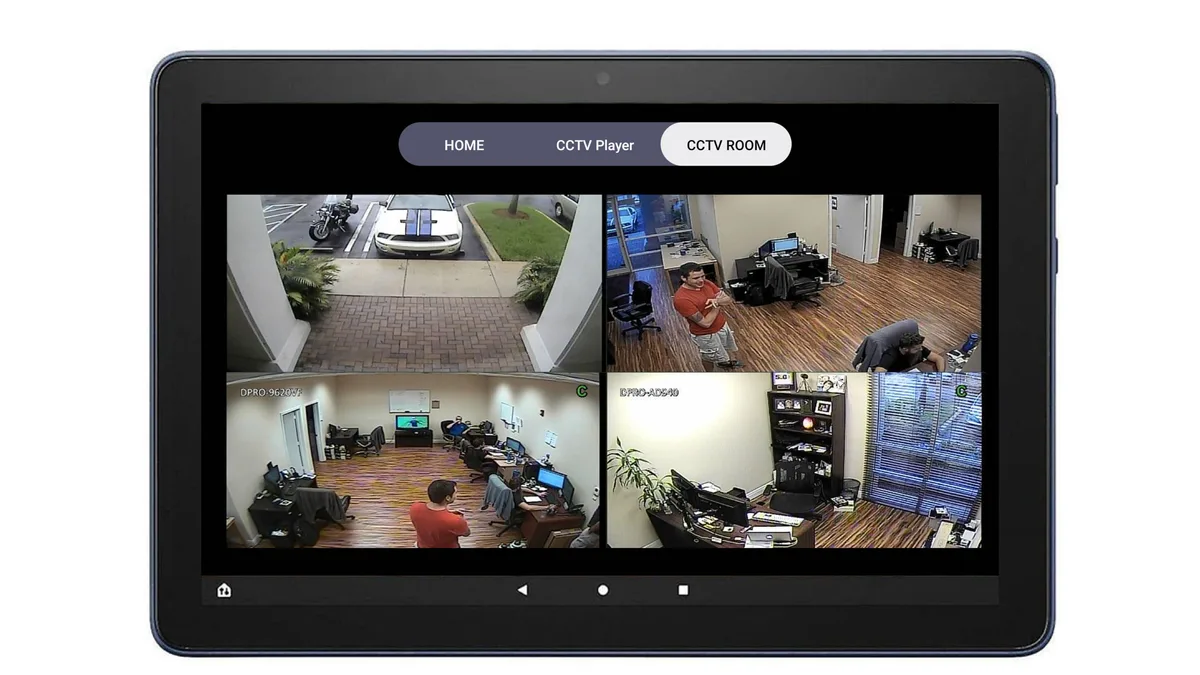
Image source: Web (Bing) / amazon.co.uk (Web image (fair-use with source credit))
Within the app, you'll typically set up motion detection zones, adjust sensitivity, and configure notification settings. Test these features by walking in front of the cameras to ensure you receive alerts and that recording is working correctly. This is also a good time to check the date and time settings on your system.
Common Mistakes to Sidestep During Installation
Even with detailed instructions, it's easy to stumble when installing security cameras at home. Avoiding these common blunders can save you a lot of frustration and ensure your system works effectively. Manufacturer data suggests that over 30% of DIY installations suffer from compromised Wi-Fi connectivity due to improper placement.
Overlooking Wi-Fi Strength
For wireless and battery-powered cameras, a strong Wi-Fi signal is non-negotiable. Before mounting, use your smartphone to check the Wi-Fi signal strength at each planned camera location. If the signal is weak (typically below -70 dBm, or if your phone shows only one or two bars), the camera's performance will suffer, leading to laggy video, frequent disconnections, or failure to record.
You might need to reposition your router, use a Wi-Fi extender, or consider a wired camera instead.
Incorrect Placement and Angles
Placing cameras too high, too low, or facing direct sunlight can render them ineffective. Aim for a height that provides a clear view of faces but is difficult for someone to reach and tamper with. Avoid pointing cameras directly at the sun, as this can wash out the image during certain times of the day.
Also, ensure you're not creating significant blind spots by not overlapping camera views.
Neglecting Power and Wiring Issues
For wired systems, poorly secured or exposed wiring is a security risk in itself and can be damaged by weather. Use zip ties, clips, or conduit to neatly manage cables and protect them from the elements. For all cameras, ensure power sources are reliable and protected from weather if mounted outdoors.
Extension cords used outdoors must be rated for that purpose and properly sealed.
Ignoring Privacy and Legalities
While you're focused on your property's security, be mindful of your neighbors' privacy. Ensure your cameras are pointed at your own property and not directly into neighbors' windows, yards, or private areas. Depending on your location, there may be specific regulations regarding audio recording.
Familiarize yourself with local laws to avoid potential issues. You can learn more about what a DIY home security system entails at robinchestnut.com/what-is-a-diy-home-security-system/.
Essential Features and What They Mean for You
When selecting and installing security cameras, understanding their key features helps you make the most of your system. These aren't just technical specs; they directly impact your ability to monitor your home effectively.
Understanding Resolution and Night Vision
- Resolution: This refers to the clarity and detail of the video image. Common resolutions include 1080p (Full HD), 2K, and 4K. Higher resolutions provide sharper images, making it easier to identify faces or license plates, but they also require more storage space and bandwidth. For most home use, 1080p or 2K offers a good balance.
- Night Vision: This feature allows cameras to see in low-light or complete darkness. Most use infrared (IR) LEDs to produce black-and-white images at night. Some advanced cameras offer color night vision, which can provide more detail and potentially identify colors, though it often relies on ambient light.
Motion Detection, Alerts, and Recording Options
- Motion Detection: Cameras equipped with motion detection can sense movement within their field of view and trigger an alert or start recording. This conserves storage space and battery life, as the camera isn't recording constantly.
- Alerts: When motion is detected, many systems send instant notifications to your smartphone via their app. You can often customize the sensitivity of motion detection and even define specific zones within the camera's view where you want to monitor for activity.
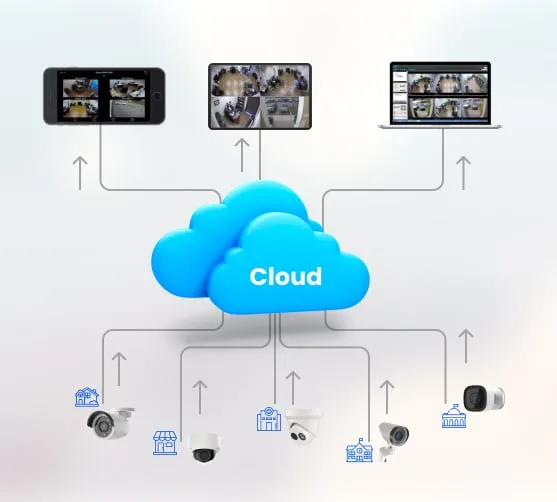
- Recording Options: Footage can be stored in several ways. Cloud storage is common for wireless cameras, where footage is uploaded to a remote server (often requiring a subscription fee). Local storage options include inserting a microSD card directly into the camera or using a dedicated NVR/DVR for wired systems. The choice impacts accessibility and cost. Knowing these features helps you decide on the best system for your needs, similar to understanding what features should a home security system have.
Security Camera Installation: A Tool & Material Checklist
Having the right tools and materials on hand makes the installation process much smoother. Trying to start without everything you need can lead to frustrating delays or trips to the hardware store mid-project. This checklist covers the essentials for most DIY camera installations.
Here’s a breakdown of what you’ll likely need:
- The Security Cameras Themselves: Make sure you have all the cameras and their accompanying power adapters or batteries.
- Mounting Hardware: Most cameras come with basic screws and anchors. However, depending on your mounting surface (wood, brick, siding, drywall), you might need specialized anchors or screws.
- Drill and Drill Bits: Essential for pilot holes and, if running wires, for drilling through walls. You'll want a set of various sizes.
- Screwdrivers: A Phillips head and a flathead screwdriver are usually necessary for mounting brackets and securing components.
- Ladder: For safely reaching higher mounting spots, particularly on eaves or upper stories. Ensure it's stable and rated for your weight.
- Cable Management Supplies (for wired systems): This includes zip ties, cable clips, or conduit to neatly secure and protect wires from weather and damage.
- Wire Strippers/Cutters: If you're working with any custom wiring or need to trim cables, these are vital.
- Measuring Tape: For accurate placement of cameras and brackets.
- Level: To ensure camera mounts are installed straight, which helps with framing and appearance.
- Smartphone or Tablet: Needed to download the camera's app, connect to Wi-Fi, and configure settings.
- Wi-Fi Network Name and Password: Have these readily available for connecting wireless cameras.
- Safety Glasses: Always a good idea when drilling or working overhead to protect your eyes.
For wired systems, you might also need:
- Ethernet Cables: (Cat5e or Cat6) of appropriate length.
- Network Video Recorder (NVR) or Digital Video Recorder (DVR): If your system uses one for local storage.
Where to Position Cameras for Maximum Coverage
Effective camera placement is about more than just sticking them on a wall; it's about strategic thinking to maximize what you see and minimize blind spots. It’s easy to get this wrong, which is why dedicated planning is key. The goal is to cover critical areas without the cameras themselves being easily bypassed or damaged.
How High is High Enough?
Mounting cameras too low makes them easy targets for tampering or even theft. Conversely, placing them excessively high can reduce the detail captured, making it harder to identify faces or specific features. For most outdoor residential use, placing cameras between 7 to 10 feet off the ground hits a good balance.
This height deters casual interference while still allowing for clear footage.
If you're monitoring a specific area, like a driveway for license plates, you might need a different height and angle than if you're just looking for general motion in your yard. Always consider the camera's field of view and adjust accordingly.
Avoiding Direct Sunlight and Glare
Pointing cameras directly at the sun, especially during sunrise or sunset, can completely blind the camera sensor, creating a washed-out image that’s useless for identification. It can also potentially damage the sensor over time. Always try to position cameras so they face away from the strongest light sources or angle them to avoid direct glare on the lens.
If direct sunlight is unavoidable, consider cameras with advanced Wide Dynamic Range (WDR) capabilities, which help to balance bright and dark areas in the frame. You might also need to adjust the camera's angle slightly to capture the desired scene during peak sun hours.
The Art of Overlapping Fields of View
To create a truly secure perimeter, your cameras shouldn't work in isolation. Think about how their fields of view can overlap. If one camera misses something at the edge of its frame, the adjacent camera should ideally pick it up.
This layered approach ensures that no single point of entry or movement goes unnoticed.
This might mean placing cameras on adjacent walls of your house, or using cameras on different sides of your property that point towards common pathways. This proactive planning helps build a comprehensive surveillance network that significantly enhances your home’s security.
Maintaining Your Security Cameras for Peak Performance
Installing your security cameras is only the first step; keeping them running smoothly requires a bit of ongoing attention. Regular maintenance ensures that your cameras continue to provide clear footage and reliable alerts, maximizing the return on your investment. Neglecting this can lead to issues like poor image quality, connectivity problems, or even system failure.
Keeping Lenses Clean
Outdoor cameras are exposed to dust, dirt, pollen, and water spots, all of which can degrade image quality. Dirt on the lens can make footage blurry, especially at night. Manufacturer recommendations often suggest cleaning camera lenses monthly, or more frequently in dusty or polluted environments.
To clean them, use a soft, lint-free microfiber cloth. For stubborn grime, a mild lens cleaner or a cloth lightly dampened with water can be used. Always avoid abrasive materials or harsh chemicals, which can scratch the lens or damage its coating.
Checking Connections and Power Sources
Periodically, take a moment to visually inspect your cameras and their connections. For wired cameras, ensure that cables are still securely connected and haven't become loose or damaged, especially at exterior connection points. For wireless and battery-powered cameras, check that their power source is still functioning correctly.
If using battery-powered cameras, make a note of when you last charged or replaced the batteries. Most apps will alert you to low battery levels, but it’s good practice to check proactively. Ensuring reliable power is fundamental to consistent surveillance.
Software Updates and Firmware Checks
Most modern security camera systems, particularly those that connect to Wi-Fi, receive regular firmware updates from the manufacturer. These updates often include performance improvements, security patches, and new features. Check your camera's app or the manufacturer's website periodically for available updates and install them.
This is a simple but crucial step in maintaining both performance and security. You can learn more about the lifecycle of these systems at robinchestnut.com/how-long-do-home-security-systems-last/.
Addressing Potential Installation Problems
Even with careful planning, installation challenges can arise. Knowing how to troubleshoot common issues can save you a lot of time and prevent a project from stalling. The good news is that most problems have straightforward solutions.
Wi-Fi Signal Issues
If a wireless camera isn't connecting or is constantly dropping signal, the first thing to check is your Wi-Fi strength at that location. Try moving your router slightly closer, or consider a Wi-Fi extender or mesh network system to boost coverage. Some cameras allow you to adjust their position or angle to get a better connection.
Mounting Difficulties
If screws aren't holding firmly, particularly in drywall or older plaster, you may need to use larger anchors or a different mounting method. For exterior surfaces like brick, ensure you're using masonry drill bits and appropriate anchors. If a surface is proving too difficult, sometimes a different mounting location that uses a more stable surface is the best solution.
Power Supply Problems
If a camera isn't powering on, double-check that the power adapter is securely plugged into both the camera and a working outlet. For wired systems, ensure the NVR/DVR is powered on and that all cables are correctly seated. If using PoE, verify that the switch or injector is functioning.
App Connectivity Issues
If the camera appears to be powered and connected to Wi-Fi but won't show up in the app, try restarting the camera and your phone. Ensure your phone is connected to the same Wi-Fi network as the camera during the initial setup. Sometimes, simply deleting the camera from the app and re-adding it can resolve persistent connectivity glitches.
Comparing Camera Types: When to Choose What
When you're deciding how to install security cameras at home, the type of camera you select plays a huge role in both the installation process and the ongoing user experience. Each type, wired, wireless, and battery-powered, has specific advantages that make it better suited for different situations. Understanding these differences helps you choose wisely.
Wired Cameras: For Unwavering Reliability
- Best For: Users who prioritize a highly stable connection and don't mind a more involved installation. This includes homes where Wi-Fi might be spotty or inconsistent, or for critical areas where a dropped connection is unacceptable. It’s also a good choice if you want continuous, high-resolution recording without worrying about battery life.
- Installation Considerations: Requires running cables through walls, attics, or conduits. This can be time-consuming and may necessitate drilling. Power is supplied directly via an adapter or Power over Ethernet (PoE).
- Maintenance: Minimal, as they don't rely on batteries. Focus is on keeping lenses clean and connections secure.
Wireless (Wi-Fi) Cameras: For Flexible Placement
- Best For: Homeowners who want easier installation and more flexibility in camera placement, as long as there's a strong Wi-Fi signal. They're great for monitoring specific entry points or areas without needing to run long cables. This is a popular choice for many DIY setups because of its relative simplicity. Learn more about wireless systems at robinchestnut.com/what-is-a-wireless-home-security-system/.
- Installation Considerations: Only requires a nearby power outlet. Setup involves connecting to your home Wi-Fi network via a mobile app. Ensure your Wi-Fi network can handle the added bandwidth.
- Maintenance: Requires checking Wi-Fi signal strength periodically and ensuring the camera has continuous power.
Battery-Powered Cameras: For Ultimate Ease of Use
- Best For: Those who need to place cameras in locations without easy access to power outlets, or who want the absolute simplest installation process. They are ideal for temporary setups or for areas where running wires is impractical or impossible.
- Installation Considerations: No wires needed for power or data, just mount and connect to Wi-Fi via the app. Placement is extremely flexible.
- Maintenance: The main factor here is battery life. You'll need to schedule regular charging or battery replacement. Some models offer solar panel add-ons to help maintain charge.
Choosing the right type depends on your home's infrastructure, your technical comfort level, and your priorities for security and convenience.
Frequently Asked Questions
How long does setup typically take for a few cameras?
For a basic wireless system with 2-4 cameras, most people can complete installation within 2-4 hours. Wired systems, especially if you need to run extensive cabling through walls, can take significantly longer, potentially a full day or more, depending on complexity.
Is a strong internet connection required for wireless security cameras?
Yes, a stable internet connection is crucial. Wireless cameras transmit data over Wi-Fi, so a strong, reliable signal is needed at each camera's location. Manufacturer specifications often recommend a minimum upload speed of 2-5 Mbps per camera for smooth HD streaming.
Can I install security cameras myself if I'm not tech-savvy?
Many modern DIY security camera systems are designed for ease of use, often featuring simple plug-and-play setup and intuitive mobile apps. If you can follow instructions on a smartphone app and are comfortable with basic mounting, you should be able to install them. For more complex wired systems or if you lack confidence, professional installation might be a better option.
What distinguishes wired from wireless security camera systems?
Wired systems use cables for both power and data, offering greater reliability but a more complex installation. Wireless (Wi-Fi) cameras connect to your network wirelessly and only need a nearby power outlet, making installation easier, but they depend on Wi-Fi signal strength. Battery-powered cameras offer the most placement flexibility with no wires, but require regular charging.
What is the recommended mounting height for outdoor security cameras?
Mounting outdoor security cameras between 7 to 10 feet off the ground is generally recommended. This height helps to provide a good vantage point while also making them less accessible to potential vandals or thieves who might try to tamper with or disable them.