How Do I View CCTV Footage Remotely?
Ever been out and about and suddenly wondered, "What's going on back home?" Or maybe you just want the peace of mind knowing everything's secure while you're away. That's where viewing your CCTV footage remotely comes in, and honestly, it's not as complicated as it might sound. We've all been there, staring at a manual or a confusing app, but I'm here to break it down for you, nice and simple.
Think of it like this: your security cameras are the eyes, and your phone or computer is the way you get to see through those eyes, no matter where you are. The key thing is that the exact steps can shift a bit depending on what kind of security system you have. So, let's figure out your situation and get you set up.
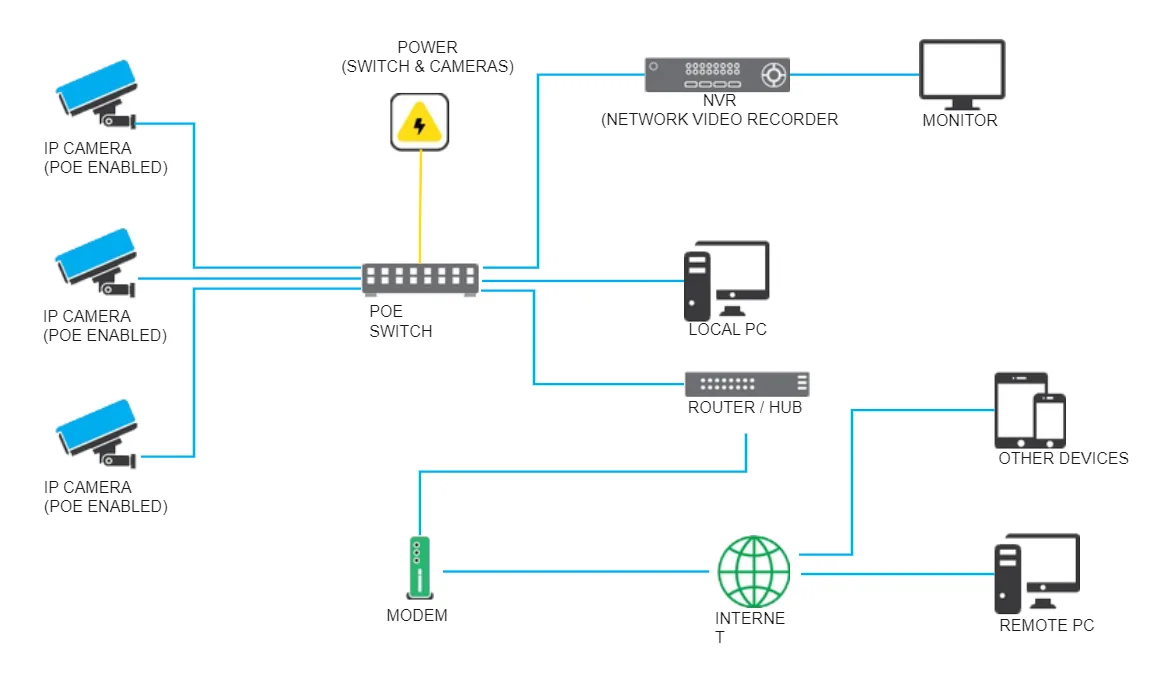
Image source: Bing (Web (fair-use with source credit))
Quick Answer
To view CCTV footage remotely, connect your recorder (DVR/NVR) or cameras to the internet. Configure network settings, set up port forwarding on your router, and potentially use Dynamic DNS (DDNS). Then, download the manufacturer's app or software to access your live or recorded feeds from any internet-connected device.
For cloud systems, this usually involves creating an account and linking your cameras.
What Kind of Security System Do You Have?
This is the biggest piece of the puzzle. Most home and small business CCTV systems fall into one of these categories, and knowing yours dictates your setup path. Manufacturer specifications from companies like Hikvision and Dahua clearly outline these distinctions, impacting how you'll achieve remote access.
DVR vs. NVR vs. Cloud-Based vs. Standalone Cameras
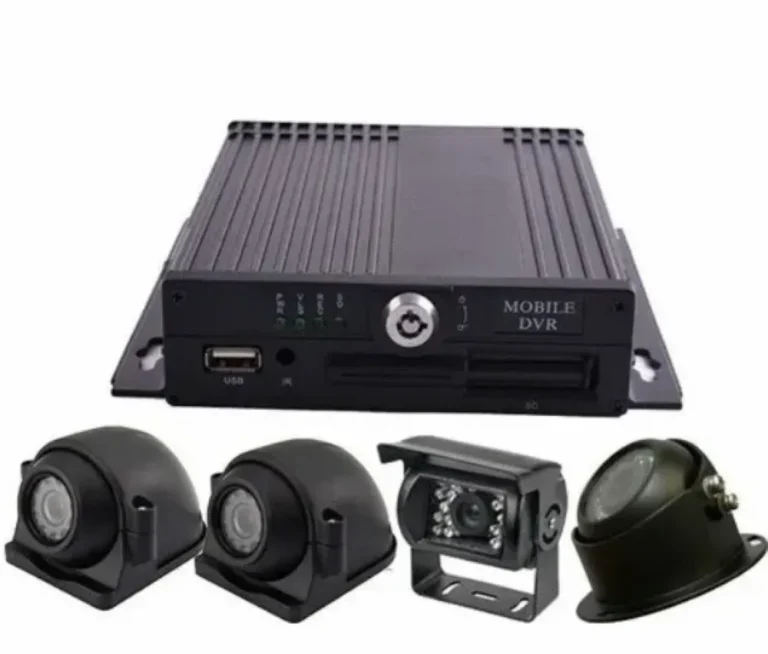
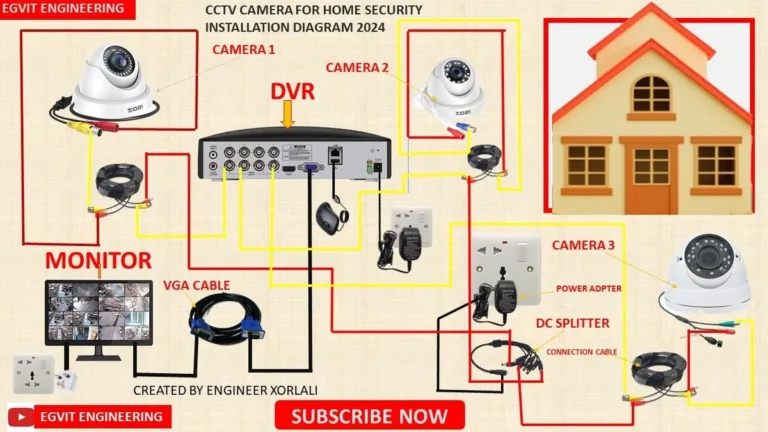
DVR (Digital Video Recorder): This is pretty common, especially with older analog or some hybrid camera systems. The cameras connect directly to the DVR unit via coaxial cables, and the DVR unit records the footage. Remote access usually means configuring the DVR itself.
NVR (Network Video Recorder): This is more common with modern IP (Internet Protocol) or network cameras. The cameras connect to your network (usually via Wi-Fi or Ethernet cables), and the NVR records the video streams from those cameras. Remote viewing is configured through the NVR.
Cloud-Based Systems: These are typically simpler setups where the cameras record directly to a secure cloud service provided by the manufacturer. Often, these systems come with a subscription fee, but setup is usually managed through a mobile app.
Standalone IP Cameras: Some cameras are designed to work on their own, streaming footage directly to a manufacturer's app or web portal without a dedicated NVR or DVR on-site. You'll access them directly through their own service.
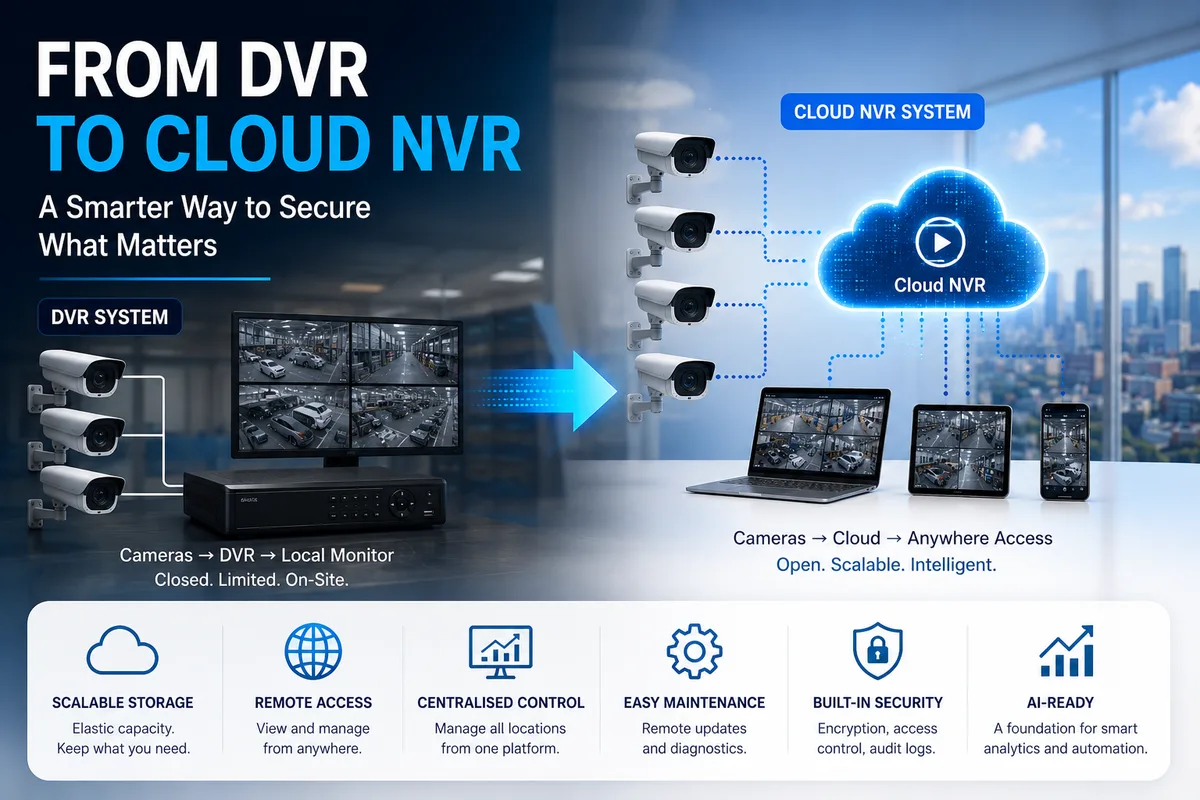
Image source: Bing (Web (fair-use with source credit))
The Big Picture: How Remote Viewing Actually Works
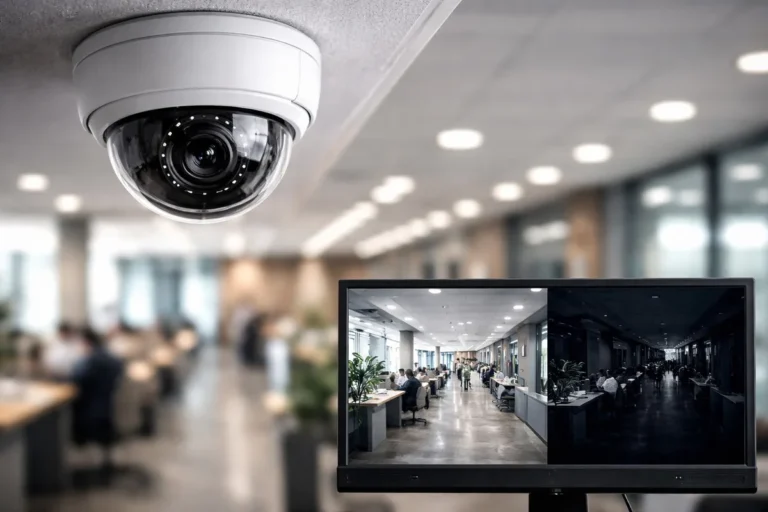
No matter your system, the core concept is similar: your cameras capture video, your recorder (DVR/NVR) or cloud service stores it, and you need a way for that recorder/service to talk to the internet. Then, you use an app or software on your phone or computer to connect to that internet-enabled recorder/service. It's a chain of connectivity, and each link needs to be solid.
For instance, a stable internet connection is paramount, as outlined by guidelines on network stability from organizations like NIST.
The crucial element is bridging your local network (where your cameras and recorder live) with the wider internet. This allows authorized devices outside your home or office to request and receive video streams. Think of your router as the gatekeeper between these two worlds.
Setting Up Remote Viewing for DVR/NVR Systems
This is where you'll likely do a bit more hands-on setup, involving your router and the recorder's interface. Manufacturers like Swann often provide detailed guides for this process.
Step 1: Get Your Recorder Online (Network Connection)
First things first, your DVR or NVR needs to be connected to your home's internet network.
Wired Connection (Recommended): Most DVRs and NVRs have an Ethernet port on the back. Plug one end of an Ethernet cable into this port and the other end into a free LAN port on your internet router. This offers the most stable and fastest connection.
Wi-Fi Connection: Some units have built-in Wi-Fi capabilities. You’ll typically configure this through the recorder's on-screen menu, similar to connecting any other Wi-Fi device. You'll need to select your network name (SSID) and enter your Wi-Fi password.
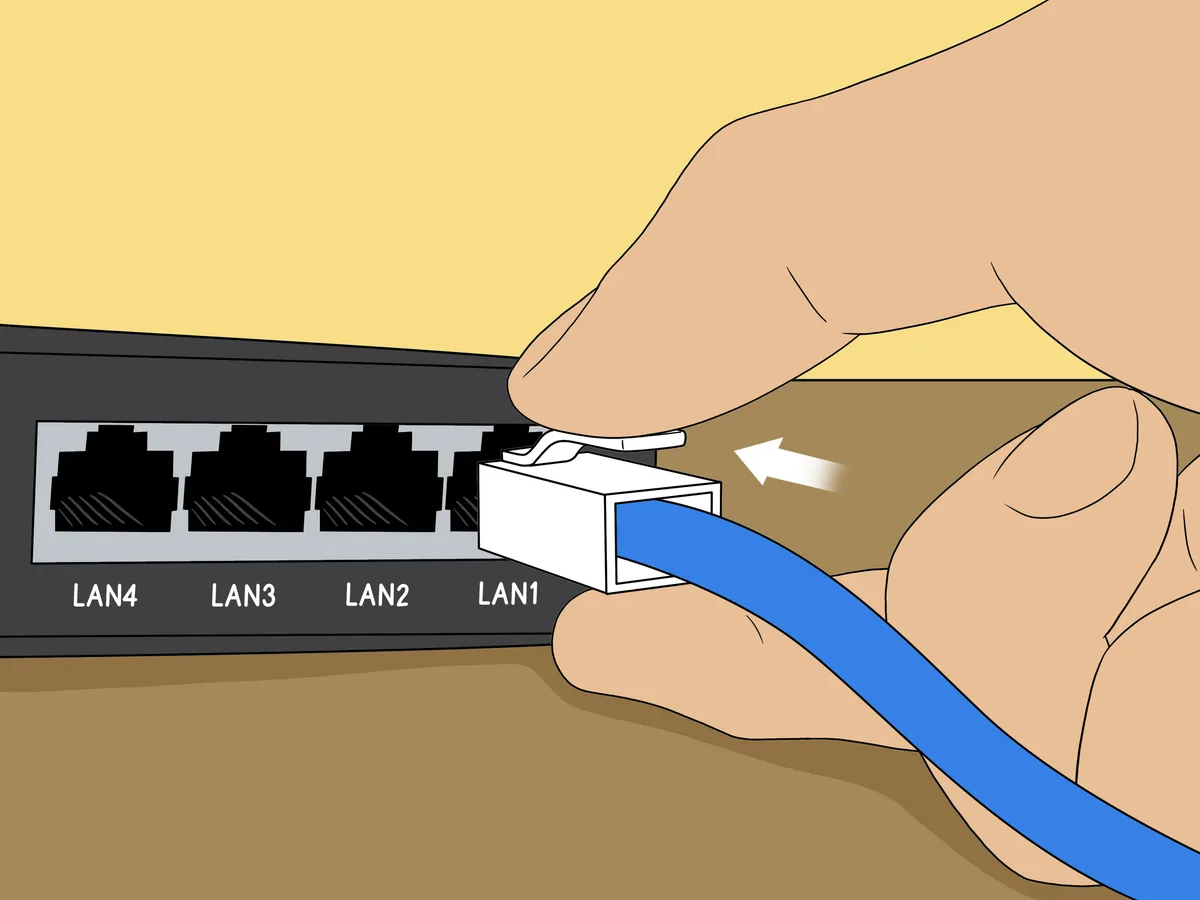
Image source: Web (Bing) / fity.club (Web image (fair-use with source credit))
Step 2: Configure Network Settings (IP, DNS)
Once connected, you need to tell your DVR/NVR how to get an IP address on your network and how to find the internet. You'll need to connect a monitor and mouse directly to your DVR/NVR for this.
- Access Recorder Menu: Navigate through the menus to find the "Network" or "TCP/IP" settings.
- Get an IP Address: For most home users, setting this to "DHCP" is best. DHCP (Dynamic Host Configuration Protocol) means your router will automatically assign an IP address to your recorder. This is usually the simplest option.
- DNS Settings: Ensure your DNS (Domain Name System) servers are set correctly. Often, your router's IP address is used here, or you can input public DNS servers like Google's (8.8.8.8 and 8.8.4.4). Proper DNS configuration is vital for the recorder to resolve internet addresses.
Step 3: Master Port Forwarding
This is often the trickiest part, but it’s essential for allowing external access to your recorder. Port forwarding tells your router, "When a request comes in on a specific 'external' port, send it directly to my DVR/NVR's 'internal' IP address and port."
- Log into Your Router: You'll need to access your router's administration interface. This is usually done by typing an IP address like
192.168.1.1or192.168.0.1into a web browser. Check your router's manual for the correct address and default login credentials if you haven't changed them. - Find Port Forwarding Settings: Look for a section named "Port Forwarding," "Virtual Servers," "NAT," or similar within your router’s advanced settings.
- Create a New Rule: You'll typically need to input:
- External Port (or WAN Port): This is the port number that devices outside your network will connect to. Common choices are
8000,8001, or8080, but you can often pick a higher, less common number (e.g.,50000) for a slight security boost. - Internal Port (or LAN Port): This is the specific port your DVR/NVR uses for remote access. Crucially, you must find this number in your DVR/NVR's network settings or manual. It's often
80,8000, or88. - IP Address: This is the local IP address of your DVR/NVR. To prevent this from changing if your router reassigns IPs, it's highly recommended to set a "static DHCP reservation" for your recorder within your router’s settings.
- Protocol: Select "TCP" or sometimes "TCP/UDP." Consult your DVR/NVR manual for the correct protocol.
- External Port (or WAN Port): This is the port number that devices outside your network will connect to. Common choices are
Step 4: Tackle Dynamic IP with DDNS
Most home internet connections have a "dynamic" IP address, meaning your public IP address can change periodically. If it changes, your remote connection will break because the address you're trying to reach is no longer valid. Dynamic DNS (DDNS) solves this.
- How DDNS Works: DDNS services provide you with a fixed hostname (e.g.,
mycameras.ddns.net). A small client program or service on your network (often built into your DVR/NVR or router) constantly monitors your public IP address. When it changes, the DDNS client updates the service, so your hostname always points to your current IP. - Set Up DDNS:
- Sign up for a DDNS service (many offer free tiers, like No-IP or Dynu).
- Configure the DDNS settings within your DVR/NVR's network menu, entering your DDNS hostname, username, and password. Alternatively, some routers have a built-in DDNS client you can configure directly.
Step 5: Connect Using Your App or Software
With the network setup complete, you're ready to connect from your remote device.
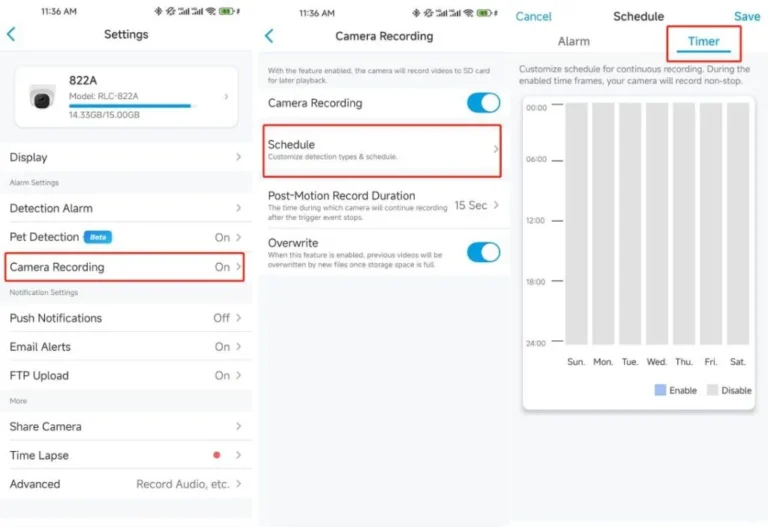
- Find the App/Software: Search the app store (iOS or Android) or the manufacturer's website for the official mobile app or desktop client for your DVR/NVR brand. For example, Hikvision uses "Hik-Connect," and many generic brands use "XMeye" or similar.
- Add Your Device: Open the app and look for an option to "Add Device" or "Add Camera."
- Enter Connection Details: You'll typically need:
- Device Name: A label for your system (e.g., "Home Cameras").
- Device SN (Serial Number) / Address: If you set up DDNS, enter your DDNS hostname here. If you're connecting from outside your home network and didn't set up DDNS, you'll need to find your current public IP address (e.g., by searching "what is my IP address" on Google from your home computer) and use that.
- Username and Password: The login credentials for your DVR/NVR.
Remote Viewing for Cloud-Based and Standalone IP Cameras
Setting up remote viewing for cloud-based systems and standalone IP cameras is generally much simpler. These systems are designed with ease of use in mind, often minimizing the need for complex network configuration like port forwarding.
For cloud systems, the process usually begins by physically connecting your cameras to your home network (often via Wi-Fi) and then downloading the manufacturer's dedicated mobile app. Within the app, you'll create an account and then follow prompts to discover and add your cameras. Once your cameras are linked to your account and have a stable internet connection, you can log into the app or web portal from anywhere and view your live feeds and recorded footage.
These systems handle the internet connection and data transfer behind the scenes, simplifying the user experience.
Standalone IP cameras follow a similar path. After connecting the camera to your network, you download the specific app provided by the camera's manufacturer. You'll then pair the camera with your account through the app, which often involves scanning a QR code on the camera or entering a serial number.
Once paired, the camera streams directly to the manufacturer's server, allowing you to access it remotely via their app. This approach bypasses the need for local recorders like DVRs or NVRs for basic remote viewing. However, for local recording with these cameras, you might still need to set up a separate network storage solution.
While these systems offer convenience, it's important to be aware of potential privacy implications and subscription costs associated with cloud storage. Always review the terms of service and data handling policies of any cloud-based security provider. Ensuring your home network is secure with strong Wi-Fi passwords (using WPA3 encryption where possible) is also a critical first step for any remote viewing setup.
If you're experiencing connectivity issues with your cameras, you might find our guide on improving security camera WiFi signal helpful.
Common Hurdles and How to Clear Them
Even with the best intentions, setting up remote CCTV viewing can sometimes hit a snag. These issues aren't usually deal-breakers, but knowing what they are can save you a lot of frustration.
Mistakes to Avoid When Setting Up Remote Access
- Ignoring Firmware Updates: Manufacturers regularly release updates to fix bugs and patch security holes. Running outdated firmware on your DVR, NVR, or cameras can leave your system vulnerable. Per the guidelines from organizations like the Cybersecurity and Infrastructure Security Agency (CISA), keeping devices updated is a foundational security practice. Always check for and install updates.
- Using Default Passwords: This is probably the single biggest security mistake. Default passwords like "admin" or "12345" are widely known and easily exploited. Always change them to strong, unique passwords for your DVR/NVR, your router, and any camera accounts.
- Incorrect Port Forwarding: If you enter the wrong internal port number or IP address, or if your router doesn't support port forwarding correctly, you won't be able to connect. Double-checking these details against your recorder's manual is key.
- Not Setting Up DDNS: If your home internet uses a dynamic IP, forgetting to set up DDNS means your remote access will likely stop working after your IP address changes. This is a very common reason for sudden connection loss.
- Overlooking Network Bandwidth: Streaming video, especially multiple high-definition feeds, uses a significant amount of internet bandwidth. If your internet plan is too slow, you might experience choppy video, lag, or complete connection failures. Our guide on how to reduce security camera bandwidth can offer solutions.
Troubleshooting Connection Problems
If you've followed the setup steps and still can't connect, here are a few things to check.
- Is the Recorder Online? Can you access the DVR/NVR's interface locally with a monitor and mouse? If not, the issue is with the recorder itself or its basic network connection.
- Check Router Status: Is your router powered on and connected to the internet? Try restarting your router and modem.
- Verify Port Forwarding: Go back into your router's settings and confirm the port forwarding rule is still active and correctly configured for your recorder's current IP address. Sometimes, router settings can reset after a power outage.
- Test From Another Network: Make sure you're trying to connect using a device on a different network (e.g., your phone on cellular data, not your home Wi-Fi). This helps isolate whether the problem is with your home network setup or the remote device/connection.
- Firewall Issues: Sometimes, a firewall on your router or even on the remote device might be blocking the connection. Temporarily disabling the firewall (for testing only!) can help diagnose this.
Expert Tips for Secure and Seamless Remote Viewing
To ensure your remote viewing experience is as smooth and secure as possible, consider these expert recommendations. These are based on best practices for network security and device management.
- Use Strong, Unique Passwords: This cannot be stressed enough. For your router, DVR/NVR, camera accounts, and DDNS service, use complex passwords that include a mix of uppercase and lowercase letters, numbers, and symbols. Change them regularly.
- Keep Everything Updated: Regularly check for and install firmware updates for your DVR/NVR, cameras, and router. These updates often contain critical security patches. Many systems allow for automatic updates, which is convenient. You can learn more about the process by checking how to update security camera firmware.
- Secure Your Wi-Fi Network: If you use Wi-Fi for any part of your setup, ensure it's secured with WPA3 encryption if your router supports it, or WPA2 at a minimum. Avoid older, less secure encryption methods like WEP.
- Consider Network Segmentation: For advanced users, creating a separate network segment (VLAN) for your security cameras can add an extra layer of security, isolating them from your main network where sensitive devices like computers and phones reside.
- Limit Remote Access: Only enable remote access when you need it, and be mindful of who has access to your system's credentials. If you need to grant temporary access to someone, consider changing passwords afterward.
- Monitor System Logs: If your DVR/NVR offers system logs, periodically review them for any unusual activity or failed login attempts. This can be an early indicator of a security breach attempt.
- Physical Security: Don't forget the physical security of your recorder. If it's easily accessible, someone could tamper with it directly, bypassing network security entirely.
- Use an Antivirus/Anti-Malware Solution: Ensure the devices you use to view footage (computers, smartphones) are protected with up-to-date security software. This helps prevent malicious software from intercepting your connection or credentials.
- Understand Bandwidth Usage: Be aware that continuous video streaming consumes significant internet bandwidth. If you have a limited data plan, this can lead to overage charges or service throttling. Our article on how much data a security camera uses can help you estimate consumption.
By implementing these practices, you can enhance the security and reliability of your remote CCTV viewing setup, giving you greater peace of mind.
Use Cases: Who Benefits Most From Remote CCTV Viewing?
Remote CCTV viewing isn't just for tech enthusiasts; it serves practical needs for a variety of users. Homeowners, for instance, gain significant peace of mind. Being able to check on pets, children arriving home from school, or simply confirm that the deliveries arrived safely offers immense convenience and security.
Small business owners also find it invaluable, allowing them to monitor staff, manage inventory, and ensure customer safety even when they're not on-site.
Travelers and those with vacation properties particularly benefit. You can keep an eye on your home while you're miles away, deterring potential intruders or simply checking if everything is in order. Even individuals managing elderly relatives or rental properties can use remote viewing as a non-intrusive way to ensure well-being or property condition.
The core benefit is always accessible oversight, no matter your distance from the location being monitored.
How Much Data and Bandwidth Do You Need?
Understanding the data consumption of your CCTV system is crucial, especially if you have a limited internet plan. Higher resolution cameras and more frequent recording or streaming naturally use more data. For example, a 1080p HD camera streaming continuously might consume anywhere from 5-10 GB of data per day, per camera.
This adds up quickly if you have multiple cameras or longer recording durations.
As of 2026, many service providers offer plans with substantial data allowances, but it's wise to check your current usage. If you're concerned about exceeding data caps, consider optimizing your system's settings. This might involve using motion-detection recording instead of continuous recording, or lowering the camera's resolution when not actively streaming remotely.
Our article on how much data a security camera uses can provide more detailed estimates and saving strategies.
Frequently Asked Questions
How long does it typically take to set up remote viewing?
Setup time varies greatly, from 30 minutes for cloud systems to several hours for DVR/NVRs involving router configuration.
Can I view my cameras on any device?
Generally, yes, as long as the manufacturer provides a compatible app or software for your device's operating system (iOS, Android, Windows, macOS).
What if my internet goes out? Can I still view footage?
No, remote viewing requires an active internet connection at both your location and the remote device. Local access to recorded footage on a DVR/NVR would still be possible if the system is powered.
Is it safe to allow remote access to my security cameras?
Yes, if set up securely with strong passwords, updated firmware, and careful management of access credentials. Insecure setups can pose risks.
Do I need a static IP address for remote viewing?
Not necessarily. Dynamic DNS (DDNS) services allow you to use a hostname even with a dynamic IP address, which is common for residential internet.