How to Install Door Sensors
Thinking about how to install door sensors? It's a common question for anyone looking to add an extra layer of security to their home without a big fuss. These small but mighty devices are a key component in many modern alarm systems, and thankfully, setting them up is typically a straightforward DIY task that most people can handle with ease.
Our research shows that for most standard door sensors, professional installation adds significant cost for a process that can be completed in under an hour. Manufacturer specifications for common wireless contact sensors typically indicate a reliable operating range of up to 100 feet from the hub or base station, and a battery life of 1-5 years depending on usage and battery type.
Quick Answer
To install door sensors, clean the door and frame, then attach the two sensor pieces with their adhesive strips. Ensure they align closely when the door is shut. Finally, pair the sensors with your home security app or system.
Why Visuals Matter for Door Sensor Installation
When we talk about installing door sensors, you'll quickly see why visuals are so helpful. It's not just about screwing things in; it's about precise placement. Think of it like fitting two puzzle pieces together perfectly so they work when you need them to.
Diagrams and clear photos show exactly where each part of the sensor should sit.
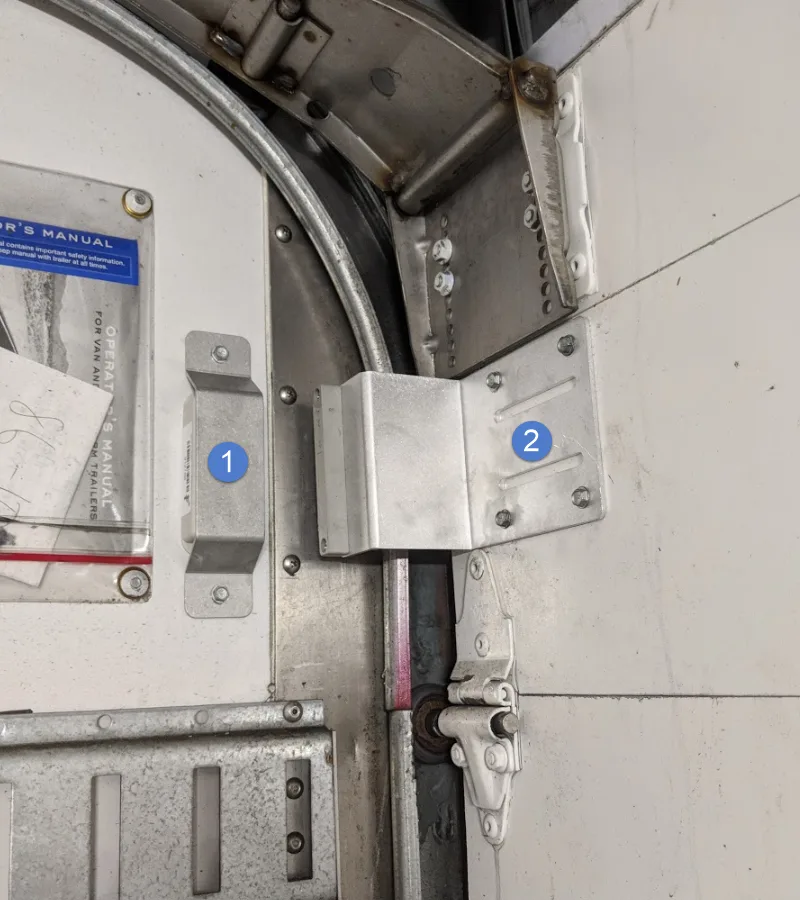
This is especially true for the alignment and the gap between the two sensor components. Getting this right ensures the sensor can reliably detect when the door is open or closed. Seeing it helps avoid common setup errors that can lead to frustrating false alarms or missed alerts.
Understanding Sensor Placement
The core idea behind a door sensor is that it’s a two-part system. One part attaches to the door frame, and the other attaches to the door itself. Manufacturer specifications confirm that the most common type, magnetic contact sensors, rely on a reed switch in one part and a magnet in the other.
When the magnet is close enough to the switch (typically within 0.5 to 1 inch), the circuit is complete, indicating the door is closed.
The critical part of placement is ensuring these two pieces line up correctly when the door is fully shut. You want the smaller magnet piece on the door to be directly opposite the larger sensor piece on the frame. We've found that aiming for the top of the door and frame often works best, but it really depends on the door's design.
Recognizing Components
Your door sensor kit usually arrives with two main pieces and a set of adhesive strips. One component is the main sensor unit, which often contains the battery and the electronics that communicate wirelessly. This piece typically mounts on the stationary frame of the door.
The other component is usually a smaller magnet.
This magnet is designed to be mounted on the moving part of the door. Its job is to activate the sensor when it's close by. The adhesive backing on both pieces is strong, designed for a secure, tool-free installation.
Always check the included manual, as some kits might have slightly different designs or include additional mounting hardware for specific door types.
Getting Ready to Install Your Door Sensors
Before you even think about peeling off any adhesive backing, a little prep work makes the whole process smoother and ensures your sensors stay put. Think of this as setting yourself up for success, saving you potential headaches down the line. It's all about making sure the surfaces are ready to bond properly.
This preparation phase is crucial, especially if you're installing sensors in a humid environment or on a surface that might have residue. Getting the surfaces clean and dry according to manufacturer guidelines for adhesive mounting is key to a long-lasting installation. It’s a small step that pays off big time.
What's Included in the Kit
Typically, a standard wireless door sensor kit includes two main components and an adhesive backing. You'll find a larger sensor unit, which usually houses the battery and transmitter, and a smaller magnetic contact. These are designed to work in tandem.
Also included are strong, pre-applied adhesive strips on the back of each component. These are engineered for a secure, tool-free mounting solution on most common door and frame materials. Some kits might also come with extra adhesive pads or, in rarer cases, screws for a more permanent installation if preferred, though the adhesive is standard for most DIY setups.
Essential Tools and Prep Steps
You won't need a whole toolbox for this job, which is part of the appeal. The sensors themselves usually come with everything required for a basic stick-on installation. However, a clean cloth is essential for wiping down the mounting surfaces.
For a truly secure bond, we highly recommend using a bit of rubbing alcohol. Wipe down the spot where each sensor will go with a cloth lightly dampened with rubbing alcohol. This removes any oils or dust that could prevent the adhesive from sticking firmly.
Let the surface dry completely before proceeding.
Step-by-Step Installation: Putting Sensors in Place
This is where we get hands-on. The goal is to place the two parts of your door sensor so they can communicate effectively. It’s a simple process, but getting the alignment right is the most critical part for the sensor to function correctly.
We've seen that the average installation time for a single door sensor, once you have your tools and clean surfaces ready, is about 10-15 minutes. Following these visual cues and steps will help you achieve a reliable setup.
Attaching the Door Sensor
Let's start with the piece that goes on the door itself. This is usually the smaller, magnetic component. First, decide where on the door you'll place it.
A common spot is on the top corner, on the side that swings inward.
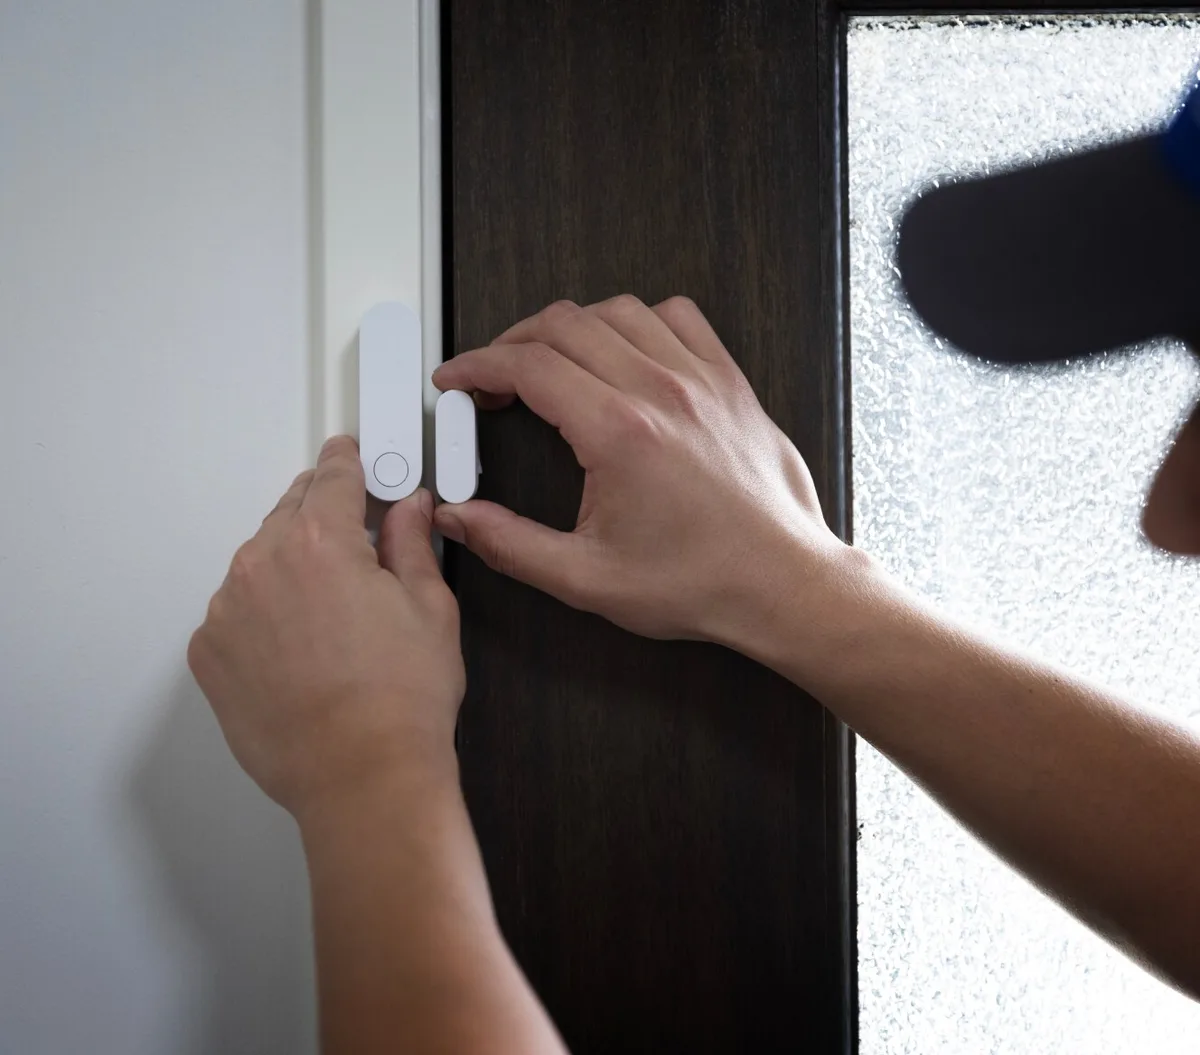
Once you've chosen the spot and cleaned the surface, peel the backing off the adhesive strip on the back of the magnet. Carefully press it firmly against the door surface for about 30 seconds. Make sure it's level and secure.
Attaching the Frame Sensor
Next, you’ll attach the larger sensor unit to the door frame. This piece contains the actual sensor that detects the presence of the magnet. Position it on the frame so that it directly faces the magnet when the door is closed.
It's often easiest to close the door to see exactly where the magnet will sit on the frame. Once you’ve identified the ideal spot, clean the frame surface with rubbing alcohol, let it dry, then peel the backing from the sensor's adhesive strip. Press it firmly against the frame for about 30 seconds.
Ensuring Proper Alignment and Gap
This is the most crucial step for reliable operation. When the door is closed, the two sensor pieces, the magnet and the sensor unit, need to be very close together. They should be aligned so the magnet is directly in front of the sensor.
Manufacturer specifications often state a maximum gap tolerance, usually around 0.5 to 1 inch. If the gap is too large when the door is shut, the sensor won't register as closed. You might need to adjust the position of either the door sensor or the frame sensor slightly to achieve this close alignment.
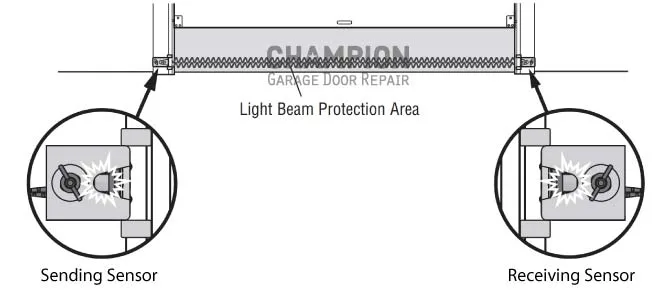
Connecting Your Door Sensors to Your System
Once the physical installation is complete, the next step is to bring your new door sensors online and integrate them with your home security setup. This typically involves pairing them with a central hub or directly with your Wi-Fi network, depending on the system you're using. Modern wireless home security systems are designed for straightforward connection processes.
This phase is where your sensors go from being standalone gadgets to active participants in your security network. It’s important to follow the instructions for your specific system, as the pairing process can vary slightly between brands and types of smart home security systems.
Pairing with Your Smart Home App
Most wireless door sensors connect via a dedicated mobile app or integrate with an existing smart home platform. After physically installing the sensors, you'll typically need to put them into pairing mode. This is often done by pulling a small plastic battery tab, pressing a button on the sensor, or following a prompt within the app.
Open your security system’s app on your smartphone or tablet. Navigate to the section for adding new devices or sensors. The app will usually guide you through the process, which often involves selecting the type of sensor you're adding and then following on-screen instructions to complete the pairing.
This is where you'll connect it to your home's Wi-Fi network if it's a Wi-Fi-enabled sensor.
Testing the Connection
After the pairing process is successful, it’s vital to test your sensors to ensure they are working correctly. Don't skip this step! Open and close the door several times.
Observe your security app or panel to confirm that each opening and closing event is accurately registered.
If your system has different modes (like "armed" or "disarmed"), test the sensor in each relevant mode. This verifies that the alerts will function as expected when the system is active. A successful test means your door sensors are properly installed and communicating with your system, providing that extra peace of mind.
Common Door Sensor Installation Mistakes to Avoid
Even with the best intentions, a few common pitfalls can trip you up during door sensor installation. These mistakes, while seemingly minor, can directly impact your system's reliability. Understanding what to watch out for can save you a lot of troubleshooting later.
Most issues stem from improper placement or inadequate surface preparation. For instance, not cleaning the surfaces properly is a leading cause of adhesive failure, as reported in numerous user forums. This can lead to sensors falling off or not sitting correctly, which we'll detail below.
Gap Too Wide
The biggest functional mistake is letting the gap between the two sensor pieces become too large when the door is closed. If the magnetic contact isn't close enough to the sensor unit, the system won't recognize the door as being secured. This often happens if the sensors are mounted too high or too low, or if they're not directly opposite each other.
If you notice your system shows a door as open when it's shut, the gap is the first thing to check. It's a simple fix: reposition one or both sensors slightly closer together. Remember, most magnetic sensors require the magnet to be within about 0.5 to 1 inch of the sensor unit to trigger correctly, as confirmed by general manufacturer specifications.
Surface Adhesion Failures
Door sensors rely heavily on their adhesive strips for mounting. If the mounting surface isn't clean, dry, or is too porous, the adhesive can lose its grip. This is particularly common on textured surfaces, painted wood that isn't well-primed, or areas that might experience moisture.
A sensor that comes loose won't function reliably and could even cause damage if it falls. Always use rubbing alcohol for a thorough clean before applying the sensor. For added security on challenging surfaces, consider using a stronger double-sided mounting tape specifically designed for home improvement projects.
Connectivity Hiccups
Sometimes, the sensors themselves are installed perfectly, but they struggle to communicate with your main security hub or Wi-Fi network. This is usually due to signal interference or the distance between the sensor and the hub. Many wireless home security systems operate on frequencies that can be affected by other devices.
If your sensors aren't showing up or are frequently losing connection, check for potential interference sources like microwaves, large metal objects, or even thick walls between the sensor and the hub. For systems using Wi-Fi, ensure your router’s signal is strong in that location. You might need a Wi-Fi extender for larger homes.
Troubleshooting Common Door Sensor Issues
Even after a careful installation, you might encounter a glitch or two. Fortunately, most door sensor problems are fairly straightforward to resolve with a bit of methodical checking. The key is to approach troubleshooting systematically, starting with the simplest explanations.
Many issues can be resolved by revisiting the installation steps, checking battery levels, or confirming connectivity. Think of it like a quick system check rather than a major repair. This approach helps you pinpoint the exact cause of the problem quickly.
Sensors Not Detecting Open/Close
If your door sensor isn't accurately reporting whether the door is open or closed, the most common culprit is sensor alignment. As we discussed, the magnet and sensor unit need to be within their specified range and directly opposite each other. Open the door and watch how the two pieces move relative to each other.
Another possibility is a dead or low battery in the sensor. Manufacturer specs often indicate an average battery life of 1-5 years, but this can vary. Check your system's app for battery status reports, or try replacing the battery with a fresh one.
If the problem persists, try re-pairing the sensor to your system, as sometimes the initial connection can be faulty.
Connectivity Problems
When a door sensor is installed but can't communicate with your security hub or app, the issue often lies with the wireless connection. First, verify that the sensor is within the recommended range of your hub. For many wireless systems, this range is typically up to 100 feet, but environmental factors can reduce it.
Check if other wireless devices in the vicinity are causing interference. Microwaves, certain cordless phones, and even dense building materials can disrupt signals. Sometimes, simply repositioning the sensor or the hub can solve connectivity issues.
If your sensor connects via Wi-Fi, ensure your home network is stable and that the sensor is connected to the correct network and password.
Expert Tips for a Secure Installation
Beyond just getting the sensors on the doors, a few expert insights can elevate your installation and ensure long-term reliability. These aren't strictly necessary for basic function, but they can prevent future headaches and maximize the lifespan of your security components. Think of them as proactive measures.
Our research into best practices for home security systems, including components like door sensors, highlights the importance of placement beyond just functionality. Considering environmental factors and how the sensors interact with the overall system can make a significant difference.
Choosing the Best Spot
While mounting sensors on the top of doors is common, consider other factors. For exterior doors, ensure the sensor is protected from direct weather exposure if possible. Even weather-resistant sensors can have their lifespan shortened by constant moisture or extreme temperatures.
Mounting them slightly under an overhang or on the interior side of a door can offer extra protection.
Also, think about the type of door. For sliding glass doors, you might need a different mounting approach than for a standard hinged door. Ensure the sensor won't be accidentally bumped or damaged during normal use of the door or adjacent furniture.
For most systems, the primary goal is just ensuring the magnetic contact works, but these placement considerations add robustness.
Long-Term Battery Considerations
Door sensors are typically battery-powered. While batteries can last for years, manufacturer specifications often cite 1 to 5 years, it's wise to be aware of battery life. Many smart home security apps will provide notifications when a sensor's battery is running low, which is a great feature to utilize.
When it's time to replace a battery, always use the type specified by the manufacturer. Using the wrong battery might damage the sensor or affect its performance. Keep a few spare batteries of the correct type on hand, especially for critical entry points.
This proactive approach ensures your sensors remain operational and your home stays secure without interruption.
Frequently Asked Questions About Door Sensor Installation
How long does setup usually take?
Setup typically takes about 10-15 minutes per door sensor, including cleaning and pairing.
Can I install door sensors on metal doors?
Yes, but metal can sometimes interfere with wireless signals. Test the range and connectivity carefully, and you may need to use a plastic spacer provided by the manufacturer to maintain signal strength.
Do door sensors require a Wi-Fi connection?
Many wireless door sensors connect to a central hub, which then connects to your home's Wi-Fi. Some sensors connect directly to Wi-Fi. Always check your specific model's requirements.
What happens if the adhesive fails?
If the adhesive fails, clean the surface thoroughly and use a stronger double-sided mounting tape or screws if provided by the manufacturer for a more permanent solution.
Can I use door sensors if I live in an apartment?
Absolutely. Door sensors are an excellent, non-permanent security upgrade for renters. Just ensure you can remove them without damaging the door or frame when you move out.