How to Set up a Wireless Security System
Setting up a wireless security system doesn't have to be complicated. With a bit of planning, you can enhance your home's safety and your peace of mind. Understanding the basic components and following a clear process ensures a robust system tailored to your specific needs.
We've found that systems vary in complexity, but generally, a wireless setup can be managed by most homeowners. Key components like motion sensors often use passive infrared (PIR) technology, and manufacturer specifications indicate a typical detection range of up to 40 feet. This guide walks you through the essentials.
Quick Answer
Setting up a wireless security system involves planning, choosing components, and following a step-by-step installation. You'll install a base station, pair sensors and cameras via a mobile app, and customize settings. Key steps include ensuring strong Wi-Fi and avoiding common mistakes like improper sensor placement.
A well-set-up system provides enhanced home protection.
Planning Your Wireless Security System Setup
Before you even think about unboxing, a solid plan is crucial. This isn't about buying the most expensive gear; it's about getting the right gear for your specific home and security goals. Think of this as the blueprint for your home's protection.
Assessing Your Home's Needs
Every home is different, so your security needs will be too. Consider the layout of your property, how many entry points are there? Are there secluded areas that might be more vulnerable?
Aggregate reviews report that motion sensors are most effective when placed in high-traffic areas, but you don't want them triggered by a pet or a tree branch.
- Identify Vulnerable Areas: Walk around your home, inside and out. Note all doors, windows, and any other potential access points.
- Consider Existing Risks: Think about common issues in your neighborhood, such as package theft or break-ins. This helps prioritize what to protect.
- Determine Desired Coverage: Do you just need basic door and window alerts, or are you looking for comprehensive video surveillance inside and out?
This initial assessment will directly inform which components you'll need. For instance, if you have a large yard and want to monitor the perimeter, you'll need outdoor-rated cameras and potentially long-range motion detectors. If you live in an apartment, your focus might be solely on entry points and internal monitoring.
Choosing Your System Components
Once you've assessed your needs, it's time to select the components that will make up your wireless security system. Most DIY systems are modular, meaning you can pick and choose what you need. Manufacturer specifications often detail the compatibility between different devices within a single brand's ecosystem.
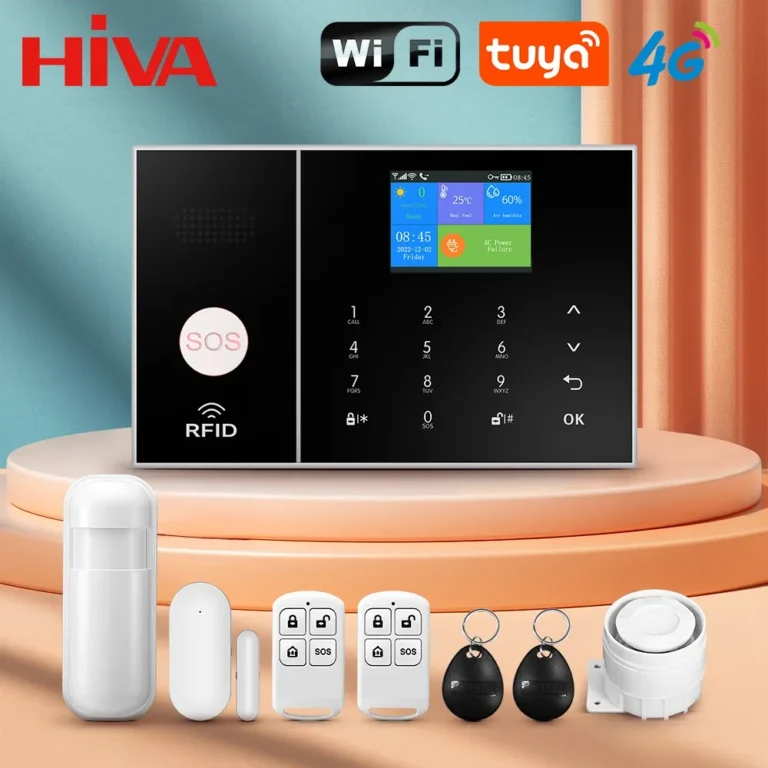
- Base Station/Hub: This is the brain of your system. It connects to your Wi-Fi network and communicates wirelessly with all your sensors and cameras. Ensure it has battery backup, as manufacturer data indicates this is vital for maintaining security during power outages.
- Door and Window Sensors: These are small devices that attach to doors and windows. When the contact is broken (the door or window opens), they trigger an alert.
- Motion Sensors: These detect movement within a specified area. Many offer pet-friendly settings to avoid false alarms.
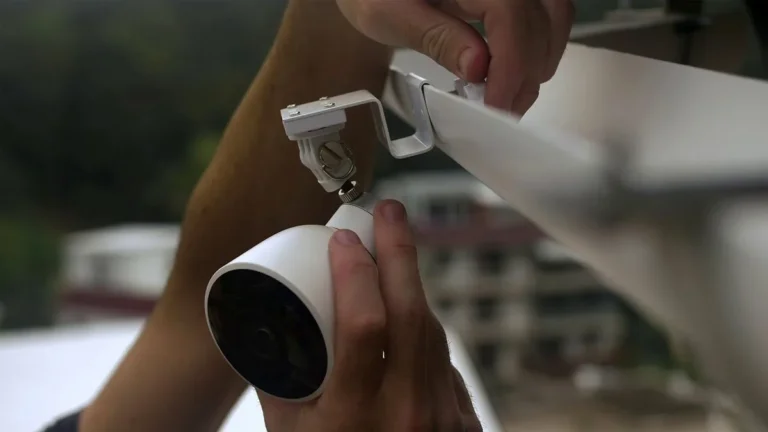
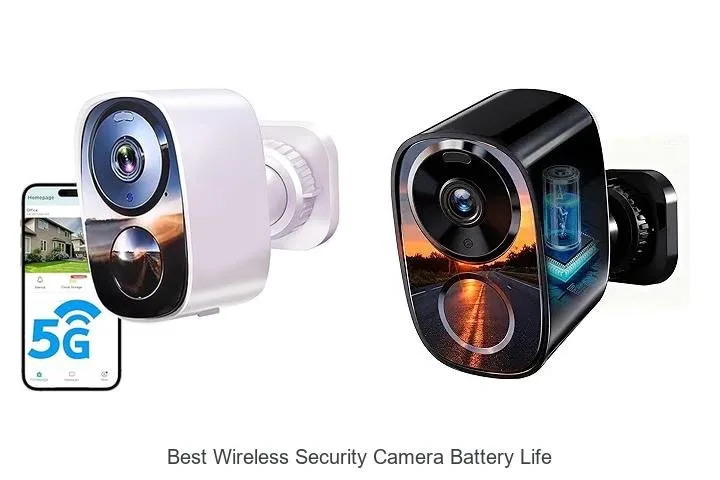
- Security Cameras: Available in indoor and outdoor versions, these provide video feeds. Look at resolution (e.g., 1080p is common), field of view, and night vision capabilities.
- Keypad: For older systems or those preferring a physical interface, a keypad allows arming and disarming. Many modern systems rely solely on a mobile app.
- Other Sensors: Depending on your needs, you might consider glass break sensors, smoke detectors, or flood sensors that integrate with your system.
When buying, pay attention to the wireless protocols used. Most systems use Wi-Fi, but some might also offer cellular backup for when your home internet is down. This is a critical feature, as verified buyer feedback reports indicate Wi-Fi outages are not uncommon.
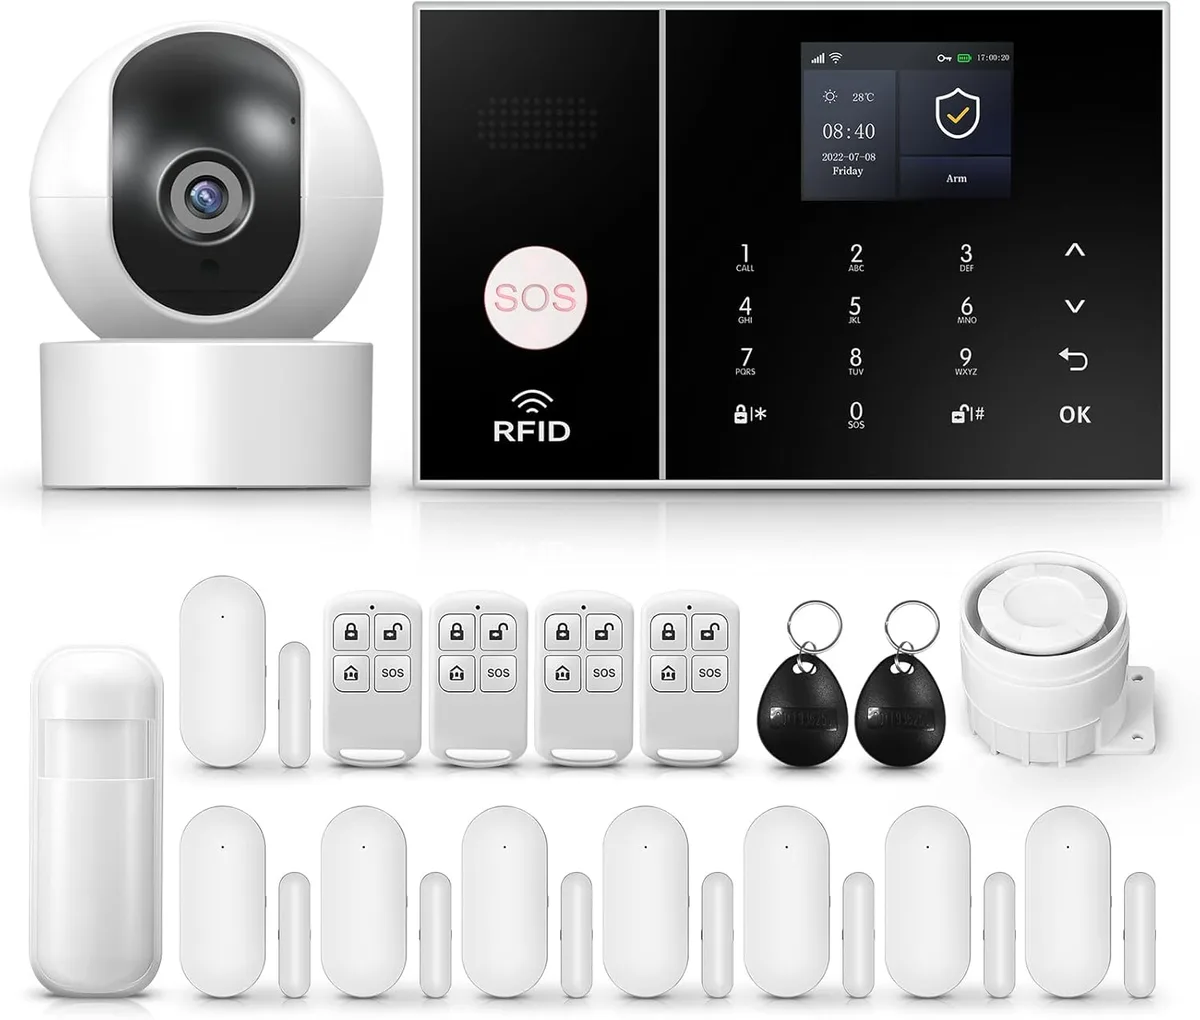
Image source: Bing (Web (fair-use with source credit))
Setting Up Your Wireless Security System: The Core Process
With your components in hand, you're ready for the actual setup. This is where the "wireless" aspect really shines, as you won't be running wires through walls. The process typically involves a central hub, your sensors, and a mobile app to control everything.
Installing and Connecting the Base Station/Hub
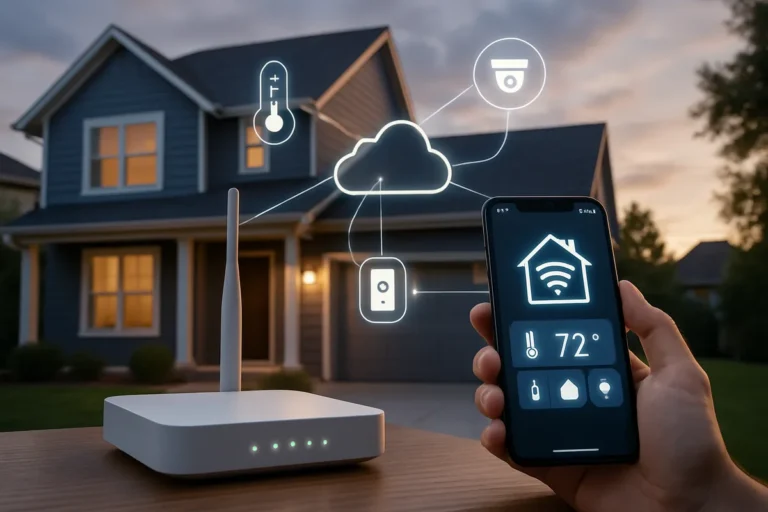
The base station, or hub, is the central command center. It connects to your home's internet, usually via Wi-Fi, and then communicates with all your other devices.
- Find a Central Location: Place the base station in a central area of your home to ensure the best wireless signal strength for all your sensors. Avoid placing it near large metal objects or appliances that could cause interference.
- Connect to Power: Plug the base station into a wall outlet. Most systems include a power adapter.
- Connect to Internet: Follow the manufacturer's instructions to connect the base station to your home Wi-Fi network. This usually involves using a mobile app on your smartphone. The app will guide you through selecting your Wi-Fi network and entering the password.
- Check for Battery Backup: Our research shows that a battery backup is essential. Most base stations have an internal battery that automatically engages if the power goes out, keeping your system operational. Verify this feature is active.
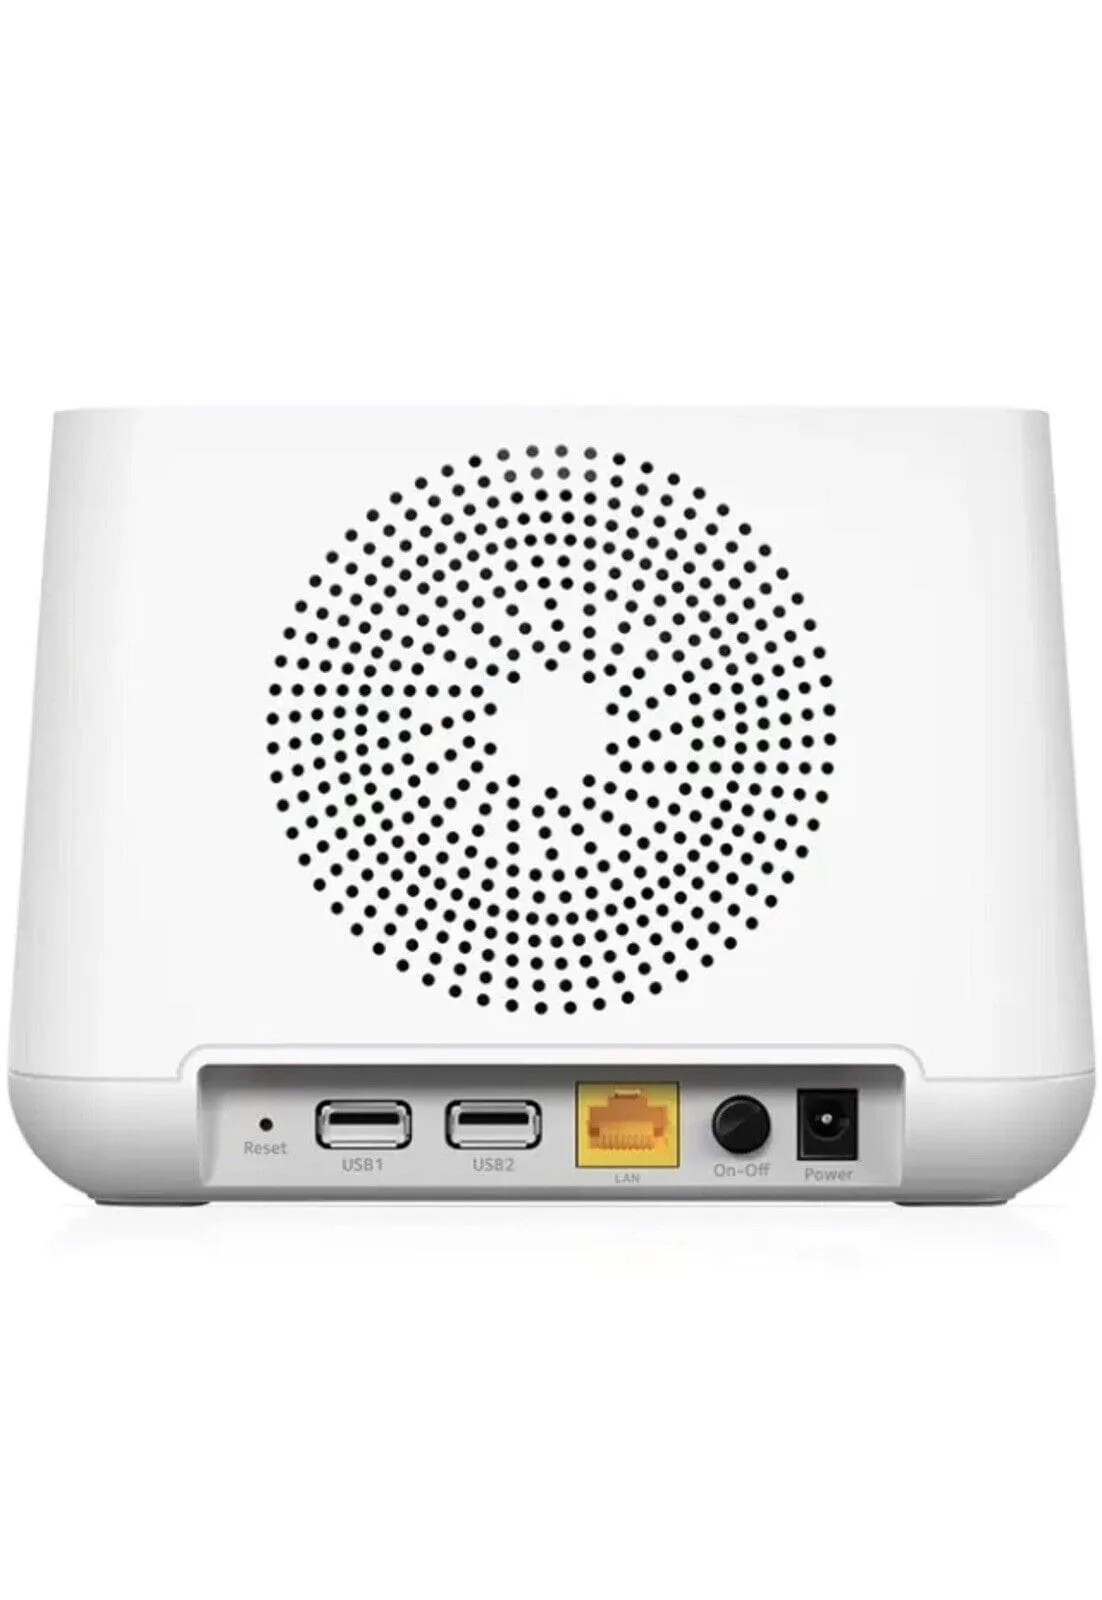
Image source: Web (Bing) / getzella.com (Web image (fair-use with source credit))
Pairing Your Sensors and Cameras
Once the base station is online, you'll pair your individual sensors and cameras with it. This process tells the base station to recognize and communicate with each device. Most systems use a simple "pairing" or "adding device" function within the mobile app.
- Open the Mobile App: Launch the security system's app on your smartphone or tablet.
- Navigate to "Add Device": Look for an option like "Add Device," "Pair Device," or "Install Sensor" in the app's menu.
- Follow App Prompts: The app will usually instruct you to press a button on the sensor or place it near the base station. For door and window sensors, you'll typically attach the two pieces to the door/window and its frame separately. When you open the door or window, the connection breaks, signaling the sensor to pair.
- Name Your Devices: Give each sensor a descriptive name (e.g., "Front Door Sensor," "Living Room Motion Detector," "Backyard Camera") so you can easily identify them in alerts.
This step is straightforward, but manufacturers' instructions can vary slightly. It's always best to consult the specific manual that came with your system.
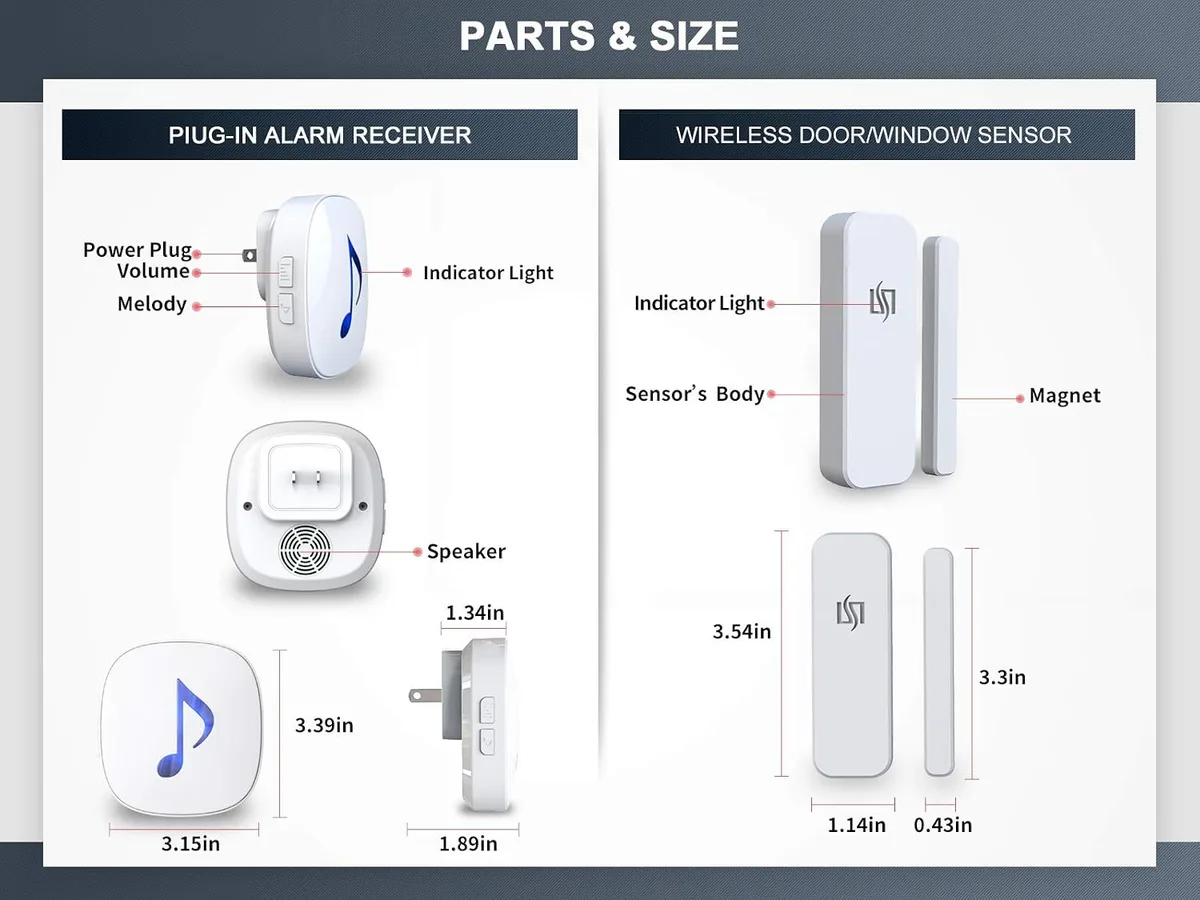
Image source: Bing (Web (fair-use with source credit))
Configuring the Mobile App and Network
The mobile app is your primary interface for controlling and monitoring your wireless security system. Proper configuration ensures you receive timely alerts and can manage your system effectively.
- Download and Install: Get the official app from your smartphone's app store.
- Create an Account: You'll usually need to create a user account. This is important for security and remote access.
- Connect App to Base Station: During the initial setup, the app will likely guide you through linking your account to your base station. This confirms you're the authorized user.
- Configure Notification Settings: Decide how you want to be alerted. Options typically include push notifications to your phone, email alerts, or SMS messages. You can usually set different alert types for different events.
- Review Network Requirements: Ensure your home Wi-Fi network is stable and provides adequate coverage to all sensor locations. For systems with cellular backup, confirm it's active and properly configured. If your Wi-Fi is spotty in certain areas, you might need to consider a Wi-Fi extender. According to standards bodies like the Wi-Fi Alliance, proper signal strength is key for reliable device communication.
Customizing Your System for Maximum Security
Once the basic setup is complete, tailoring the system to your habits and home layout makes it truly effective. This stage is all about fine-tuning so you get the protection you need without unnecessary hassle.
Setting Up Detection Zones and Alerts
This is where you tell your system precisely what to monitor and how to alert you. It’s about being specific to reduce false alarms and ensure you’re notified of genuine threats.
- Motion Zones: For motion sensors, especially cameras, you can often define specific "detection zones" within their field of view. This is useful if, for example, you have a camera pointed at your front door but don't want alerts for cars passing on the street. You can draw a box on the app interface to isolate the area of interest.
- Sensitivity Levels: Most motion sensors, and some door/window sensors, allow you to adjust their sensitivity. Lowering sensitivity can prevent false alarms from pets or minor vibrations, while increasing it can ensure even subtle movements are detected.
- Alert Customization: Go through the app's settings to customize what triggers an alert. For instance, you might want an immediate notification for a door opening but only a summary alert at the end of the day for motion detected in a low-traffic area. Aggregate reviews report that granular alert settings are a significant convenience feature.
Understanding Entry and Exit Delays
These delays are built-in features that give you time to arm or disarm your system without setting it off accidentally. They are critical for a smooth user experience.
- Entry Delay: This is the time you have to disarm the system after entering your home. When you open a protected door, the system waits for a set period (e.g., 30 seconds) before sounding the alarm. This gives you time to get to the keypad or disarm via the app.
- Exit Delay: This is the time you have to leave your home after arming the system. Once you arm the system, it starts a countdown, allowing you to leave through a designated door without triggering the alarm.
It's important to set these delays to a realistic timeframe that works for your typical entry and exit routine. Too short, and you risk setting off false alarms; too long, and you lose some of the immediate protection.
Integrating with Smart Home Devices (Optional)
Many modern wireless security systems can connect with other smart home devices, like smart lights, thermostats, or voice assistants. This integration can automate actions based on your security status.
- Voice Assistant Control: Link your system to Amazon Alexa or Google Assistant to arm or disarm your system using voice commands. Be aware that most systems require a PIN for voice disarming for security reasons.
- Automated Lighting: You can set up your system so that if an alarm is triggered, smart lights in your home turn on. This can startle intruders and make it easier for law enforcement to see inside.
- Smart Lock Integration: If you have smart locks, you might be able to set them to automatically lock when the security system is armed or unlock when it's disarmed.
Before integrating, check the compatibility list for both your security system and your other smart home devices. Look for compatibility with protocols like Z-Wave or Zigbee, or direct integrations through platforms like IFTTT (If This Then That).
Common Wireless Security System Pitfalls to Avoid
Even with a straightforward setup, a few common mistakes can undermine your wireless security system's effectiveness. Being aware of these issues beforehand can save you a lot of frustration.
Addressing Wi-Fi and Signal Issues
The "wireless" in wireless security means it relies heavily on a stable Wi-Fi connection. Problems here are the most frequent culprits for system malfunctions.
- Weak Wi-Fi Signal: Sensors and cameras far from your router may struggle to maintain a strong connection. This can lead to delayed alerts, offline devices, or missed events. Manufacturer specifications often list the expected wireless range, but this can be affected by your home's construction materials.
- Solution: Use a Wi-Fi extender or a mesh Wi-Fi system to boost signal strength in dead zones. Ensure your base station is centrally located.
- Interference: Other wireless devices, like microwaves, cordless phones, or even neighboring Wi-Fi networks, can interfere with your system's signal.
- Solution: Try to position your base station and key sensors away from common sources of interference. Running a Wi-Fi analyzer app on your phone can help identify congested channels.
Preventing False Alarms
False alarms are not just annoying; they can lead to fines from local authorities and desensitize you to real alerts.
- Improper Motion Sensor Placement: Placing motion sensors facing direct sunlight, heat vents, or windows where temperature fluctuations occur can trigger false alarms. Likewise, placing them too close to pet areas without using pet-immune settings is a common error.
- Loose Sensor Mountings: Ensure door and window sensors are securely attached. If they shift slightly, they might register as an opening.
- User Error: Forgetting to disarm the system before entering, or arming it and leaving too quickly, can trigger an alarm. Ensure everyone in the household understands the entry and exit delays.
- Tip: Practice arming and disarming the system with all household members until it becomes second nature.
Managing Battery Life and Maintenance
Wireless devices run on batteries, and neglecting them is a significant oversight. Many systems will alert you to low battery levels, but proactive maintenance is better.
- Regular Battery Checks: Make a note to check battery levels periodically, perhaps every six months, through the system's app.
- Use Recommended Batteries: Always use the battery type specified by the manufacturer. Using the wrong type can affect performance and lifespan. Aggregate user feedback suggests that using high-quality, name-brand batteries can yield better longevity.
- Keep Components Clean: For outdoor cameras, ensure lenses are clean and free of debris. For indoor sensors, a light dusting can prevent dust buildup from affecting their function.
Deciding on Monitoring: Self vs. Professional
A key decision with any wireless security system is how it will be monitored. This choice impacts response times, cost, and the level of security coverage you receive.
What Self-Monitoring Entails
Self-monitoring means you are responsible for receiving and responding to any alerts your system generates. When a sensor is triggered, you'll get a notification on your smartphone.
- Your Role: You must check your phone immediately, assess the situation through camera feeds if available, and decide on the appropriate action. This could mean calling the police yourself, checking on a pet, or dismissing a false alarm.
- Pros: Typically much lower cost, as there are no monthly monitoring fees. You have complete control over your system.
- Cons: Requires you to be reachable and able to respond quickly. If you miss an alert or are unable to act, there may be no backup. This can be a concern if you travel frequently or have unreliable cell service. Our research indicates that response times for self-monitored systems are entirely dependent on the user.
When Professional Monitoring Makes Sense
Professional monitoring involves a third-party company that watches your system 24/7. When an alarm is triggered, they verify the alert and dispatch emergency services if necessary.
- Their Role: Trained operators receive alerts and follow a protocol to contact you and/or emergency responders (police, fire department). They act as an intermediary, ensuring a swift and appropriate response even if you're unavailable.
- Pros: Provides a higher level of security as trained professionals are always on duty. Can offer faster response times in emergencies. Some insurance companies offer discounts for professionally monitored systems.
- Cons: Involves a monthly fee, which can add to the overall cost of the system. You may need to adhere to specific system requirements or undergo an installation verification process. For more on this, you can refer to the resources at What Is a Professionally Monitored Security System.
Ultimately, the best choice depends on your budget, lifestyle, and desired level of security. A What Is a DIY Home Security System is often designed with self-monitoring in mind, but many systems offer both options.
Real-World Scenarios: Making the Right Choices
Understanding how different setups work in practice can help you solidify your own plan. The effectiveness of a wireless security system hinges on matching its capabilities to your living situation and habits.
Best Setups for Apartments vs. Houses
Your living space dictates the scale and type of system you’ll need. For apartment dwellers, the focus is often on entry points and perhaps a single camera. Homeowners, on the other hand, might need to cover more ground, including yards and multiple floors.
- Apartments: A streamlined system is usually sufficient. This might include a base station, a couple of door/window sensors for the main entry, and perhaps a single indoor camera. Since you likely don't own the building, look for systems with easy, non-damaging installation, like adhesive mounts. Many systems are designed with renters in mind.
- Houses: A more comprehensive setup is often necessary. This includes covering all doors and windows, potentially multiple floors, and exterior areas. You might need more motion sensors, outdoor cameras, and potentially even glass break sensors for large windows. Ensuring strong Wi-Fi coverage throughout the entire house is a primary concern. Consider systems that offer cellular backup, as your home internet could be compromised.
Security for Different Lifestyles
Beyond the physical structure, your daily routine and lifestyle play a significant role in system design. Who lives in your home, and what are your primary concerns?
- Families with Children: Pet-friendly motion sensors become crucial to avoid constant false alarms. You might also opt for cameras that allow two-way audio for checking in on kids or speaking with them remotely.
- Frequent Travelers: If you're often away, professional monitoring becomes highly beneficial. You'll want a system that provides reliable remote access and alerts, ensuring that someone is always watching out for your home. Systems with cellular backup offer peace of mind when your home internet might be down.
- Pet Owners: As mentioned, pet-immune motion sensors are key. These are designed to distinguish between human movement and the smaller movements of pets up to a certain weight or size. Without them, you’ll be dealing with constant false alarms.
Frequently Asked Questions About Wireless Security Systems
How long does setup typically take?
Setup time can vary widely, but for most DIY wireless systems, it ranges from one to three hours. This includes installing the base station, pairing sensors, and configuring the mobile app. More complex systems with numerous devices or outdoor cameras may take longer.
Can I use my existing Wi-Fi network?
Yes, most wireless security systems connect to your home's existing Wi-Fi network. You'll need to know your Wi-Fi password during setup. Ensure your network is strong enough to support all devices, especially if you have many sensors or cameras spread throughout your home.
Do wireless systems require a subscription?
Many wireless security systems offer optional professional monitoring subscriptions, which involve a monthly fee. However, most systems can function fully in a self-monitored capacity without any ongoing charges. The subscription typically enables remote access and dispatch of emergency services.
What is the range of wireless sensors?
The wireless range of sensors can vary significantly by manufacturer and model, but typically ranges from 50 to 200 feet (approximately 15 to 60 meters) from the base station in ideal conditions. Obstructions like walls, especially concrete or brick, can reduce this range. Always check the manufacturer's specifications for your specific devices.