How Do I Delete CCTV Footage?
Sometimes, you just need to clear out old video recordings. Whether it's to free up storage space or for privacy reasons, knowing how to delete CCTV footage is a practical skill. The exact process can vary significantly depending on the type of system you're using, from older DVRs to modern cloud-based solutions.
To effectively manage your video surveillance, understanding the different systems and their specific deletion protocols is essential. As of 2026, many systems offer automated overwriting, but manual deletion still requires careful attention. Let's dive into the specifics of clearing out your recorded data.
Quick Answer
To delete CCTV footage, you'll typically access your system's playback menu and select the desired recordings for removal. For DVRs and NVRs, this involves logging into the device interface, searching for the footage, and choosing a delete option. Cloud systems usually manage deletion through their mobile apps or websites, while cameras with SD cards require manual file deletion or formatting.
Understanding Your CCTV System Type
The first step in deleting footage is identifying what kind of system you're working with. Each type has its own interface and method for managing recordings. Understanding these differences ensures you approach the deletion process correctly and avoid common pitfalls.
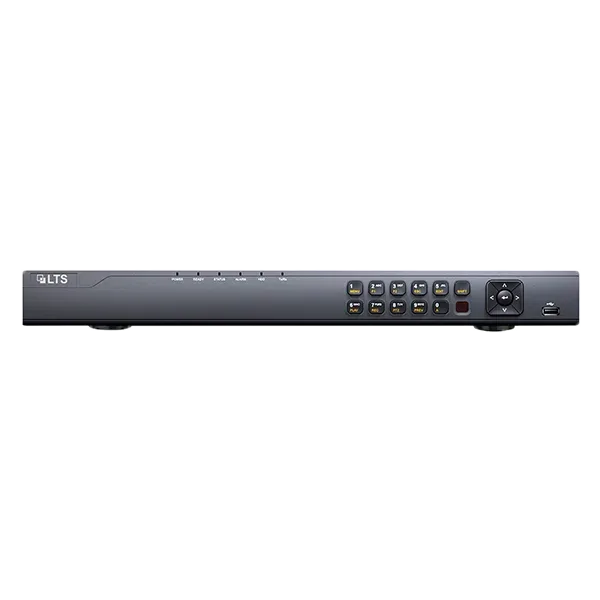
Image source: Web (Bing) / pngtemplates.com (Web image (fair-use with source credit))
DVR vs. NVR vs. Cloud vs. SD Card
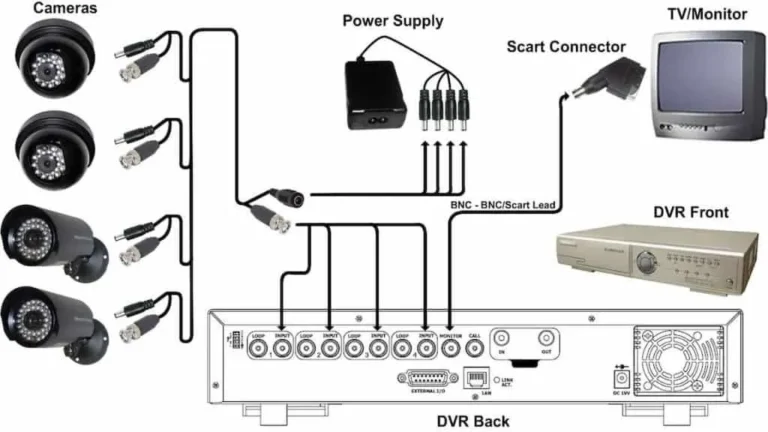
- DVR (Digital Video Recorder): These are typically used with analog or older coax-based cameras. The DVR itself contains a hard drive where all footage is stored. Deletion usually happens through the DVR's on-screen menu, accessed via a connected monitor and mouse.
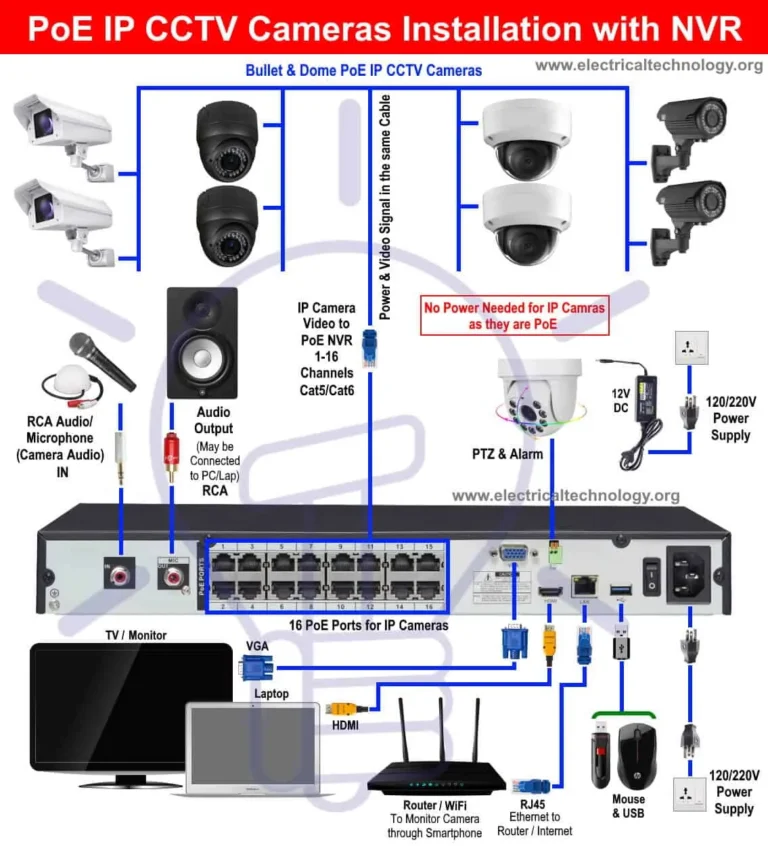
- NVR (Network Video Recorder): Used with IP cameras, an NVR connects to your network. Footage is stored on an internal hard drive. Access is similar to a DVR, either directly via a monitor or remotely through a web browser or dedicated software.
- Cloud-based Storage: Modern systems often record directly to a secure online server. Deletion is managed through a mobile app or web portal provided by the service. This offers convenience but might involve subscription fees for storage and access.
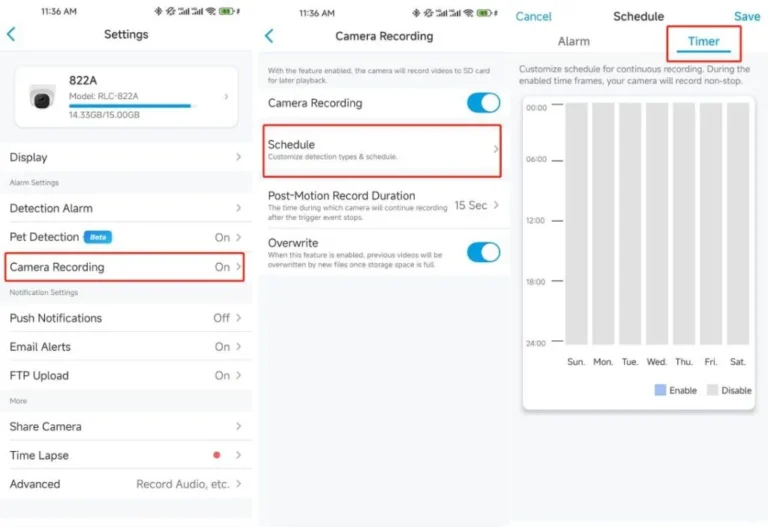
- CCTV Camera SD Card: Some individual cameras have built-in SD card slots for local storage. Footage is saved directly onto the card, and deletion involves removing the card and managing files on a computer or formatting the card directly within the camera's settings.
Knowing your system type is crucial because the steps to how do security cameras store footage vary greatly.
Accessing Your Recorded Footage
Once you've identified your CCTV system type, the next step is to get into its interface to find the recorded video. This is where you'll navigate to the playback or search functions to locate the specific footage you want to remove. Access methods depend heavily on whether your system is local or cloud-based.
Logging Into Your Recorder or App
- For DVRs and NVRs: Most recorders have a physical connection for a monitor and mouse. You'll typically see a login screen upon boot-up. You'll need the administrator username and password. If you’ve forgotten these, a factory reset might be necessary, but this often erases all settings, including recorded footage. Manufacturer specifications confirm that unauthorized access is a primary security concern for these devices.
- For Cloud Systems: You'll use a smartphone app or a web browser to log into your account. This usually involves your email address or username and a password. Two-factor authentication is common for added security.
- For Cameras with SD Cards: Access is typically achieved by physically removing the SD card and inserting it into a computer's card reader or using an external reader. Some cameras also allow remote access to the SD card via their app if connected to your network.
Methods for Deleting CCTV Footage
There are several ways to delete CCTV footage, ranging from targeted removal of specific clips to a complete system wipe. The best method for you depends on your goals, the type of system you have, and how much footage you need to clear. It's important to be sure about what you're deleting, as some actions are irreversible.
Deleting by Date and Time Range
This is often the most common and safest method for manual deletion. You can pinpoint specific dates and times and remove all recordings within that window. This is useful for clearing out old, irrelevant footage without affecting more recent recordings.
- How it works: You’ll navigate to a playback or search menu, select the camera or all cameras, and then choose the desired date and time span. After confirming your selection, you initiate the deletion command.
- Best for: Clearing out outdated footage from a specific period, such as last week's general activity, without impacting critical events.
Deleting Specific Camera Recordings
If you only need to remove footage from a particular camera, this option allows for that. It’s handy if one camera's storage is filling up faster, or if you only want to manage recordings from a specific area.
- How it works: Similar to deleting by date, you'll first filter the search to a single camera. Then, you can select specific recordings or a time frame associated with that camera for deletion.
- Best for: Managing storage on individual cameras or removing recordings from a camera that is no longer needed.
Formatting the Entire Storage Drive (Use With Caution!)
This is the most comprehensive deletion method, essentially wiping the entire hard drive or storage medium clean. It’s a drastic step that removes all recorded video, system logs, and other data.
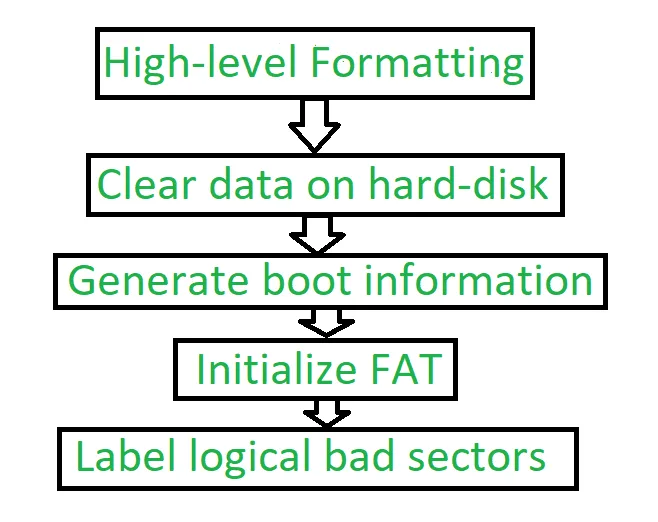
Image source: Web (Bing) / flyingmachinearena.org (Web image (fair-use with source credit))
- How it works: This option is usually found within the system's storage management or maintenance settings. You'll be prompted with several warnings before proceeding.
- Best for: A complete fresh start, clearing all data when upgrading storage, selling the system, or when facing persistent storage issues that a simple deletion won't resolve. Be aware that after formatting, you cannot recover previously deleted footage, unlike minor deletions which might have recovery options for a short period per how to recover deleted security camera footage.
Understanding Automatic Overwriting
Many CCTV systems are configured with a feature called "overwrite" or "loop recording." This means when the storage drive becomes full, the system automatically deletes the oldest footage to make space for new recordings.
- How it works: This is a setting you usually enable or configure in the system's recording schedule or storage management. You can often set how many days of footage you want to retain before overwriting begins (e.g., 7 days, 30 days).
- Benefit: It ensures your system never stops recording due to a full drive, providing continuous coverage without manual intervention. This aligns with what is continuous recording on security cameras.
Step-by-Step Deletion Process
Navigating the deletion process can feel daunting, but breaking it down by system type makes it manageable. Each system has its unique interface, but the core actions remain similar: access, select, and delete. Always proceed with caution, especially when dealing with irreversible actions like formatting.
For DVR/NVR Systems
These systems typically require direct interaction, either via a connected monitor and mouse or through a remote interface.
- Connect and Power On: Ensure your DVR or NVR is powered on. Connect a monitor and USB mouse if you're accessing it directly.
- Log In: Enter your administrator username and password. If you don't have this, you may need to consult your device manual for a reset procedure.
- Navigate to Playback/Search: Look for a menu option labeled "Playback," "Search," "Record," or similar.
- Select Timeframe and Camera(s): Choose the date, time range, and specific camera(s) you want to manage. Many systems display a calendar view.
- Initiate Deletion: Find a "Delete," "Erase," or "Remove" button. You might be able to select individual clips or an entire date range for deletion.
- Confirm Action: The system will ask for confirmation. Double-check your selections before proceeding.
This process is fundamental to managing your recorded data, especially if you find your system is experiencing how to fix security camera video lag which can sometimes indicate storage issues.
For Cloud-Based Systems
Cloud storage simplifies deletion, as it's usually managed through a user-friendly app or website.
- Access Your Account: Open the mobile app or log into the cloud service's website using your credentials.
- Go to Recordings/History: Find the section that lists your recorded video clips or event history.
- Select Footage: Tap on individual clips to select them, or look for options to select a date range or all recordings.
- Tap "Delete": A trash can icon or a dedicated "Delete" button will be available.
- Confirm Deletion: The system will prompt you to confirm your irreversible action.
Cloud storage offers a convenient way to manage data, but understanding cloud vs local storage security cameras can help you decide which approach best suits your needs.
For Cameras with SD Cards
When footage is stored on an individual camera's SD card, the process is more hands-on.
- Power Off Camera: It’s best practice to power off the camera before removing the SD card to prevent data corruption.
- Remove SD Card: Carefully eject the SD card from its slot.
- Access on Computer: Insert the SD card into a computer's built-in reader or an external USB card reader.
- Delete Files: Open the card's storage on your computer and select the video files you wish to delete. Drag them to the computer's recycle bin or permanently delete them.
- Format Card (Optional): For a complete wipe, you can format the SD card using your computer’s disk management tools or through the camera’s interface if it supports that option. This ensures all data is thoroughly erased.
Common Mistakes to Avoid When Deleting Footage
While deleting CCTV footage is straightforward for many, a few common errors can lead to frustration or loss of critical information. Being aware of these pitfalls can help you avoid them and ensure a smooth data management process.
Accidental Data Loss
The most frequent mistake is accidentally deleting footage you might still need. This is especially true if you're quickly clearing out space without carefully reviewing the selected recordings.
- Scenario: You intend to delete last month's recordings but accidentally select the current month instead, and then confirm the deletion.
- Prevention: Always double-check the date ranges, camera selections, and the confirmation prompts. If your system offers a "backup" or "download" option before deletion, use it for any footage you're unsure about. For critical events, how to transfer security camera footage to another location before deletion is a wise step.
Deleting Necessary Evidence
In business or legal contexts, CCTV footage can serve as crucial evidence. Deleting it prematurely can have serious consequences.
- Scenario: A security incident occurs, and the footage is deleted before any investigation is complete, or before understanding how long should security footage be kept.
- Prevention: Establish clear data retention policies for your CCTV system. Understand any legal or regulatory requirements regarding how long footage must be stored. If an incident occurs, preserve relevant footage immediately by downloading it and clearly labeling it as evidence. Consult with legal counsel if unsure about retention periods or evidentiary needs.
When to Seek Professional Help or Manufacturer Support
While deleting CCTV footage is often a user-level task, there are times when you might need to call in the experts. If you're dealing with complex systems, persistent errors, or situations involving legal compliance, professional assistance is invaluable.
- System Malfunctions: If your DVR or NVR is not responding, shows error messages, or the deletion function is grayed out or non-functional, there might be a hardware issue. Manufacturer support or a qualified technician can diagnose and resolve these problems. You might need to how to reset a security camera or its recording device, which often requires specific guidance.
- Forgotten Passwords: If you’ve lost administrator credentials for your system, attempting multiple incorrect logins could lock you out entirely or trigger security protocols. Manufacturer documentation often outlines official password reset procedures, sometimes requiring proof of ownership.
- Legal and Compliance Requirements: For businesses or organizations, maintaining compliance with data privacy laws (like GDPR or CCPA) is critical. If you're unsure about deletion procedures, data retention policies, or how to securely dispose of footage to meet these regulations, consulting with a cybersecurity expert or legal counsel is recommended.
- Data Recovery Needs: If you accidentally deleted footage and believe it might still be recoverable, specialized data recovery services exist. However, the success rate depends heavily on the system, the storage media, and how quickly you act after the deletion.
Frequently Asked Questions About Deleting CCTV Footage
How long does footage typically stay on a DVR before being overwritten?
This depends entirely on the DVR's storage capacity and the recording settings. Many DVRs are configured to overwrite footage after 7, 14, or 30 days, but this can be adjusted. A 1TB hard drive recording at a moderate resolution might store several weeks of continuous footage, while a smaller drive or higher quality recording settings could mean only a few days.
Can I recover deleted CCTV footage?
In some cases, yes, but it’s not guaranteed. If you’ve recently deleted footage through a standard deletion command and not a full format, some systems might have a temporary recovery buffer. For more permanent deletion or after formatting, specialized data recovery software or professional services may be required, with success varying greatly.
This is explored in more detail in how to recover deleted security camera footage.
Is formatting my CCTV hard drive safe?
Yes, formatting a CCTV hard drive is safe for the drive itself and is a standard procedure for clearing data. However, it is irreversible, meaning all recorded data will be permanently erased. Ensure you have backed up any necessary footage before proceeding, as this action is final.
What is the difference between deleting and formatting a drive?
Deleting typically targets specific files or date ranges, leaving other data on the drive intact. Formatting, on the other hand, erases the entire drive, making it appear blank and ready for new data. Formatting is a more thorough wipe and is often used when you want to start fresh or prepare a drive for reuse.
Do cloud-based CCTV systems delete footage automatically?
Yes, most cloud-based CCTV services have automatic deletion policies built-in. This is often tied to your subscription plan, where footage is retained for a specific period (e.g., 7, 30, or 60 days) before being automatically purged from their servers to manage storage costs. You can usually adjust these settings within your account.
Best Practices for Managing CCTV Storage
Effectively managing your CCTV storage goes beyond simply deleting old footage. It involves understanding how your system operates, setting appropriate recording schedules, and performing regular maintenance. By implementing smart storage practices, you can ensure you have the footage you need when you need it, without unnecessary clutter or storage expenses.
Regularly checking your system's storage status is key. Most systems provide an overview of how much space is used and how much is available, often in a dedicated "Storage" or "Disk Management" section within the settings. This allows you to anticipate when manual deletion or drive formatting might be necessary.
Ensuring Smooth Operation: Maintenance and Optimization
Keeping your CCTV system running smoothly, especially its recording and storage functions, requires a bit of proactive care. Just like any electronic system, regular checks and timely updates can prevent issues before they start. This proactive approach is more efficient than troubleshooting problems after they occur.
Think of it as regular tune-ups for your car. Performing these tasks can prevent common problems like why is my security camera showing a black screen or ensuring your motion detection remains accurate.
Why You Should Update Your Firmware
Manufacturer specifications consistently highlight the importance of firmware updates for security devices. Firmware is the low-level software that controls the device's hardware. Updates often include critical security patches, performance improvements, and bug fixes.
- Security Patches: These are vital to protect your system from unauthorized access and cyber threats. Outdated firmware can leave your system vulnerable.
- Performance Boosts: Updates can optimize how your system records, processes, and stores video data, potentially improving efficiency and reducing issues like why is my security camera delayed.
- Bug Fixes: Manufacturers release updates to correct known issues, which might include problems with recording, playback, or storage management. Regularly checking for and applying updates, as outlined in guides on how to update security camera firmware, is a cornerstone of good system maintenance.
Checking and Cleaning Hard Drives
The hard drive within your DVR or NVR is the heart of your recording system. Over time, these drives can accumulate errors or wear down, impacting performance and potentially leading to data loss.
- S.M.A.R.T. Status: Many DVRs and NVRs allow you to check the Self-Monitoring, Analysis, and Reporting Technology (S.M.A.R.T.) status of the hard drive. This provides an early warning if the drive is failing.
- Physical Cleaning: Dust can accumulate inside the DVR/NVR unit, affecting cooling and potentially causing components to overheat. Periodically, and with the unit powered off and unplugged, you can use compressed air to gently clear out dust from vents and fans.
- Drive Health: Some systems offer built-in disk check utilities. Running these periodically can help identify and sometimes repair file system errors before they become critical.