How Do I Check CCTV Footage?
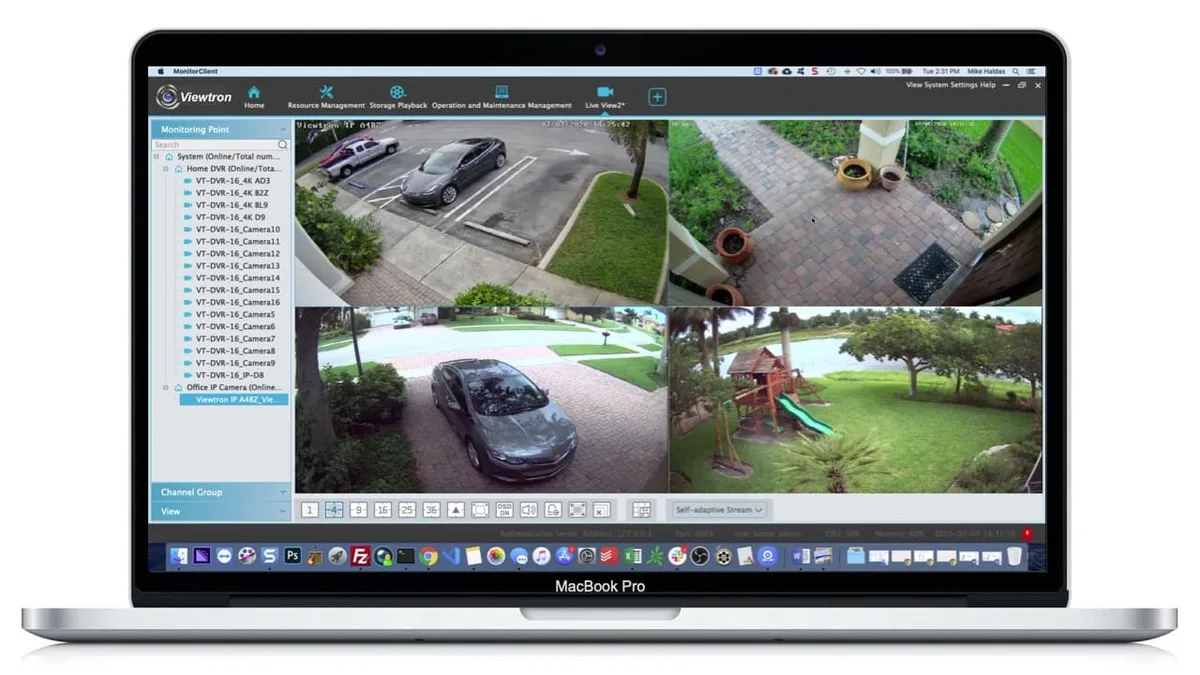
Image source: Web (Bing) / cctvcamerapros.com (Web image (fair-use with source credit))
Figuring out how to check CCTV footage can feel like cracking a code, especially when you're facing a specific event you need to review. It’s not always as simple as hitting play on a movie. Getting to the right recording often depends on the type of security camera system you have and your level of access.
Understanding the basics of your Digital Video Recorder (DVR) or Network Video Recorder (NVR) is key. Manufacturer specifications, such as those from Dahua Technology for some of their systems, often detail storage capacities ranging from 1TB up to 12TB, which influences how long footage is kept. Knowing your system's setup is the first step to accessing those crucial recordings.
Quick Answer
To check CCTV footage, you typically need to access your Digital Video Recorder (DVR) or Network Video Recorder (NVR) interface. Log in using your credentials, navigate to the playback or search menu, and select the date and time range. You can then review recorded video, often with options to search by motion events.
What's Your Goal for Checking the Footage?
Before you even think about logging in, it’s helpful to ask yourself why you need to check the footage. Your purpose shapes how you’ll search and what you’ll be looking for. Are you trying to pinpoint when a package was delivered, identify a visitor, review an incident, or perhaps just check on a pet?
Knowing your objective helps narrow down the search. If you're looking for a specific event like a car entering your driveway, you'll want to focus on motion detection logs or a particular time window. If you need to verify activity over an entire day, you might opt for continuous recording playback.
This initial clarity saves a lot of time and frustration.
Your CCTV System: What You're Working With (DVR vs. NVR)
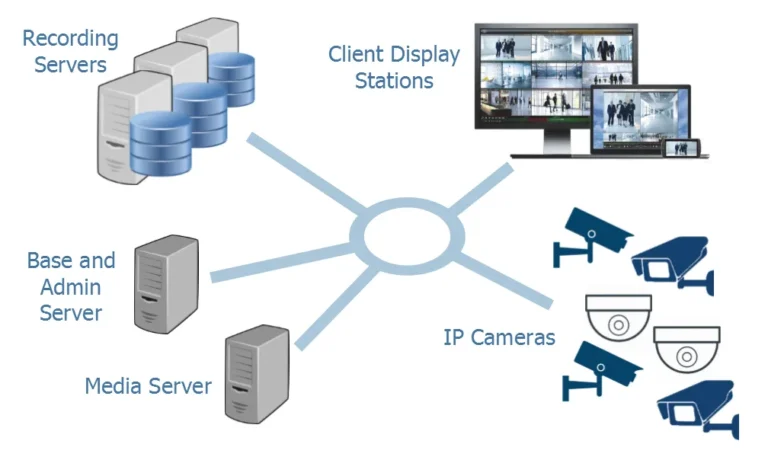
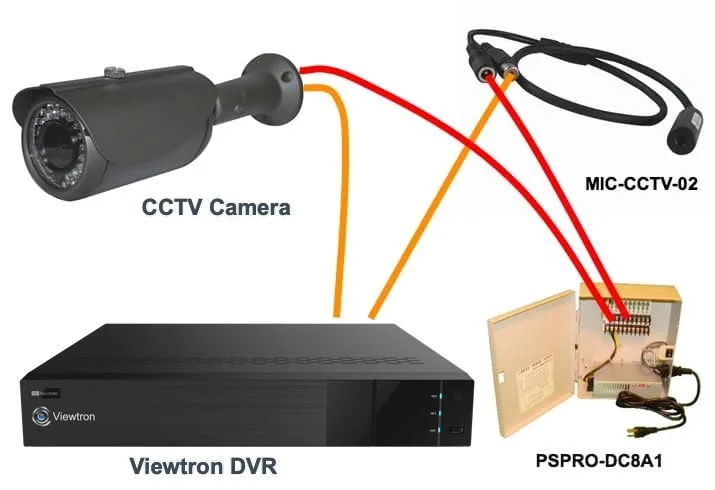
The way you check footage largely depends on the type of CCTV system you have installed. The two main types you'll encounter are Digital Video Recorders (DVRs) and Network Video Recorders (NVRs). While they both store video, their underlying technology and how you interact with them differ.
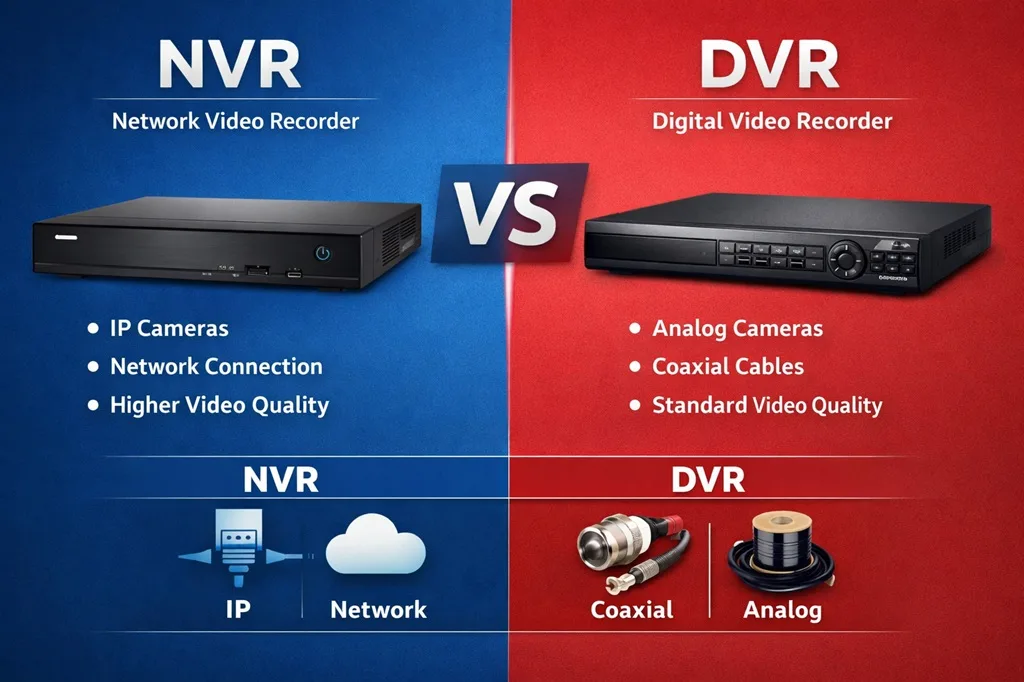
Image source: Web (Bing) / smarteyecctv.com (Web image (fair-use with source credit))
Here’s a quick rundown of what that means for you:
- DVR Systems: These systems use analog cameras that connect directly to the DVR via coaxial cables. The DVR itself handles the recording and compression of the video signals. Accessing footage is done directly through the DVR's interface, either on a connected monitor or via its remote access software.
- NVR Systems: These systems utilize IP (Internet Protocol) cameras, which are network-connected. The cameras capture and compress video, sending it over a network to the NVR for storage and management. This setup often offers more flexibility in camera placement and can support higher resolutions.
Most modern systems will have a web interface or a dedicated mobile app for remote access. For instance, manufacturer specifications for some NVRs indicate they can support resolutions up to 4K, requiring robust network capabilities. Understanding which system you have is crucial before you start looking for specific playback options.
How to Actually Check Your Recorded Footage: Step-by-Step
Getting to the video you need involves a few common steps, regardless of whether you have a DVR or an NVR. The interface might look slightly different depending on the brand and model, but the core process remains quite similar.
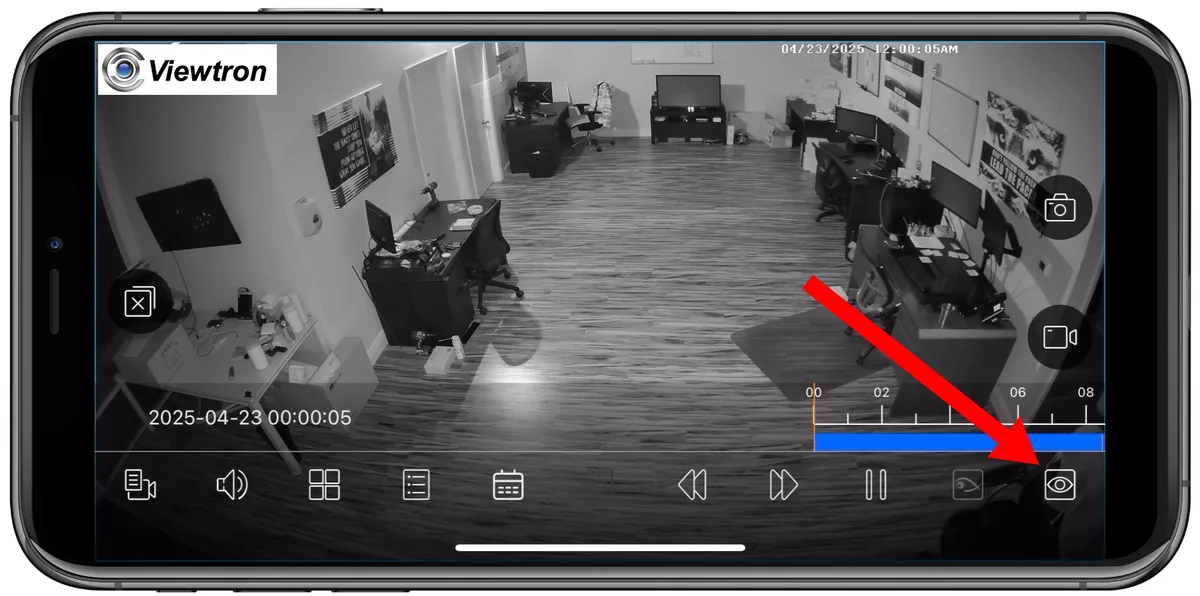
Image source: Web (Bing) / videos.cctvcamerapros.com (Web image (fair-use with source credit))
Getting Started: Logging In
First things first, you need to access your system's interface. This is usually done in one of three ways:
- Directly via a Monitor: If your DVR/NVR is connected to a monitor, you’ll typically use a mouse and keyboard to log in. You’ll be prompted for a username and password.
- Via Web Browser: Most systems offer a web interface accessible from a computer on the same local network. You’ll enter the DVR/NVR's IP address into a web browser. Again, you’ll need your login credentials.
- Using a Mobile App: Many manufacturers provide dedicated apps for smartphones and tablets. After initial setup, you can usually log in remotely to view live feeds and recorded footage.
It’s vital to keep your login credentials secure. If you’ve forgotten them, you might need to perform a system reset, which could erase settings. Always refer to your system’s user manual for specific instructions on password recovery or system resets.
Navigating Playback Menus
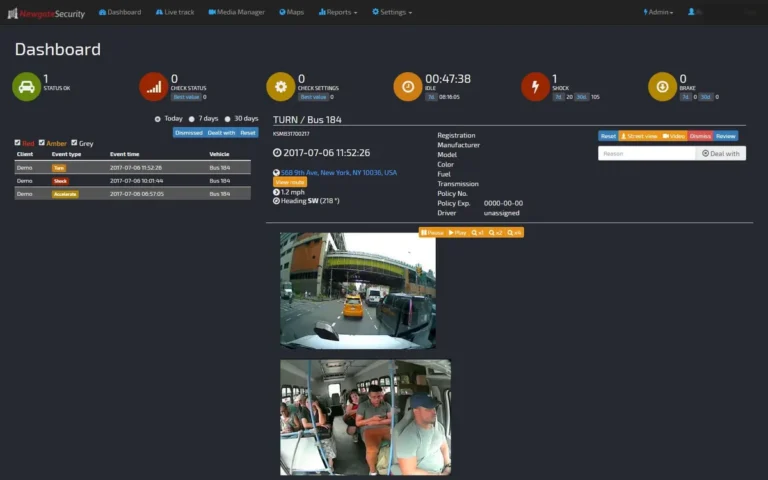
Once logged in, look for a section labeled "Playback," "Search," "Review," or something similar. This is where you’ll find your recorded video. The interface typically displays a calendar view, allowing you to select a specific date.
Some systems also show a timeline directly below the calendar. This timeline often uses color coding to indicate different types of recording activity:
- Green: Continuous recording.
- Red: Motion detection recording.
- Blue/Other Colors: Scheduled recordings or other specific events.
You can usually click on a date and then manipulate the timeline slider to jump to different times of the day. If you're looking for a particular event, the color-coded timeline can be a huge time-saver.
Searching for Specific Events
If you know roughly when an event occurred, using the search function is more efficient than scrubbing through hours of footage. Most systems offer search options based on:
- Date and Time: Specify a precise start and end date and time.
- Motion Detection: If motion detection was enabled, you can often search specifically for periods where movement was recorded. This drastically cuts down review time.
- Alarms/Events: Some systems log specific events like camera tampering or external alarm triggers.
For example, if you're reviewing footage from a break-in that happened at 2 AM, you’d set the search parameters for that time. You can usually search across all cameras or select specific ones. This targeted search is key to efficiently finding evidence.
If your motion detection isn't working correctly, you might have trouble with this feature; you can check out how to fix security camera motion detection for more on that.
Exporting and Saving Footage
Once you’ve found the footage you need, you’ll likely want to save it. This is typically done through an "Export," "Download," or "Backup" function. You’ll usually be prompted to select the specific clip by marking a start and end time.
Most systems allow you to export footage in common video formats like MP4 or AVI. Some systems might also offer proprietary formats that require special playback software. You can often save the footage to a USB drive connected to the DVR/NVR, or download it directly to your computer if using the web interface.
- USB Drive: Plug in a USB drive, select the desired clip, and initiate the export.
- Direct Download: Use the system's software to download the clip directly to your PC.
Keep in mind that the size of the exported file will depend on the resolution, frame rate (FPS), and duration of the clip. High-resolution footage, like that from a 4K camera, will take up more storage space. If you're concerned about storage, learn about how much data does a security camera use.
This process is essential for preserving evidence, so ensure you follow your system’s specific instructions for reliable backups.
Common Pitfalls When Reviewing CCTV Footage
Even with the right steps, it's easy to run into trouble when checking CCTV footage. Most issues stem from either the system's setup or user error. Understanding these common pitfalls can help you avoid them.
One frequent issue is trying to find footage without a clear understanding of the recording schedule. If your system is set to record only on motion detection, and no motion occurred during the time you're interested in, you won't find anything.
Another pitfall is not properly exporting or saving the footage you find. If you simply close the playback window without saving, the clip might be lost, especially if it's a temporary playback session. Always use the export or download function and confirm the file has been saved to your intended location, such as a USB drive.
This ensures you have a record you can refer back to later or share as needed.
- Not knowing the recording schedule: If your system only records during specific times or when motion is detected, you need to know this to search effectively.
- Assuming footage is always available: Storage limitations mean older footage is often deleted automatically. Plan to export important clips promptly.
- Overlooking system alerts: Many systems will flag errors like a full hard drive or an offline camera. Ignoring these can lead to lost recordings.
- Misinterpreting timestamps: Always verify that your system's date and time are accurate. Incorrect timestamps can confuse when an event actually occurred.
When to Get Help: Troubleshooting and Next Steps
If you've tried the basic steps and are still struggling to access or review your CCTV footage, it's time to consider troubleshooting or seeking professional help. Many issues are common and have straightforward solutions, but some require expert intervention.
- Consult Your User Manual: This is always the first step. Your DVR/NVR manual is the definitive guide to your specific system's features and troubleshooting. It will explain menu navigation, search functions, and export procedures.
- Check Your Network Connection: If you're trying to access footage remotely via a web browser or mobile app, a poor or unstable internet connection is often the culprit. Check your home or business Wi-Fi signal strength or wired connection. You can explore how to improve security camera WiFi signal for tips if that’s an issue.
- Verify System Health: Many systems have a status indicator or log that can tell you if cameras are offline, if the hard drive is full, or if there are other system errors. A black screen on a camera feed could indicate a connection problem or a faulty camera; see why is my security camera showing a black screen.
- Contact Manufacturer Support: If you're dealing with a persistent software glitch or a hardware issue, reaching out to the manufacturer's technical support is a good option. They can guide you through advanced troubleshooting steps or advise on repair or replacement.
- Seek Professional Installation/Maintenance: For complex systems, or if you're uncomfortable troubleshooting yourself, consider hiring a professional security system installer or technician. They have the expertise to diagnose and fix a wide range of problems, from network configurations to hardware failures. They can also help ensure your system is properly updated, which is crucial for security and performance, you can learn about how to update security camera firmware.
How to Save and Transfer Security Camera Footage
Once you've located the specific video clips you need, the next crucial step is saving them properly. This ensures you have a usable copy for your records, for sharing, or for potential evidence. The process usually involves exporting the video from your CCTV system's interface.
Most systems will prompt you to select a start and end time for the clip you want to save. You’ll then typically choose a destination, often a USB drive connected directly to the DVR or NVR. Some systems also allow direct download to a computer connected to the same network.
The file will then be generated in a format like MP4 or AVI, which are widely compatible. This is vital for how to transfer security camera footage to different devices or platforms.
Consider the file size when saving. High-resolution footage (like 4K) will create much larger files than lower-resolution video. Ensure your USB drive has sufficient capacity.
If you're saving multiple clips, you might need a larger drive or to manage your storage effectively. Learning how to back up security camera footage is a proactive measure to prevent data loss.
What to Do If Your Footage Is Delayed or Lagging
Video lag or delay in CCTV footage is a frustrating problem that can hinder effective monitoring and evidence gathering. This usually indicates an issue with data transmission or processing. If you notice that what you're seeing on playback isn't matching the real-time event accurately, or if the video stutters, it’s a sign something needs attention.
One common cause is insufficient network bandwidth. If too many devices are using the network simultaneously, or if the internet connection is weak, the video data can get bottlenecked. This is particularly true for IP cameras sending high-resolution streams.
You might need to explore how to reduce security camera bandwidth or improve your network’s capacity. Another cause could be the processing power of the DVR or NVR itself struggling to keep up with multiple high-resolution streams. Issues like why is my security camera delayed often point to these underlying network or processing challenges.
Understanding Storage Options: Cloud vs. Local
When it comes to storing your CCTV footage, you have two main options: local storage and cloud storage. Each approach has distinct benefits and drawbacks that affect accessibility, security, and cost. Making the right choice depends on your priorities and budget.
Local Storage typically involves a hard drive within your DVR or NVR, or external storage devices like NAS (Network Attached Storage).
- Pros: You have direct physical control over your data. There are no ongoing subscription fees after the initial hardware purchase. Access speeds can be very fast when on the local network. This is a common setup for systems like those described in how do security cameras store footage.
- Cons: If the DVR/NVR or storage device is stolen, damaged, or destroyed, your footage is gone. Expanding storage can require purchasing new hardware.
Cloud Storage involves uploading your footage to remote servers managed by a third-party provider.
- Pros: Footage is stored off-site, protecting it from local theft or damage. You can usually access it from any internet-connected device, anywhere in the world. Providers often handle maintenance and updates.
- Cons: Requires a reliable internet connection and often involves recurring subscription fees based on storage amount and retention period. Data privacy and security of the cloud provider are also considerations. You can compare them in cloud vs local storage security cameras.
Frequently Asked Questions About CCTV Footage Access
How long is CCTV footage typically stored?
Storage duration varies greatly depending on the system's hard drive capacity, the number of cameras, and the recording resolution and frame rate. Systems might store footage for anywhere from a few days to several months. Many systems use a loop recording method where older footage is automatically overwritten.
Can I access my CCTV footage from anywhere?
Yes, most modern CCTV systems, especially those with Network Video Recorders (NVRs) or advanced Digital Video Recorders (DVRs), allow remote access. This is typically done through a mobile app or a web browser, provided the system is connected to the internet and configured for remote viewing.
What format is CCTV footage usually exported in?
Footage is commonly exported in standard video formats like MP4 or AVI, which can be played on most computers and mobile devices. However, some older or specialized systems might use proprietary formats that require specific playback software provided by the manufacturer.
What should I do if my CCTV footage is blurry?
Blurry footage can be due to several factors. Check if the camera lens is dirty or smudged, or if there’s condensation on the lens. Ensure the camera is properly focused and that there isn’t excessive motion blur if the camera has a low frame rate.
Environmental factors like fog or heavy rain can also impact clarity. You can find more tips on this at why is my security camera blurry.
Is it legal to check CCTV footage?
Generally, checking footage from your own security system is legal for personal use or evidence. However, laws regarding surveillance, recording, and data privacy vary by location, especially concerning public spaces or areas where employees or visitors might have an expectation of privacy. Always be aware of local regulations and ensure compliance with privacy laws when using and storing footage.