How Do I Set up CCTV Cameras at Home?
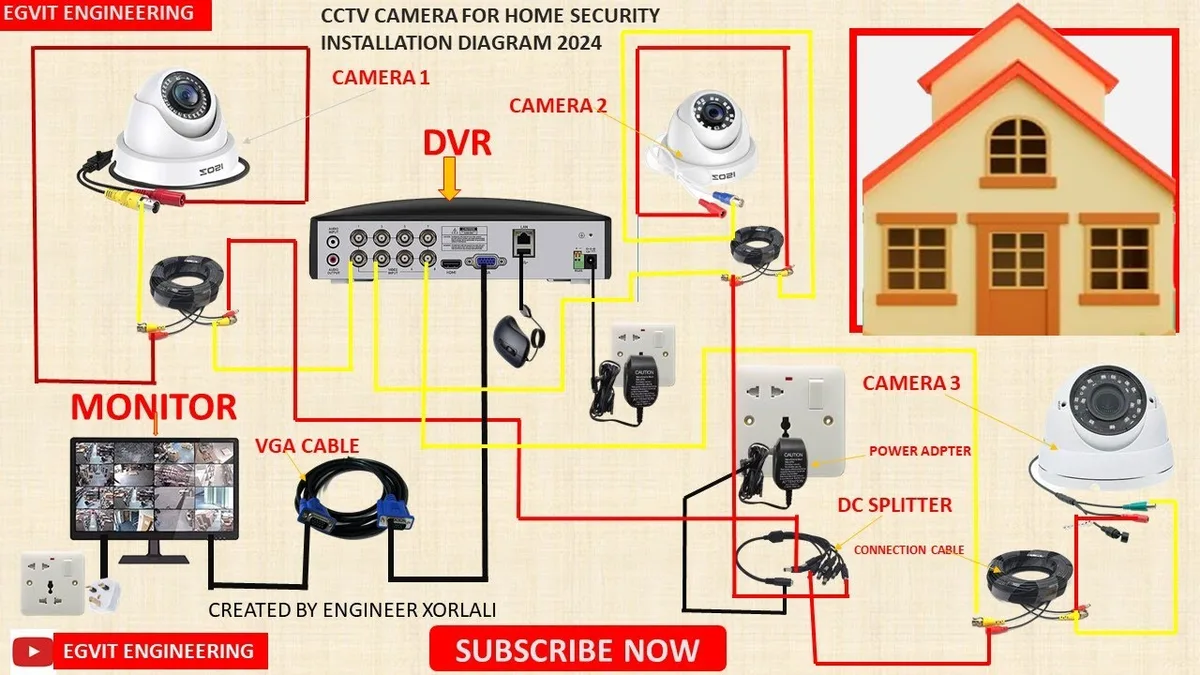
Image source: Bing (Web (fair-use with source credit))
Figuring out how to set up CCTV cameras at home can feel a bit daunting, but it’s more about taking it step by step. You want that extra layer of security and peace of mind, and a well-installed system is key to achieving it. Our research shows that for most homeowners, a DIY approach is entirely achievable with the right guidance.
When planning your home surveillance setup, consider the resolution; many modern IP cameras offer at least 1080p full HD, providing clear footage. Understanding the different components and how they connect is the first step to a functional system, which we'll break down visually and practically.
Quick Answer
Setting up home CCTV cameras involves planning placement, choosing between wired and wireless systems, selecting an NVR or DVR for storage, and physically mounting and connecting the cameras. You’ll then configure software for motion detection, remote viewing, and ensure proper power supply. Careful attention to lighting and potential blind spots during placement is crucial for effective surveillance.
Why Visuals Matter for CCTV Setup
When you're looking at how to set up CCTV cameras at home, what you see often matters more than what you read. Explaining camera angles, cable runs, or how to properly aim a lens is just plain hard with words alone. That’s why a visual approach is so important here.
Imagine trying to describe the perfect spot for a camera, you need to show how it covers an entry point without being too obvious, or how to avoid glare from direct sunlight. Diagrams and actual photos make these concepts click. For instance, understanding a camera's Field of View (FOV) is much easier when you see it illustrated, demonstrating how much area it can cover from a specific distance.
Planning Your Home CCTV System: What to Consider First
Before you even think about drilling holes or running cables, you’ve got to plan. This stage is critical because it prevents headaches later and ensures your system actually does what you need it to. It’s all about making smart choices upfront based on your property and your goals.
Choosing Your Camera Type: Wired vs. Wireless
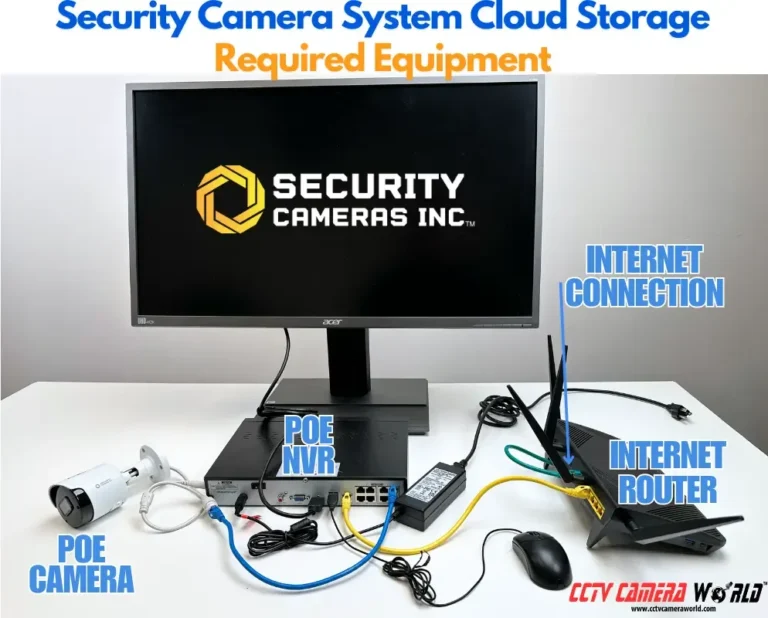
This is one of the first big decisions. Wired security cameras, often using Ethernet cables for both data and power (known as Power over Ethernet or PoE), generally offer a more stable and reliable connection. This stability is great for ensuring you don't miss footage.
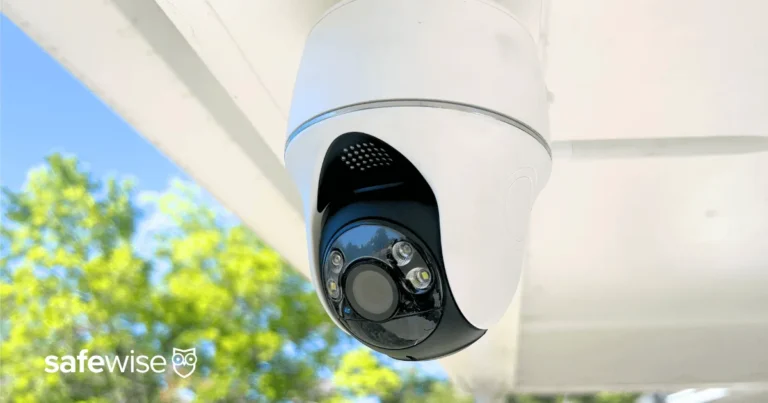
Wireless security cameras, on the other hand, offer flexibility. They connect via Wi-Fi and are powered by a nearby outlet or batteries. While easier to install in some cases, their performance can be impacted by your home's Wi-Fi signal strength.
Aggregate reviews report that wireless systems can sometimes suffer from lag or connection drops if the signal isn't strong and stable throughout the property; learning how to improve security camera WiFi signal can be a key part of your setup if you go wireless.
Deciding on a Recorder: NVR or DVR
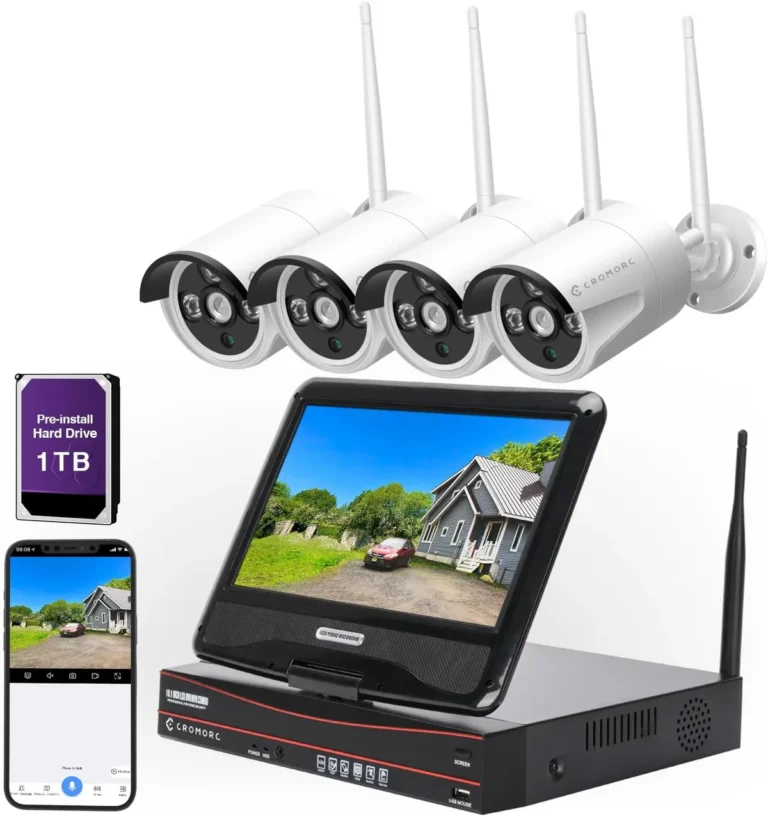
Your cameras need somewhere to send their video feeds for recording and storage. That’s where the Network Video Recorder (NVR) or Digital Video Recorder (DVR) comes in.
- NVR: Typically used with IP cameras (network cameras). It connects to your network, and the cameras connect to the NVR directly or via your network. NVR systems are generally considered more advanced and flexible.
- DVR: Used with analog or HD-over-analog cameras. It’s a standalone unit that cameras connect to directly via coaxial cables.
The choice often depends on the type of cameras you select. If you’re going with IP cameras, an NVR is your go-to. For analog cameras, it's a DVR.
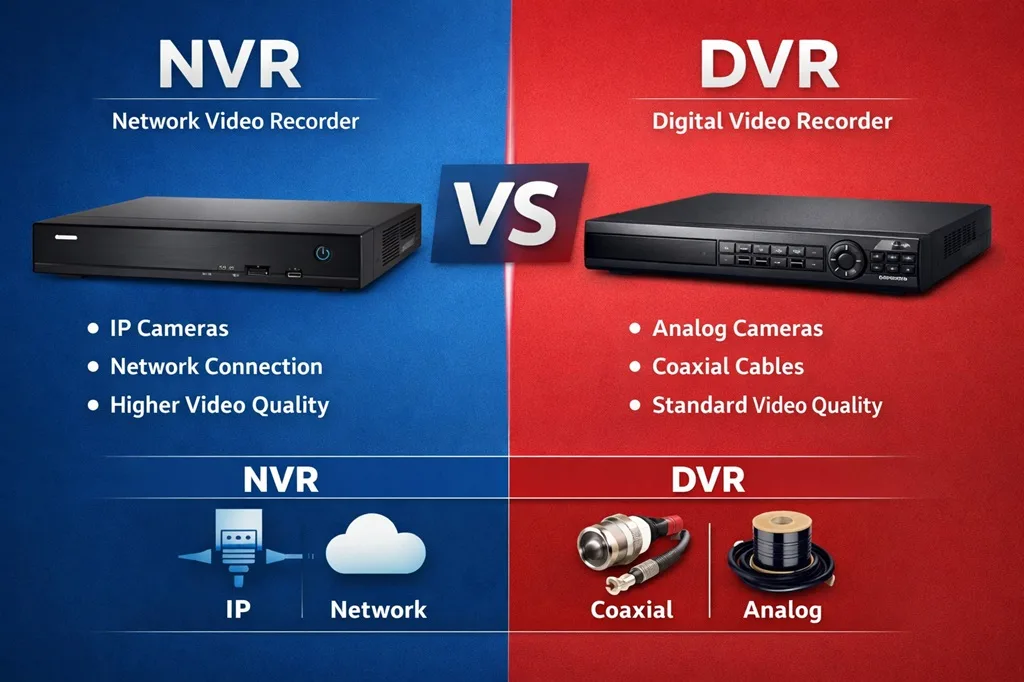
Image source: Web (Bing) / smarteyecnm.com (Web image (fair-use with source credit))
Identifying Key Camera Placement Spots
Think like a potential intruder. Where would someone try to enter? Focus on main entry points like front doors, back doors, and ground-floor windows.
Also, consider areas where valuables are kept or where you want to monitor activity, such as driveways, garages, and outdoor storage areas.
Manufacturer specifications often highlight ideal mounting heights and angles. For example, cameras positioned too high might miss details on faces, while those too low could be vulnerable to tampering. Our research indicates that a common mistake is placing cameras too close to bright light sources, which can cause overexposure and ruin footage quality.
Aim for a balance that captures clear views without being easily obstructed or damaged.
Step-by-Step: Installing Your Home CCTV Cameras
Alright, you’ve planned, you’ve picked your gear, and now it's time for the hands-on part. This is where visuals really shine, helping you see exactly where things go and how they connect. We're going to walk through the typical installation process, assuming you’ve chosen a system that requires physical mounting and connections.
Mounting the Cameras Safely
This step involves physically attaching your cameras to walls, eaves, or poles. Always use the mounting hardware that came with your cameras. For outdoor installations, ensure you’re using weatherproof mounts and that the camera itself is rated for outdoor use, usually indicated by an IP rating (like IP66 or IP67 for good protection against dust and water).
- Drill pilot holes: Mark your mounting points and drill pilot holes for screws.
- Secure the mount: Attach the camera mount firmly to the surface.
- Attach the camera: Screw or clip the camera onto the mount.
- Aim and adjust: Initially, aim the camera roughly where you want it to point. Fine-tuning comes later.
Safety first: if you’re working at heights, use a sturdy ladder and have someone spot you. Always turn off power at the breaker before working with any electrical wiring.
Running Cables (for Wired Systems)
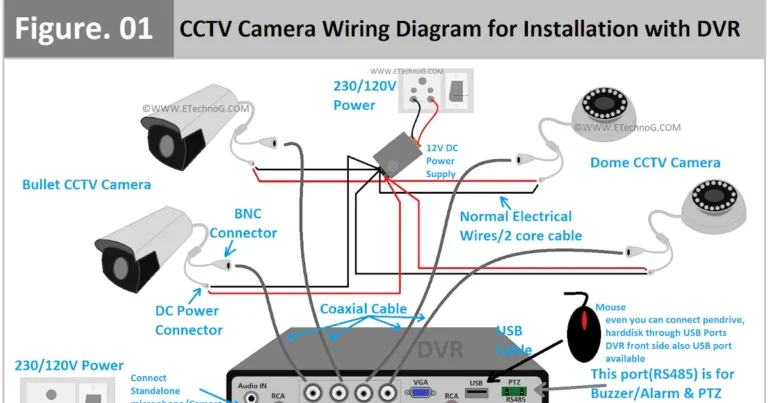
If you’ve opted for wired security cameras, this is often the most labor-intensive part. You’ll need to run cables from your cameras back to your NVR or DVR. This usually involves Ethernet cables for IP cameras or coaxial cables for analog systems.
- Plan your routes: Decide how you’ll route cables to minimize visibility and protect them from the elements or damage. This might involve running them through attics, crawl spaces, or along exterior walls, often using conduit for protection.
- Drill entry points: Carefully drill holes into your home's exterior where needed to bring cables inside.
- Secure cables: Use cable clips or ties to keep cables neat and prevent them from sagging or getting snagged.
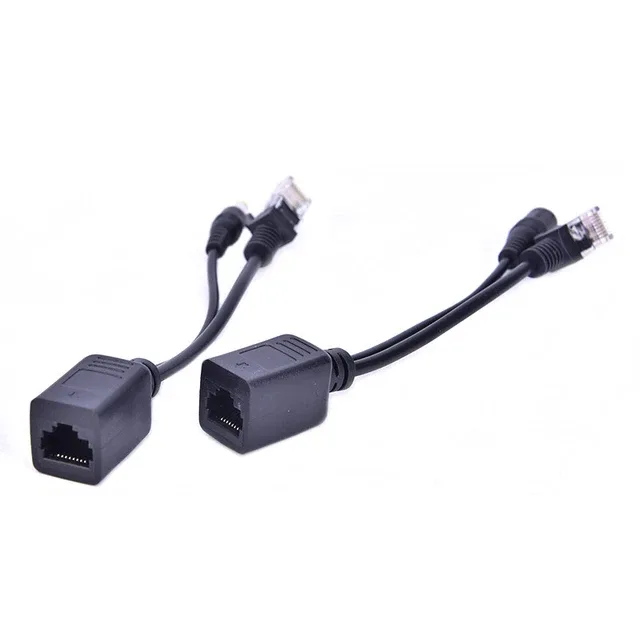
Image source: Web (Bing) / picclick.co.uk (Web image (fair-use with source credit))
A common challenge here is cleanly passing cables through walls. If you’re uncomfortable with this, consider professional installation or look for wireless solutions. For very long cable runs with IP cameras, you might need to consider signal boosters or PoE switches to maintain power and data integrity.
Connecting Cameras to Your Recorder or Network
Once your cameras are mounted and cables are run (or for wireless, cameras are powered and within Wi-Fi range), it’s time to connect them.
- Wired Systems (NVR/DVR):
- Plug the Ethernet cable from each IP camera into a port on your NVR or a PoE switch connected to the NVR.
- For DVR systems, connect the coaxial cable from each analog camera to the corresponding input on the DVR.
- Wireless Systems:
- Ensure each camera is powered on and within range of your Wi-Fi network.
- You'll typically use the camera's mobile app or the NVR's interface to discover and add the cameras to your network.
This connection process is what allows your recorder to “see” the video feed from each camera. Getting this right ensures your system is ready for configuration.
Powering Up and Initial Configuration
With all physical connections made, it’s time to power everything up. Turn on your NVR or DVR first, then power up your cameras. If you’re using PoE, the NVR or PoE switch will power the cameras.
For cameras with separate power adapters, plug them into a suitable power source.
Once the system is powered, you’ll typically access the NVR or DVR through a connected monitor and mouse, or via a web browser on your network. This is where you’ll perform the initial setup:
- Set a strong password: Immediately change the default administrator password.
- Configure network settings: Connect the NVR/DVR to your home network (usually via an Ethernet cable to your router).
- Format storage: If your NVR/DVR has a hard drive, you’ll need to format it.
- Add cameras: The system should detect connected cameras, or you’ll manually add them.
This initial setup gets the core system running and ready for more advanced settings.
Configuring Your CCTV System for Peak Performance
Now that your cameras are physically installed and connected, and the basic system is up and running, we can fine-tune it to make sure it’s working effectively for you. This stage is all about making sure the system captures the right footage at the right time and that you can access it easily.
Setting Up Motion Detection and Alerts
Most modern CCTV systems offer motion detection, a feature that triggers recording or sends an alert only when movement is detected. This saves storage space and prevents you from sifting through hours of uneventful footage.
- Define detection zones: You can usually specify areas within the camera's view where motion should be monitored. This helps avoid false alarms from things like swaying trees or passing cars on a distant street.
- Adjust sensitivity: Motion detection sensitivity can often be tweaked. Too low, and you’ll miss events; too high, and you’ll get constant alerts for minor movements. Our research indicates that calibrating this is a common task for new users.
- Configure alerts: Decide how you want to be notified. This could be push notifications to your smartphone app, email alerts, or an audible alarm from the NVR. You can find more on why your camera might not be detecting motion at robinchestnut.com/why-is-my-security-camera-not-detecting-motion/.
Setting up motion detection correctly is key to getting the most out of your system without being overwhelmed by notifications.
Enabling Remote Viewing via App or Web
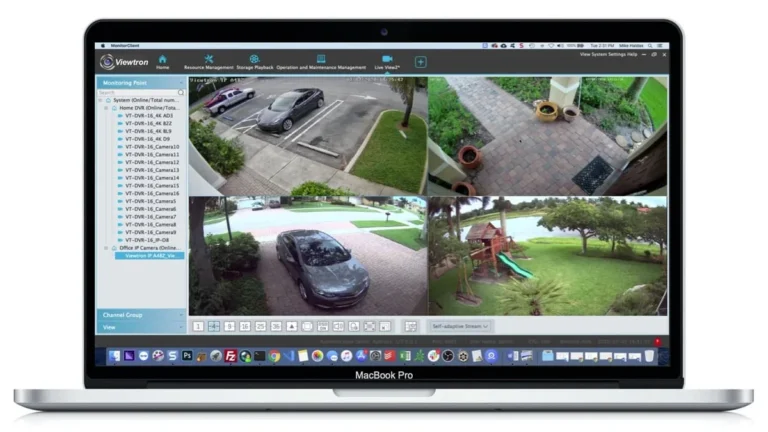
One of the biggest advantages of modern CCTV systems is the ability to view your cameras remotely from anywhere in the world. This usually requires setting up an account with the system's manufacturer or accessing your NVR/DVR through a web browser or dedicated mobile app.
- Download the app: Search for your NVR/DVR manufacturer's official app in your device’s app store.
- Create an account: Sign up for an account, which links your system to your login.
- Scan QR code or enter ID: Your NVR/DVR usually has a unique ID or QR code that you scan or enter into the app to link it.
- Configure network: Ensure your NVR/DVR is connected to your home internet. Some systems may require port forwarding on your router, though many modern ones use a peer-to-peer (P2P) connection to simplify this. If you're experiencing issues with your system's speed, understanding how to reduce security camera bandwidth can be very helpful.
With remote access set up, you can check in on your property anytime, anywhere, offering significant peace of mind. If you notice a delay in what you're seeing remotely, investigating why is my security camera delayed is a good next step.
Common Mistakes to Avoid During CCTV Setup
Even with clear instructions, it’s easy to stumble during the setup process. Most of these issues stem from overlooking small details or rushing through steps. Being aware of these common pitfalls can save you a lot of troubleshooting time and ensure your system works reliably.
Placement Pitfalls That Create Blind Spots
A camera placed poorly is almost as bad as no camera at all. Many DIY installers aim cameras too high, making it hard to identify faces, or too low, making them easy targets for vandalism. Another frequent mistake is placing a camera directly facing a bright light source, like the sun at dawn or dusk.
This can completely wash out the image, rendering it useless. Always consider the time of day and potential light sources when choosing a spot. For instance, a camera pointed towards a busy street might capture too much irrelevant motion, while one inside overlooking your driveway needs to capture license plates.
Wiring and Connection Errors
For wired systems, improperly run cables are a major issue. Cables that are not secured can sag and become a tripping hazard, or they might be damaged by weather or pests over time. If you’re drilling new holes to run cables, ensure they are sealed properly afterward to prevent water damage and drafts.
For wireless cameras, a weak Wi-Fi signal is the most common connection problem. This often leads to video lag or dropped connections, making the footage unreliable. Addressing why is my security camera not detecting motion is often a direct result of poor connection setup.
Ignoring Lighting Challenges
Lighting is crucial for any camera. Cameras have different capabilities for low-light performance, often using infrared (IR) for night vision. However, IR light can reflect off nearby surfaces like glass doors or shiny paint, creating a bright glare that obscures the image.
Similarly, while cameras may have good dynamic range to handle bright and dark areas simultaneously, extreme contrast can still be an issue. If you find your footage is too dark or too bright, you might need to adjust camera angles or consider supplemental lighting. Some systems allow you to control exposure settings further, but placement is usually the first line of defense against lighting problems.
Understanding Your CCTV System's Specs and Features
Knowing what your CCTV cameras and recorder can do is vital for maximizing their effectiveness. Different features cater to different needs, and understanding them helps you get the most out of your investment. This isn't about picking the most expensive gear, but the right gear for your situation.
- Resolution: This is measured in megapixels (MP) or pixels (e.g., 1080p, 4K). Higher resolution means clearer, more detailed images, which is essential for identifying faces or license plates. A 1080p camera captures images at 1920×1080 pixels, while 4K is four times that resolution.
- Field of View (FOV): This tells you how wide an area the camera can see. A wider FOV (e.g., 120 degrees) covers more ground but with less detail at a distance. A narrower FOV (e.g., 60 degrees) offers more detail in a specific area.
- Night Vision: Look for the IR (infrared) range, typically measured in meters or feet. This indicates how far the camera can “see” in complete darkness. Some advanced systems also offer color night vision in very low light.
- Storage: Consider how much footage you need to store and for how long. This involves the capacity of your NVR/DVR's hard drive or the subscription plan for cloud storage. Understanding how do security cameras store footage will help you plan.
- Connectivity: For wireless cameras, check the Wi-Fi standards supported (e.g., Wi-Fi 5/802.11ac). For wired systems, ensure your NVR/DVR has enough ports and supports the necessary Ethernet speeds.
These specs directly impact the quality and usefulness of your surveillance footage.
Frequently Asked Questions About Home CCTV Setup
How long does CCTV setup typically take for a home?
For a basic DIY setup with 2-4 cameras, you can expect it to take anywhere from 4 to 8 hours. This includes planning, mounting, running cables (if wired), connecting, and initial configuration. More complex systems or challenging property layouts could take longer.
Can I use regular security cameras without a recorder?
Some security cameras are designed to record directly to a local microSD card or upload footage to cloud storage without a dedicated NVR or DVR. However, these often have limited storage and may not offer the same level of centralized management or long-term recording capabilities as a system with a recorder.
What are the legal requirements for home CCTV installation?
In most regions, installing CCTV on your own property for your own security is legal. However, laws generally prohibit pointing cameras at public areas where people have a reasonable expectation of privacy, or recording audio without consent. It’s wise to check local ordinances regarding surveillance.